Crochet Pattern: Amigurumi Baby Squid
By A Guest Writer – 4 Comments| A Guest Post by JennyAndTeddy.
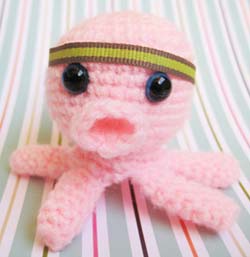
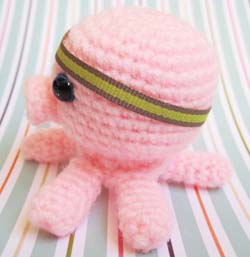
Meet Susie, the little squid! She is extremely popular with kids of all ages, yet simple and quick to throw together. This little baby squid will be a delight in your collection. But be careful, looking so cute this little fellow is a must have and you may be asked to make a beach bucket full of them.
Finished Size: Body is 2″ (5 cm) diameter and Tentacles are 2″ (5 cm) long
|
  |
Need help understanding the crochet abbreviations and symbols? Check out the crochet abbreviation chart.
Crochet Pattern: Baby Squid
Note: This pattern is worked continuously in the round like a spiral. At the end of each round, you will not join, but begin the next round in the next stitch.
Body
Round 1: Make an adjustable ring, 6 sc into ring, place marker: 6 sc
Round 2: 2 sc in each sc around: 12 sc
Round 3: (sc in next sc, 2 sc in next sc) 6 times: 18 sc
Round 4: (sc in next 2 sc, 2 sc in next sc) 6 times: 24 sc
Round 5: (sc in next 3 sc, 2 sc in next sc) 6 times: 30 sc
Round 6: (sc in next 4 sc, 2 sc in next sc) 6 times: 36 sc
Rounds 7 – 13: sc in each sc around
Round 14: (sc in next 4 sc, sc2tog) 6 times: 30 sc
Round 15: (sc in next 3 sc, sc2tog) 6 times: 24 sc
Round 16: (sc in next 2 sc, sc2tog) 6 times: 18 sc
Round 17: (sc in next sc, sc2tog) 6 times: 12 sc
Round 18: 2 sc in each sc around: 24 sc
Round 19: sc in each sc around: 24 sc
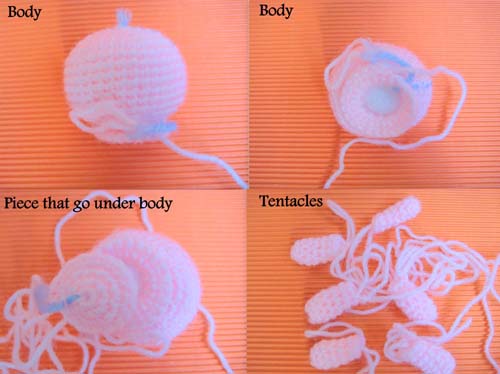
Finish off and leave long tail for sewing. Attach plastic eyes, then stuff firmly with filling.
Bottom of Body
Round 1: Make an adjustable ring, 7 sc into ring, place marker: 7 sc
Round 2: 2 sc in each sc around: 14 sc
Round 3: (sc into next sc, 2 sc in next sc) 7 times: 21 sc
Round 4: sc in each sc around: 21 sc
Finish off and leave long tail for sewing.
Tentacles (make 6)
Round 1: Make an adjustable ring, 7 sc into ring, place marker: 7 sc
Round 2-7: sc in each sc around
Finish off and leave long tail for sewing. Then lightly stuff with filling.
Mouth
Round 1: ch 10, sl st in first ch, sc in each ch around: 10 sc
Finish of leave long tail for sewing.
Assembly
Using a yarn needle:
- Sew the mouth on the body.
- Sew the bottom of the body to the body.
- Sew all tentacles to the bottom of the body.
- Cut a length of ribbon that fits around Susie’s head and apply craft glue to the ribbon before wrapping it around her head.

I hope you like this cute baby squid! If you have any questions or comments don’t hesitate to leave them below. You may also be interested in other amigurumi tutorials on Crochet Spot:
How to Sew Amigurumi Parts Together
How to Stuff Amigurumi
Amigurumi Tips and Tricks
Jane is proud to call herself a crafter. She has been crocheting since she was a little girl. When she doesn’t have yarn in her hands you can find her in the kitchen baking up a storm. Jane loves to crochet cute little Amigurumi dolls, which she mostly gives to local school fundraising events. Check out her blog JennyAndTeddy where she shares more cute little creations!


So so cute! Thanks for sharing the pattern!
Have a great day,
Hanni
Super cute! It will go great with the baby octopus I make! 🙂
Ahh!! So cute 🙂
This little guy reminds me of the octopus I made when my daughter was a youngster. She wanted it on her head. So I pinned it to the top her head and everyone turned their heads to look at it. Had quite a few complements. Later I saw other children with other colored octopus(on their heads, on purses etc.) I think this little fella of yours is much cuter than mine was. I would love to make yours and give them away to little ones. I want one for mysef first of all. Another thought–I’ll make one and put it on a straw basket (Half in and Half out). and see how that comes out.