How to Make a Russian Join
By Candace – 31 CommentsSometimes you just don’t want to use regular joining methods to add another ball of yarn to your project. That’s where the Russian Join comes in. It is practically invisible and there’s no worrying about how to work the stitches in transition from one ball to another.
Thread a yarn needle with your current color. Weave the needle through the yarn.
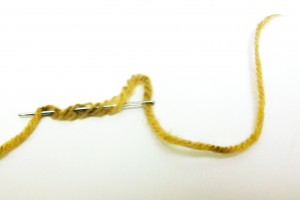
Pull the needle and tail through the yarn and remove the needle.
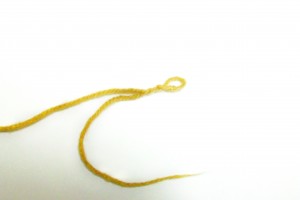
Thread the needle with your new yarn. Pass the needle and yarn through the loop in your old yarn.
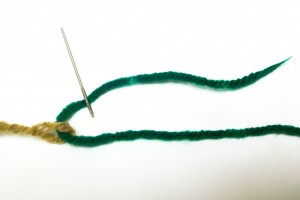
Weave the needle through the new yarn just as you did with the old yarn. Pull the needle and tail through the yarn and remove the needle.
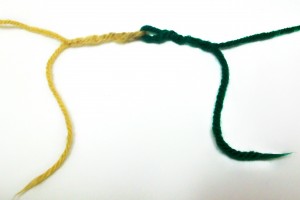
Pull both yarn tails taut, closing the loops where the ends of the yarn meet.
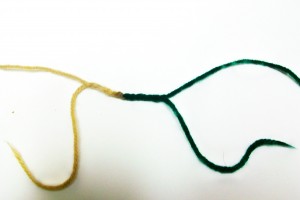
Clip the tails and continue crocheting.
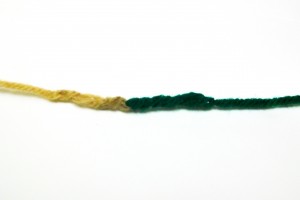
If you need any help, feel free to leave a comment.


I love it! Gotta try it …. soon.
This is a great method when continuing with the same colour, but less reliable when changing colours because you won’t really know where the join will end up.
I would think with a bit of practise and measuring the yarn to work out how much you use in a stitch you would very soon figure out exactly where the join should be 🙂
Yes, you can estimate the end of color 1 closely. I crochet to the changing point, then, marking that point on the yarn, rip out enough to do the join – say 10 inches or so.
Then when I go back and redo the last few color 1 stitches, it changes to color 2 at the point it should.
thank you for making this easy to understand. Question though . would you recommend this join for 4 ply yarn??
I’m not sure if you mean a yarn with 4 plies or fingering weight yarn, but I see no problem with using it on either one.
I used this to sew together small pieces of scrap yarn. Then I rolled it into a ball and used it to crochet a cover for my e-book reader. Made a digi scrap page about it so you can see part of the cover here: http://ozone.oscraps.com/gallery/showphoto.php?photo=222412&title=ebook-reader&cat=all
Love the new way to join yarn. This would be ideal to join scraps before making anything. One great way to use up left overs. Many thanks.
Candace, clear and consise directions and, of course, pictures are always a big help. Thanks!
oops … concise 😉
I am so grateful to STILL be learning new crochet stitches and ways to do things. This Russian join is fantastic!
thanks for sharing!
This is the answer to my problem with a project that only the color change stiches to be seen. When I made a sample with their instructions to keep the color changes hidden, it just didn’t look well to me. This technique you demonstrated is the answer. I’m going to pick up the project again this time with enthusiasm. Thanks for this ingenius solution.
Can’t wait to try this method I think this is the solution I have been looking for, thanks for sharing Rachel, have a great week!
So simple and so fabulous! I’ll be using this! I would much rather spend a minute or two doing this when joining in a new ball than to have to go back through later and sew in all the ends!! Thank you 🙂
This is a great idea….very smooth transition except…………I’m sorry I don’t get it…….where is my loop to continue crocheting?
on your hook, just out of the picture 🙂
One of the strands is the tail of your working yarn, and the other is the new ball you’re joining in.
Can you picture it now?
What a brilliant idea. Can’t wait to try it – hopefully it will stop all that fumbling around trying to get a good join!
Oh I love this, especially as the yarn won’t come apart and there are no ends to weave in — I really hate weaving in ends. I’m going to have to try it soon, plus I think I’ll link to this on my blog. Thank you so much for sharing!!! <3
Hey super way to join so must try it.Would like to know if a Russian knot works for joining different thicknesses of yarn ?
Wow… I wish I had this when I started my scrap blanket. It’s already about 3 to 4 feet wide so it’s a bit too late and frustrating to pull out and fix now. I just tried this however on a jester hat where I used the last of one skein of yarn and simply joined the new skein to it seamlessly and I love it! Thanks so much for this.
I saw this on some other yarncrafter site a while back (video and everything), but you made it seem half as complicated…thanks!
This is my favorite way to join my yarn now! Seamless and almost timeless.
does this work for cotton yarn?
It should work for any yarn you can get your needle into.
So glad this came up again…….you have made it look so easy I will be trying this on my next project. Thank You This needs a special bookmark!!!!
I just saw this but can I use this for knitting as well as crochet?
Yes, go ahead and give it a try!
Is there a way to make this work with curly or loopy yarn that is thicker, such as homespun or thick & quick? The curliness of the yarn hides any join somewhat, but I want something that is very secure.
Thanks in advance.
Thanks for the great tutorial!
This is great! Thank you for sharing. I have avoided patterns with multiple color changes because I HATE weaving in ends and they always seem to pop out. I’m excited to try this technique.
thanks will help so much