Making Flat Beads with Crochet
By Caissa "Cami" McClinton – 8 CommentsMany of us are interested in multiple crafts. My first craft hobby was jewelry making, which I started at age 9! I loved making earrings for my friends and teachers. Ever since then, I’ve loved beads. There are many ways to make crocheted beads, but today we’ll focus upon making flat beads. Because beads are small, this can be an excellent way to use up yarn scraps, especially those of our most expensive and luxurious yarns!
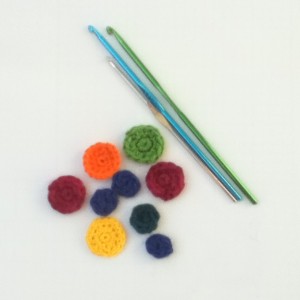
For the purpose of this tutorial, I’ve used a large hook and yarn. I wanted to make sure the photos were easy to see. In order to increase stability of the bead when working the actual project, choose a yarn you like and a hook that allows you to work on the tighter side. You will also need an appropriately sized yarn needle. For my sample beads (shown in photos above), I chose a size 3 crochet thread with a 2.55 mm hook (yellow and orange), a light worsted yarn with a size 3.5 mm hook (green and fuchsia), and a worsted yarn with a 3.75 mm hook (blue and dark teal).
Additionally, you can choose to stop this pattern at the end of round 1, 2, or 3, thus having the freedom to create different sized beads. In the photo above the orange and yellow are worked in three rounds, the green and fuchsia are worked in two rounds, and the blue and dark teal are worked in one round.
You may mouse over tutorial images images for left-handed views.
Abbreviations:
ch – chain
hdc – half double crochet
sc – single crochet
sl st – slip stitch
Round 1: Start with a magic ring. Crochet 6 sc into the magic ring.
The photo below shows this done.
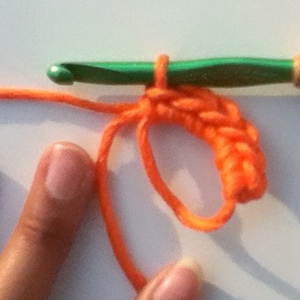
Tighten. Join with sl st to the first sc: 6 sc
The photo below shows this done.
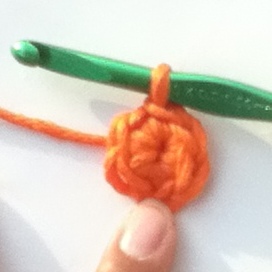
Round 2: ch 2 (counts as 1 hdc), 2 hdc in each of next 5 sc,
The photo below shows this done. The arrow is pointing to the same space as join.
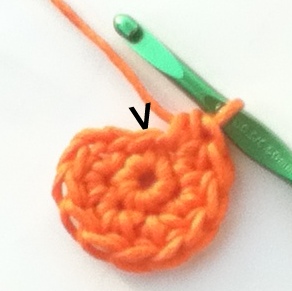
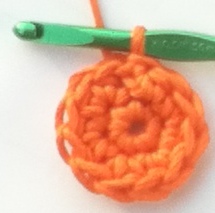
hdc into same st as join. Join with sl st to the first hdc: 12 hdc
The photo below shows this done.
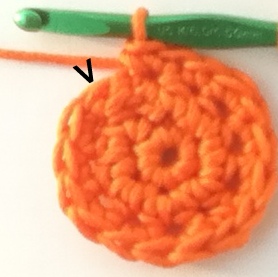
Round 3: ch 1 (counts as 1 sc), 2 sc into next hdc, (sc into next hdc, 2 sc in next hdc) 5 times,
The photo below shows this done. The arrow is pointing to the first sc.
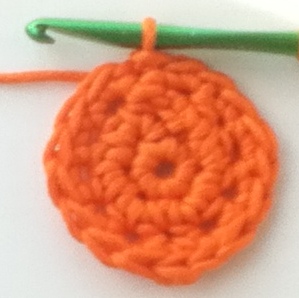
Join with sl st to the first sc: 18 sc
The photo below shows this done.
Finishing: Finish off and cut yarn. Securely weave in tail with yarn needle and snip yarn near work.
There are many ways to use these beads, so get creative in your jewelry design! Combine them with other types of beads for an impact. These are just three ideas about how to use them!
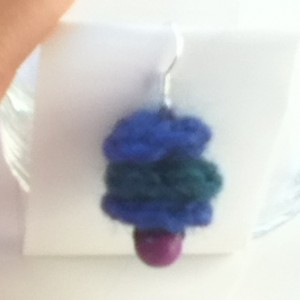
Stack the one-round beads on top of each other to make earrings.
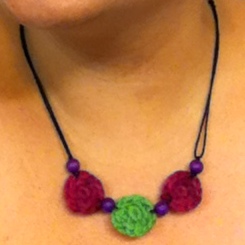
Make a necklace with 3 two-round crocheted beads and coordinating wooden beads.
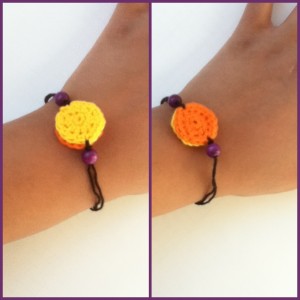
Stack the three-round beads for a reversible bracelet.
I hope you enjoyed this tutorial. Please let me know if you have questions, or even ideas for future tutorials.
Additional Resources
How to Crochet a Circle


Soooo darling!! Thanks for sharing.
I’m very glad you liked it!
I love this idea!
Wow!! I can do this. So many possibilities! Thank you.
Thanks, Paty and Gardenchef! I am really happy you like it.
great ,thanks a lot, 😉 😉
Rachel, is there a way to keep the tutorial pics to stay on the right hand view, instead of switching to the left hand view when I try to copy it. I know, some people are never satisfied no matter what you do. Sorry.
Hi Pat, please don’t copy the photos off of the website. They aren’t meant to be copied. But if you would like to print out a copy of the tutorial for your personal use, you can do that by using the print function in your internet browser. All the pages on Crochet Spot are coded to be printer friendly, so they should all print out neatly. To print, go to ‘File’ then ‘Print’ in your internet browser.