How to Wet Block Crocheted Lace with Wires
By Caissa "Cami" McClinton – 2 CommentsMy life has been engulfed in yarn, crochet, and having good crafty times lately and I couldn’t be happier about it. I recently made a really beautiful crochet lace poncho that looks fabulous on everyone! It was crocheted in the beautiful Louet Euroflax Sport Weight Linen. The pattern was from Rustic Modern Crochet by Yumiko Alexander.
I had a lot of fun crocheting this poncho, but I knew that it would have to be specially blocked when I was done. Maybe you are wondering what blocking is and how you can do it. If so, read on to follow my process step by step.
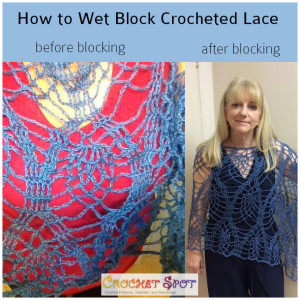

Blocking is a process that crocheters go through to condition and form their yarn so that the stitches can relax and even out into a garment or project that looks finished and professional. For some yarns (acrylic) it can be a simple as washing your item and throwing it in the dryer, but for this beautiful linen poncho, it took a bit more work but was well worth it.
Materials
Basin
Water
Towel
Large Surface (like bed, large table, or floor)
Mild Soap (I used Eucalan, which is rinse free!)
Blocking Mat or Board (I used one very similar to this board)
Blocking Pins (Almost any will do but I used some like these T-pins)
Stiff Lace Blocking Wires (I used Knitter’s Pride brand)
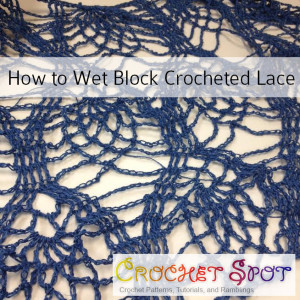

Follow this step by step process to block your crocheted lace:
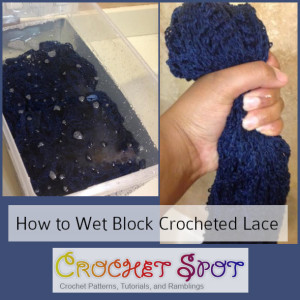
1. Wash your garment in a basin with cool water and mild soap like wool wash. Follow the directions on the bottle. I used Eucalan, so I didn’t have to rinse. Other products may require rinsing. When you take the lace out, gently squeeze out the water. Do not wring. I held my piece over the tub and squeezed from the top by just closing my hand around the piece and repeating the squeezing process a little further down the garment until I got to the other end.

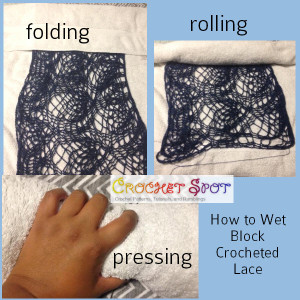
2. Remove excess water by rolling your garment in a towel. I spread my towel out on the bed and placed the garment on top. I folded over the top of the towel and rolled the garment into the towel. When it was entirely rolled, I pressed on the rolled towel, moving from one end to the other. This removed the excess water.

3. Remove the garment from the towel and insert blocking wires. On my garment, I inserted the blocking wires on the top only. To insert the blocking wires, I just “wove” the stiff wires in and out on the top of the garment. Because my wires weren’t long enough, I used two wires that overlapped at the top of the garment. If you are blocking a triangular or square shawl, you can insert the wires on all sides.
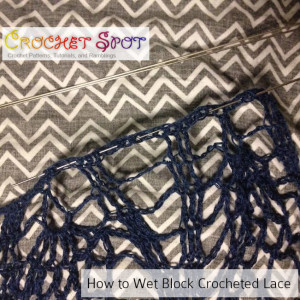

4. Pin the garment to the blocking board. As you can see, I had to set up my blocking board at an angle. Long story, but this worked out fine. Feel free to set up your blocking board on a bed or on the floor. Using the pattern as a guide, pin your garment to match the measurements put forth in the pattern schematic. On mine, I secured the wires on the top, and (while adjusting lace motifs to look symmetrical) then pinned the garment in other places where needed.
In the picture below, you can see on the top that I have placed a pin in the middle of the top lace wires. On the bottom left, I have placed a pin to secure the end of the top of the shawl. On the bottom right, I have place a wire on the side to spread out the lace motif.
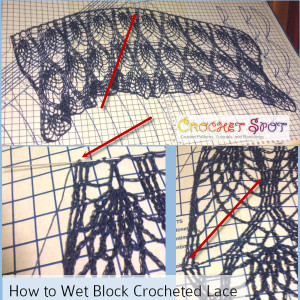

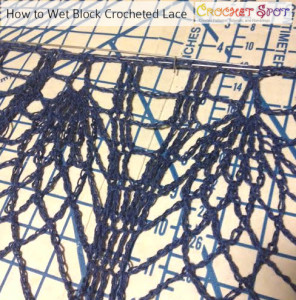
In this picture, you can see how I used the guiding line on my blocking mat to line up the lace wires straight across. You can also see where I added another lace wire and overlapped the two a bit for continuity.

5. Allow garment to dry overnight.
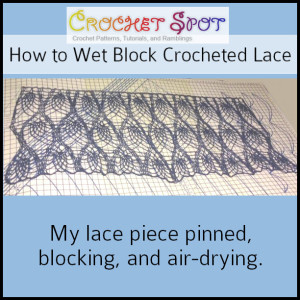

When I was done with my blocking I made the simple seam along the top and wove in my ends. Now I have a stunning garment that looks great on literally everyone who has tried it on.
So what about you, my friends? Have you ever wet blocked a crocheted project? Do you have any great blocking tips or tools to share? Please leave your thoughts, ideas and questions in the comment section below.


Love this pattern and purchased the book last year.
I live near WEBS in North Hampton,MA, USA, so was able to pick it up there along with a literal warehouse of yarn, including looms (floor size) and all the accessories for knitting, crochet and weaving.Unbelievable place to go–yarns you never dreamed were possible–everything from alpaca to stainless steel and even milk!
I was drawn to this pattern, but didn’t try because of the blocking. Would not have thought to block before final assembly.
Thanks for the how to pics. Now will have to go back and get the yarn!
Do you have to re-block after every washing? If you gave it to someone would you have to give them blocking tools and instructions?