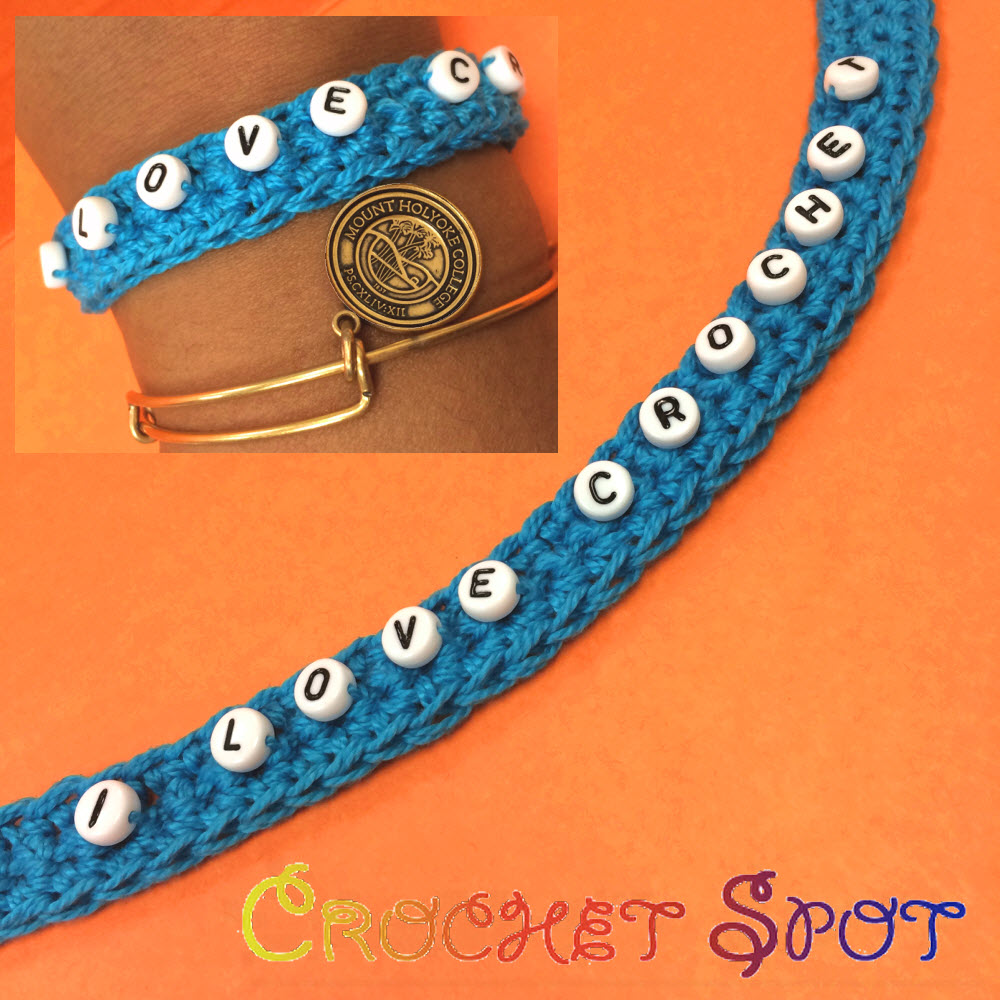
Crochet Pattern: “I Love Crochet” Beaded Bracelet
By Caissa "Cami" McClinton – Be the first to comment| You can find alphabet beads in the kids’ section of your craft store. But why should kids have all the fun? I love using alphabet beads for various crafts, and since we’ve been exploring beads quite a bit here on Crochet Spot, I decided to design a bracelet that proudly proclaims to the world my love of crochet! I hope you like it as much as I do! This pattern is written to accommodate the “I LOVE CROCHET” message, but you could substitute other words. |  |
| Skill Level: |  |
Finished Size: Finished bracelet fits 7.5″ (19 cm) wrist as written. Add or subtract from beginning chain in order to lengthen or shorten bracelet. Standard bracelet sizes are as follows:
Newborn – 6 months – 4†(10 cm) – 4 ½†(12 cm)
6 -12 months – 4 ½” (12 cm) – 5†(13 cm)
1 – 4 years – 5″ (13 cm) – 5 ½” (14 cm)
4 – 7 years – 5 ½†(14 cm) – 6″ (15 cm)
Petite Woman – 7″ (18 cm)
Average Woman – 7.5″ (19 cm)
Larger Than Average Woman – 8″ (20 cm)
| Materials: Embroidery Floss (2 skeins – approximately 20 yards) Crochet Hook D (3.25 mm) |
Gauge: 39 chains measure 8.25″ (19 cm) long
Need help understanding the abbreviations and symbols? Check out the crochet abbreviation chart.
Preparation:
1. Select the alphabet beads to spell the message “I LOVE CROCHET”. The letter “I” should be the first letter strung on and the “T” should be the last letter strung on. The “T” will be the first letter bead used when crocheting in the pattern.
2. String the beads onto one of the skeins in order so the message reads “I LOVE CROCHET”. This will be called “beaded string”.
Note: There are alphabet beads with large holes. I didn’t buy those, but I kind of wish I had! Still, the smaller ones fit on my embroidery floss.
Crochet Pattern: I Love Crochet Beaded Bracelet
Note: Bracelet is worked holding two strands of string held together: the beaded string and the string from the other skein of embroidery floss.
Row 1: ch 39, working in back ridge only, sc in second ch from hook and in each ch across: 38 sc
Row 2: ch 1, turn, sc in first 5 sc, (sc with bead in next sc, sc in next sc) 7 times, sc in next sc, (sc with bead in next sc, sc in next sc) 4 times, sc in next sc, sc with bead in next sc, sc in next 4 sc, ch 2, skip 2 sc, sc in next 2 sc: 38 sts
Row 3: ch 1, turn, sc in each st across: 38 sc
Finishing:
Finish off and weave in ends. Sew a button to the side of the bracelet, opposite the button hole. Adjust the size of the bracelet by placing the button so it fits the intended wrist.
Need help while crocheting? Feel free to leave a comment below and I’ll help you out!

