Free Crochet Patterns

Free Crochet Pattern: Newborn Baby Hat

Posted in Free Crochet Patterns on June 25th, 2009 by Rachel Choi – 114 Comments
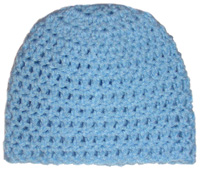
Here is another hat/beanie that is great to make and donate to charities, hospitals or someone in need. It is designed to fit an average newborn head, and although baby heads may vary in size, there is extra length at the bottom of this hat to fold up and should stretch depending on the yarn you use. Feel free to change colors and get creative with this basic hat! crochet newborn hat
Skill Level: beginner crochet skill level

Finished Size: 5 1/2″ (14 cm) tall, 6″ (15 cm) wide when flat
Note: hat is meant to stretch

Materials:
Medium Weight Yarn (small amount)
Crochet Hook I (5.50 mm)
crochet yarn size 4

Gauge: Rounds 1 – 3 in pattern creates a circle that is 3 3/4″ in diameter

Crochet Pattern: Newborn Baby Hat
Round 1: ch 4, 12 dc in forth ch from hook, sl st in top of beg ch: 12 dc
Round 2: ch 3, 2 dc in each dc around, sl st in top of beg ch-3: 24 dc
Round 3: ch 3, (2 dc in next dc, dc in next dc) around, sl st in top of beg ch-3: 36 dc
Round 4 – 10: ch 3, dc in each dc around, sl st in top of beg ch-3: 36 dc
Finish off.

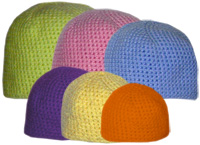
You may also like to check out the Crochet Pattern: Family Beanie Set – 6 sizes. This pattern set has various beanies for you to crochet!

Be sure to check out the Crochet Spot Store for more hat and baby patterns!

crochet beanies

Free Crochet Pattern: Basic Preemie Hat

Posted in Free Crochet Patterns on June 23rd, 2009 by Rachel Choi – 44 Comments
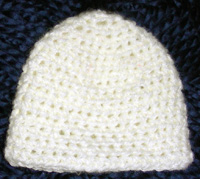
Lots of people love to donate hats for preemies to charities and hospitals. Here is a basic, simple pattern that works up very fast. It leaves room for a lot of your own creativity and imagination. Feel free to change colors and decorate as you desire. Although preemies come in all sorts of tiny sizes, this hat should fit most, as the bottom can fold up to just the right length and depending on the type of yarn you use it can stretch. crochet preemie hat
Skill Level: beginner crochet skill level

Finished Size: 4″ (10 cm) tall, 4 1/2″ (11.5 cm) wide when flat

Materials:
Medium Weight Yarn (small amount)
Crochet Hook H (5.00 mm)
crochet yarn size 4

Gauge: 8 hdc and 5 rows = 2″

Crochet Pattern: Preemie Hat
Round 1: ch 3, 6 hdc in third ch from hook, place marker: 6 hdc
Round 2: 2 hdc in each hdc around: 12 hdc
Round 3: (2 hdc in next hdc, hdc in next hdc) around: 18 hdc
Round 4: (2 hdc in next hdc, hdc in next 2 hdc) around: 24 hdc
Round 5: (2 hdc in next hdc, hdc in next 3 hdc) around: 30 hdc
Round 6: (2 hdc in next hdc, hdc in next 4 hdc) around: 36 hdc
Round 7 – 14: hdc in each hdc around: 36 hdc
Finish off.

If you need help with this preemie hat pattern, let me know and I’ll be glad to help!

Free Crochet Pattern: Fun Fur Monster

Posted in Free Crochet Patterns on June 20th, 2009 by Rachel Choi – 6 Comments
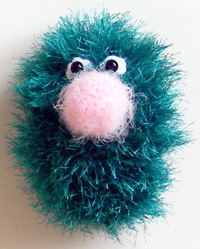
I bought some fun fur yarn on clearance not knowing exactly what to make with it. It turns out I made this fun little monster! The pattern it’s self is fairly easy, but if you’ve never worked with fun fur before, I would suggest playing around with it first before trying to make anything. Often times it can be hard to see the stitches in your work so try and push the “eyelashes” of the yarn back to help get a good visual of where to stick you hook. Other than that, have fun making this goofy monster!

Skill Level: crochet skill level easy
crochet fun fur monster

Note: if this is your first time working with fun fur yarn, it may be difficult to see the stitches in your work. It is recommended to practice using this type of yarn before attempting pattern.

Finished Size: 5 1/2″ (14 cm) tall, 3 1/2″ (9 cm) wide
read more »

Free Crochet Pattern: Boucle Hair Tie Scrunchie

Posted in Free Crochet Patterns on June 18th, 2009 by Rachel Choi – Be the first to comment
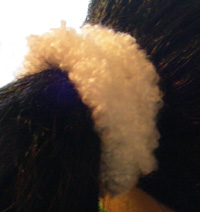
The boucle hair tie scrunchie is very easy and fast to make! Sometimes when people hear the term “boucle yarn” they grab their crochet hook and run away. Why? Because crocheting with boucle makes it very hard to see the stitches. But for this pattern, that’s a good thing! You won’t need to hunt for any stitches here!

With this pattern you will be making very cost efficient, cute and not over the top crazy hair ties! The boucle yarn gives it a very soft feel hiding an elastic rubber band underneath so that it won’t pull your hair. The simplicity of the hair tie makes it great to wear everyday!

crochet boucle hair tie sccrunchie
Skill Level: beginner crochet skill level

Finished Size: Will depend on the rubber band size

Materials:
Medium Weight Boucle Yarn (small amount)
Crochet Hook I (5.50 mm)
Rubber Band
crochet yarn size 4

Crochet Pattern: Hair Tie Scrunchie
Round 1: sc in rubber band until the rubber band is fully covered (the number of sc will vary based on rubber band size)
Round 2: sc around in rubber band overlapping stitches made in previous round, sl st and finish off.

If you need help crocheting this hair tie scrunchie, let me know and I’ll be glad to help!

Free Crochet Pattern: Surface Cleaning Cloth

Posted in Free Crochet Patterns on June 12th, 2009 by Rachel Choi – 16 Comments
I don’t know why I keep calling crocheted dishcloths, dishcloths, because I rarely ever use them as dishcloths. I find that these cloths are great at cleaning surfaces such as counter tops, microwaves, stoves and any other surface that may be messy. I decided to design a “surface cleaning cloth” that is meant to be narrow (a little wider than the size of person’s palm) to make it easy to move around, and long so that it can be folder over a couple times so that your don’t have to keep running to the sink to rinse it off. This pattern uses the same ridges as my previous crocheted dishcloth with ridges since it is more scrubbie than a non-textured cloth and is great at picking up crumbs! The strap on top is great for hanging your cloth to dry, whether it’s on a hook or on your refrigerator door handle, as the cloth can be pulled through the strap to form a loop on your handle.

Skill Level: beginner crochet skill level

Finished Size: 4 1/2″ (11.5 cm) wide, 12″ (30.5 cm) tall (not including strap)

Materials:
Medium Weight Yarn (approximately 60 yards)
Note: use 100% cotton for good absorbency
Crochet hook J (6.00 mm)
crochet yarn size 4
crochet cleaning cloth

Crochet Pattern: Cleaning Cloth
Note: all stitches are crocheted in back loop only unless otherwise indicated
Row 1: ch 19, sc in second ch from hook and in each ch across: 18 sc
Row 2 – 47: ch 1, turn, sc in each sc aross: 18 sc
Note: stitches are crocheted in both loops for the rest of the pattern
Row 48: ch 1, turn, sc in first sc, ch 25, skip next 16 sc, sc in last sc: 2 sc
Row 49: ch 1, turn, sc in first sc, 30 sc in ch-25 space, sc in last sc, finish off

If you need help crocheting this cleaning cloth, let me know and I’ll be glad to help!

Crochet Plastic Bags: Plarn Can Cozy

Posted in Free Crochet Patterns on June 10th, 2009 by Rachel Choi – 15 Comments
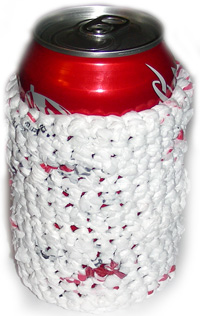
Call me butterfingers, I almost dropped my can of soda the other day because it was so wet from being chilled in the refrigerator! I never really knew why people used can cozies, but now I know. Here is one that I made for my soda can with plarn (plastic yarn). I’m so proud of how nice and tight the cozy fits on a can. This cozy can also be made with regular yarn if desired, just be sure to do some measuring so that it fits properly.

Also I noticed that this cozy makes a perfect pencil holder!!! The plastic makes it really stiff and less likely to fall over if loaded with pencils or whatever you may decide to put in it!

Skill Level: beginner crochet skill level
corchet plarn can cozy

Finished Size: 3″ (7.5 cm) in diameter, 4″ (10 cm) tall
Note: you may adjust size if desired

Materials:
Approximately 10 plastic bags made into plarn (plastic yarn)
Crochet hook H (5.00 mm)

Gauge: Round 1 – 5 in pattern is a circle that measures 2 3/4″ (7 cm) in diameter

Crochet Pattern: Can Cozy
Round 1: ch 2, 6 sc in second ch from hook, place marker: 6 sc
Round 2: 2 sc in each sc around: 12 sc
Round 3: (2 sc in next sc, sc in next sc) around: 18 sc
Round 4: (2 sc in next sc, sc in next 2 sc) around: 24 sc
Round 5: (2 sc in next sc, sc in next 3 sc) around: 30 sc
Note: your circle should be 2 3/4″ (7 cm) in diameter fitting perfectly under your soda can. After round 8, the bottom of your can should fit tightly into the cozy.
Round 6 – 20: sc in each sc around: 30 sc

If you need help with crocheting this can cozy, feel free to let me know and I’ll be glad to help!

Free Crochet Pattern: Rug with Ridges

Posted in Free Crochet Patterns on June 6th, 2009 by Rachel Choi – 62 Comments
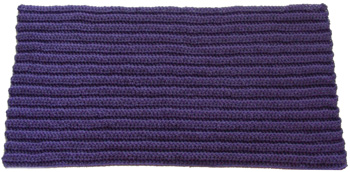
I’ve been meaning to make a rug for my bathroom and kitchen for a while and I finally got around to doing it! I needed something simple. Nothing fancy or else I won’t want to step on it. I made it a little too big to go in front of my bathroom sink, so this one is going in the kitchen. Next time I’ll remember to measure first. This rug has a nice ridge texture that is made by crocheting in the back loop only. It’s a great project if you’re a beginner or if you just need a rug! Make sure to put something slip resistant on the bottom of it so it doesn’t slip and slide around the floor.

crochet rug with ridges

Skill Level: beginner crochet skill level

Finished Size: 32″ (81 cm) wide, 16 1/2″ (42 cm) tall
Note: adjust rug to the size you want using directions in the pattern

Materials:
Medium Weight Yarn (approximately 364 yards)
Crochet hook K (6.50 mm)
crochet yarn size 4

Gauge: not really important, crochet as tight or loose as you want your rug.

Crochet Pattern: Rug
Note: all stitches are crocheted in the back loops only
Start by chaining 90 or as wide as you want rug
Row 1: ch 3, dc in forth ch from hook and in each ch across: 90 dc
Row 2: ch 3, turn, dc in each dc across: 90 dc

Repeat row 2, 28 times or until rug is as tall as you desire.

If you need help with crocheting this rug, feel free to let me know and I’ll be glad to help!

Free Crochet Pattern: Dishcloth with Ridges

Posted in Free Crochet Patterns on June 4th, 2009 by Rachel Choi – 15 Comments
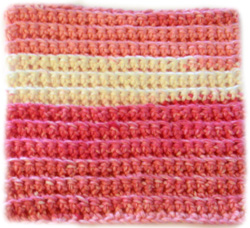
Crochet dishcloths are really fun! They are great for brightening up any kitchen or bathroom and clean those dirty counter tops and dishes at the same time. This dishcloth has ridges for extra scrubbing power. The ridges are created by crocheting in the back loops only, although it may be difficult to see the ridges in the photo to the right. For super absorbency use 100% cotton yarn. This dishcloth is made with self striping yarn, if you use other types of yarn feel free to change colors as desired. crochet ridge dishcloth
Skill Level: beginner crochet skill level

Finished Size: 6 1/2″ (16.5 cm) square

Materials:
Medium Weight Yarn (approximately 50 yards)
Crochet Hook J (6.00 mm)
crochet yarn size 4

Crochet Pattern: Dishcloth
Note: all stitches are worked in the back loops only
Row 1: ch 25, sc in second ch from hook and in each ch across: 24 sc
Row 2: ch 1, turn, sc in each sc across: 24 sc

Repeat row 2, 24 times or until dishcloth is as long as you desire.

If you need help with crocheting this dishcloth, let me know and I’ll be glad to help!

Free Crochet Pattern: Lacey Headband

Posted in Free Crochet Patterns on May 30th, 2009 by Rachel Choi – 21 Comments

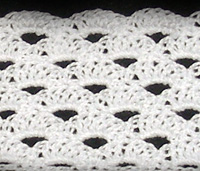
This headband is made with size 10 thread and is designed to fit any women or child’s head. The pretty lacey center is crocheted first then small straps are sewn on to secure the headband in the back of the head, while still making it adjustable for the different sizes. This headband can be worn everyday to keep your hair in place or for the special occasion when you need a touch of lace for your outfit. Follow the instructions below to get started.

crochet lacey headband

Skill Level: crochet skill level easy

Finished Size: 2” (5 cm) wide, 10” (25.5 cm) long not including straps
Note: you may alter the size of the headband if desired by following the instructions within the pattern

Materials:
Size 10 Thread
Crochet Hook US 1 (2.35 mm)
Sewing Needle

crochet lacey headband

Gauge: not really important

Need help reading the crochet pattern? Learn more about how to read crochet patterns.

Crochet Pattern: Head Band
Start by chaining 86 or a chain that is a multiple of 6, then add 2 chains
Row 1: sc in second ch from hook, sc in next ch, ch 3, skip 3 ch, (sc in next 3 ch, ch 3, skip 3 ch) across, sc in last 2 ch
Row 2: ch 1, turn, sc in first sc, (skip 1 sc, 5 dc in next ch-3 space, skip 1 sc, sc in next sc) across
Row 3: ch 3, turn, skip 2 sts, sc in next 3 dc, (ch 3, skip next 3 sts, sc in next 3 dc) across, ch 2, skip 1 st, sc last sc
Row 4: ch 2, turn, skip 1 sc, 3 dc in ch-2 space, skip 1 sc, sc in next sc, (skip 1 sc, 5 dc in next ch-3 space, skip 1 sc, sc in next sc) across, 3 dc in last ch-3 space
Row 5: ch 1, turn, sc in next 2 dc, (ch 3, skip 3 sts, sc in next 3 dc) across, ch 3, skip 3 sts, sc in last 2 sts
Repeat rows 2 – 5, two times, stopping after row 4 on last repeat.

Strap (make 2)
Start by chaining 12 or a chain that is wide as the headband
Row 1: ch 2, dc in third ch from hook and in each ch across: 12 dc
Row 2: ch 2, turn, dc2tog, dc in next 8 dc, dc2tog: 10 dc
Row 3: ch 2, turn, dc2tog, dc in next 6 dc, dc2tog: 8 dc
Row 4: ch 2, turn, dc2tog, dc in next 4 dc, dc2tog: 6 dc
Row 5: ch 2, turn, dc2tog, dc in next 2 dc, dc2tog: 4 dc
Row 6: ch 2, turn, dc in each dc across: 4 dc

Repeat row 6, 40 times or until strap is as long as desired.

Sew strap to side of headband with a sewing needle.

To wear the headband, place on head and tie the straps in the back. If desired, you may choose not the create straps, instead make headband long enough to fit around head and sew ends together.

If you need help crocheting this headband, let me know and I’ll be glad to help!

Free Crochet Pattern: Felted Bowl

Posted in Free Crochet Patterns on May 29th, 2009 by Rachel Choi – 20 Comments
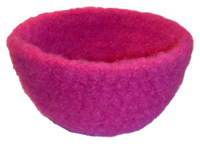
Here is a cute, fuzzy bowl to crochet! This a small project that is great for practicing and learning how to felt if you’re a beginner. This bowl can be crocheted really fast using your scrap yarn. Just make sure to use yarn made of 100% animal fibers, such as wool, or else I won’t felt. Have fun and happy felting! crochet felted bowl
Skill Level: beginner crochet skill level

Finished Size:
Not felted: 4 ½” (11.5 cm) diameter, 3 ¼” (8.5 cm) tall
Felted: 4 ¼” (11 cm) diameter, 2 ½” (6.5 cm) tall
Note that felted size may vary based on type/brand of yarn and felting method.

Materials:
Medium Weight Yarn (approximately 75 yards of 100% wool or other felt-able material)
Crochet Hook I (5.50 mm)

Crochet Pattern: Bowl
Round 1: ch 4, 12 dc in forth ch form hook, sl st in top of ch-3 joining to beginning of round: 12 dc
Round 2: ch 3, 2 dc in each dc around, sl st in top of ch-3: 24 dc
Round 3: ch 3, (2 dc in next dc, dc in next dc) around, sl st in top of ch-3: 36 dc
Round 4: ch 3, (2 dc in next dc, dc in next 2 dc) around, sl st in top of ch-3: 48 dc
Round 5 – 9: ch 3, dc in each dc around, sl st in top of ch-3: 48 dc

Finish off and tuck in ends. Felt as desired or use felting instructions as a guide. Block crochet to shape your bowl.

If you need help with crocheting and felting this bowl, let me know and I’ll be happy to help!