Free Crochet Patterns

Crochet Flower Pattern: Sunflower

Posted in Free Crochet Patterns on February 27th, 2009 by Rachel Choi – 32 Comments
If there is any flower out of all the flowers to ever crochet, the happiest of them all has to be the sunflower. The bright yellow is bound to brighten up anyone’s day. Sunflowers almost look like they are smiling at you with their arms open for a hug. Do you see it? Or is it just me?

Here are the instructions to crochet this sunflower!

Skill Level: crochet skill level easy

Finished Size: approximately 11 ½” (29 cm) tall, 6” (15 cm) wide

Materials:
Medium Weight Yarn
Crochet Hook F (3.75 mm)
Yarn Needle
Polyester fiberfill (optional)
Wire (optional)
crochet yarn size 4
crochet sunflower

Gauge:
17 sc = 3’’
8 rows = 2’’
Gauge Swatch: 3’’w x 2’’h (7.5cm x 5cm) ch 18.
Row 1: sc in second ch from hook and in each ch across: 17 sc
Row 2 – 8: ch 1, turn, sc in each sc across: 17 sc
Finish off.

Need help understanding the abbreviations? Check out the crochet abbreviation chart.

Center
Round 1: with brown, ch 2, 6 sc in second ch from hook, place marker: 6 sc
Round 2 : 2 sc in each sc around: 12 sc
Round 3: (2 sc in next sc, sc in next 1 sc) around: 18 sc
Round 4: (2 sc in next sc, sc in next 2 sc) around: 24 sc
Round 5: (2 sc in next sc, sc in next 3 sc) around, sl st in next sc, finish off: 30 sc

Petal (Make 11)
Start by chaining 13.
Row 1: sl st in second ch from hook, sc in next ch, hdc in next ch, dc in next 6 ch, hdc in next ch, sc in next ch, sl st in next ch: 12 sts
Row 2, ch 1, turn, sl st in next sl st, sc in next sc, hdc in next hdc, dc in next 6 dc, hdc in next hdc, sc in next sc, sl st in next sl st, finish off: 12 sts

Using photo as a guide, sew petals to edge of center with a yarn needle.

Stem
Round 1: ch 6, sl st in sixth ch from hook, place marker: 6 ch
Round 2: dc in each ch around: 6 dc
Round 3 – 16: dc in each dc around: 6 dc
Round 17: 2 dc in each dc: 12 dc
Round 18: 2 dc in each dc: 24 dc
Round 19: (2 dc in next dc, dc in next dc) around: 36 dc
Round 20: (sl st in next dc, ch 3) around, sl st in next dc, finish off: 36 sl st

Using photo as a guide, sew stem to back of center with a yarn needle. Optional: While sewing stuff only the top of the stem, behind the sunflower with fiberfill to create a cone shape.

Leaf (Make 2)
Start by chaining 13.
Row 1: sl st in second ch from hook, sc in next ch, hdc in next ch, dc in next 2 ch, tr in next 2 ch, dc in next 2 ch, hdc in next ch, sc in next ch, sl st in next ch: 12 sts
Row 2: ch 1, turn, sl st in next sl st, sc in next sc, hdc in next hdc, dc in next 2 dc, tr in next 2 tr, dc in next 2 dc, hdc in next hdc, sc in next sc, sl st in next sl st, finish off: 12 sts

Using photo as a guide, sew leaves to stem with a yarn needle.

Optional: Insert wire into stem of flower for stiffness.

If you need help with this pattern, just leave a comment! For more flower patterns, visit the Crochet Spot Store.

Crochet Pattern: Youthful Striped Bag

Posted in Free Crochet Patterns on February 25th, 2009 by Rachel Choi – 12 Comments
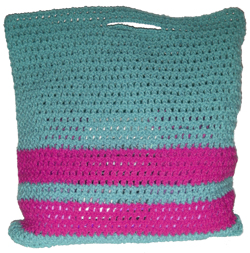
I love carrying my yarn in this very bright bag! Just looking at it makes me full of energy. This bag is very easy and simple to crochet. It’s great for teens since the colors give it a youthful look. But feel free to play with the colors to make your own look with it.

Skill Level: crochet skill level easy

Finished Size:13 ¼” (35 cm) wide, 14 ½” (37 cm) tall

crochet stripe-bag
Materials:
Medium Weight Yarn
Crochet Hook F (3.75 mm)
crochet yarn size 4

Gauge:
17 sc = 3’’
8 rows = 2’’
Gauge Swatch: 3’’w x 2’’h (7.5cm x 5cm) ch 18.
Row 1: sc in second ch from hook and in each ch across
Row 2 – 8: ch 1, turn, sc in each sc across
Finish off.

Need help understanding the abbreviations? Check out the crochet abbreviation chart.

Crochet Pattern: Handbag
Round 1: with MC, ch 80, place marker
Round 2 – 4: (ch 1, skip 1, dc in next ch) around foundation ch
Round 5: (ch 1, skip 1, dc in next ch) around, change color to CC in last dc
Round 6 – 8: (ch 1, skip 1, dc in next ch) around
Round 9: (ch 1, skip 1, dc in next ch) around, change color to MC in last dc
Round 10 – 11: (ch 1, skip 1, dc in next ch) around
Round 12: (ch 1, skip 1, dc in next ch) around, change color to CC in last dc
Round 13 – 16: (ch 1, skip 1, dc in next ch) around
Round 17: (ch 1, skip 1, dc in next ch) around, change color to MC in last dc
Round 18 – 31: (ch 1, skip 1, dc in next ch) around
Round 32: (ch 1, skip 1, dc in next ch) 15 times, ch 20, skip 20, dc in next ch, (ch 1, skip 1, dc in next ch) 29 times, ch 20, skip 20, dc in next ch, (ch 1, skip 1, dc in next ch) 14 times
Round 33 – 34: (ch 1, skip 1, dc in next ch) around
Finish off

If you need help with this youthful striped bag, just leave a comment!

Free Crochet Pattern: Small Classy Clutch

Posted in Free Crochet Patterns on February 24th, 2009 by Rachel Choi – 30 Comments

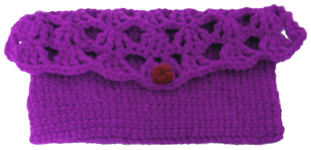
I don’t know about you, but I have a fetish for bags, purses, and clutches especially when it comes to crocheting them! This small classy clutch is my lucky little bag. Even though this crocheted clutch is perfect for a night on the town, it sits on my desk and keeps my small crochet tools snug. crochet small-clutch

This clutch is great for whatever small stuff you have, whether it is makeup, phone, keys or crochet hooks. Here is the very fast, simple and easy pattern for this small classy clutch.

Skill Level: crochet skill level easy

Finished Size: 7 ½” (18 cm) wide, 4” (10 cm) tall

Materials:
Medium Weight Yarn
Crochet Hook F (3.75mm)
Yarn Needle
crochet yarn size 4

Gauge:
17 sc = 3’’
8 rows = 2’’
Gauge Swatch: 3’’w x 2’’h (7.5cm x 5cm) ch 18.
Row 1: sc in second ch from hook and in each ch across
Row 2 – 8: ch 1, turn, sc in each sc across
Finish off.

Need help understanding the abbreviations? Check out the crochet abbreviation chart.

Crochet Pattern: Clutch
Start by chaining 39
Round 1: sc in second ch from hook, sc in each ch across, turn, sc in each ch on other side of foundation ch: 76 sc
Round 2 – 16: sc in each sc around: 76 sc
Row 17: dc in next 38 sc: 38 dc
Row 18: ch 4, turn, skip 1, tr in next dc, (skip 4, tr in next dc, ch 1, tr in same dc, ch 1, tr in same dc, ch 1, tr in same dc) 6 times, skip 4, 2 tr in next dc
Row 19- 20: ch 4, turn, skip 1, tr in next st, (skip 4, tr in next st, ch 1, tr in same st, ch 1, tr in same st, ch 1, tr in same st) 7 times, skip 4, 2 tr in next st
Finish off.

Button
Round 1: ch 2, sl st in second chain from hook, 8 sc in loop, sl st in next sc, finish off

Using Photo as a guide, sew button onto clutch using a yarn needle.

If you need help with this crocheted clutch pattern, just leave a comment!

Crochet Plastic Bags: Plarn Purse

Posted in Free Crochet Patterns on February 22nd, 2009 by Rachel Choi – 16 Comments
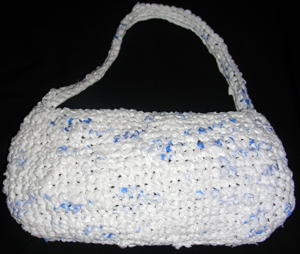
Here is my very first plarn (plastic yarn) creation! I had a collection of Wal-Mart grocery bags sitting under my sink from each time I went grocery shopping and it was time to put them to good use. This is a great way to recycle your plastic bags by turning them into something awesome and useful. Give it a try with the next batch of grocery bags you bring home!

Skill Level: crochet skill level easy
crochet plarn-purse

Finished Size: 10” (26 cm) wide, 5 ¼” (13 cm) tall, not including strap

Materials:
20 plastic grocery bags, cut into a ball of plarn (How to Make Plarn)
Crochet Hook Size G (4.00 mm)
Yarn Needle

Need help understanding the abbreviations? Check out the crochet abbreviation chart.

Crochet Pattern: Purse
Round 1: ch 31, sc in each sc across, ch 1, sc in each ch on opposite side of ch, place marker
Round 2: 2 sc in next ch, sc next 30 sc, 2 sc in next ch, sc in next 30 sc
Round 3: 2 sc in next 2 sc, sc next 30 sc, 2 sc in next 2 sc, sc in next 30 sc
Round 4: 2 sc in next 4 sc, sc next 30 sc, 2 sc in next 4 sc, sc in next 30 sc
Round 5 – 14: sc in each sc around
Round 15: sc in next 3 sc, decrease, sc in next 36 sc, decrease, sc in next 33 sc
Round 16: sc in each sc around
Round 17: sc in next sc, decrease, sc in next sc, decrease, sc in next 32 sc, decrease, sc in next sc, decrease, sc in next 31 sc
Round 18: decrease, sc in next sc, decrease, sc in next 30 sc, decrease, sc in next sc, decrease, sc in next 30 sc, sl st in next sc, finish off

Strap
Row 1: ch 61, turn, sc in each ch across
Row 2 – 3: ch 1, turn sc in each sc across

Using photo as a guide, sew strap to purse using a yarn needle.

If you need help making your plarn or purse, just leave a comment!

Free Crochet Pattern: Cardholder

Posted in Free Crochet Patterns on February 19th, 2009 by Rachel Choi – 13 Comments
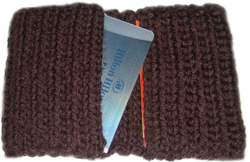
My messy friend needed a place to put all his credit cards, since he normally leaves them laying all over his desk, so here is the cardholder that I made for him, which of course can be used for business cards and cash as well. Personally I use a cardholder as a wallet since it is not as bulky as regular wallets and has fewer compartments to get lost in. Crocheting this cardholder is very fast and simple. You can even use your scrap yarn for this project. crochet cardholder
Skill Level: beginner crochet skill level

Finished Size: 5 1/2” (14 cm) wide when opened, 3 ¾” (9 cm) tall

Materials:
Medium Weight Yarn
Crochet Hook F (3.75mm)
Yarn Needle
crochet yarn size 4

Gauge:
17 sc = 3’’
8 rows = 2’’
Gauge Swatch: 3’’w x 2’’h (7.5cm x 5cm) ch 18.
Row 1: sc in second ch from hook and in each ch across
Row 2 – 8: ch 1, turn, sc in each sc across
Finish off.

Need help understanding the abbreviations? Check out the crochet abbreviation chart.

Crochet Pattern: Cardholder
Row 1: ch 21, sc in second ch from hook, sc in each ch across
Row 2 – 48: ch 1, sc in each sc across
Finish off

Using Photo as a guide, sew in both sides 2 1/4″ (6 cm) with a yarn needle.

For additional design, you may like to change colors after each row to create stripes. See more cardholders color ideas here.

If you need help with this crochet pattern, no worries! Just leave a comment!

How to Crochet a Scarf

Posted in Free Crochet Patterns, Tutorials and Help on February 17th, 2009 by Rachel Choi – 2 Comments
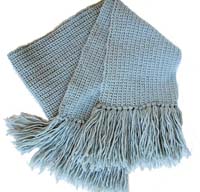
Learning how to crochet a scarf is so simple. There are tons and tons of crochet patterns on the internet and in books that you can follow or you can always make up your own pattern. Once you know the basics of crocheting, it will be very easy for you to crochet any scarf that you desire.

The basic instructions for crocheting a scarf are to start out with a foundation chain that is as long as the width of the scarf you want to crochet. Using the foundation chain, you can continue to make rows of crocheted stitches, using any crochet stitch that you like.

crochet scarf

Each row you add will make your scarf longer, so just keep adding rows until it is the perfect length for you. When you determine that you added enough rows, simple cut your yarn and tie the end, so your scarf does not unravel. To finish off, weave the end of the yarn as neatly as possible into your scarf.

There is an infinite number of ways you can crochet a scarf. Here is a very basic, easy to follow pattern for beginners.

Crochet Pattern: Scarf
Row 1: ch 31, sc in second ch from hook, sc in each ch across
Row 2: ch 1, turn, sc in each sc across
Repeat row 2 until the scarf is as long as you desire. Finish off the scarf by cutting the yarn and weaving the end into your scarf.

Need help understanding the abbreviations? Check out the crochet abbreviation chart.

To make a different scarf, try using other crochet stitches or a variation of crochet stitches. You can also create patterns by changing yarn colors or adding tassels.

If you need help on how to crochet a scarf, just leave a comment with your question!

Crochet Pattern: Piano Key Scarf

Posted in Best Crochet Patterns, Free Crochet Patterns on February 16th, 2009 by Rachel Choi – 160 Comments

EDIT: This pattern was updated on December 21, 2009. The pattern as written now, uses a larger hook size (to solve the stiffness problem) and includes tips for changing colors and carrying loose ends as you work so that you will have only ONE loose end to tuck in after you complete your scarf. This pattern is intended for people with experience and lots of patience as a lot of color changes are required. This pattern is not recommended for beginners.

Please read this pattern fully and carefully before beginning. You will be required to repeat certain rows to obtain the piano key layout. Be sure to only repeat the rows indicated when instructed to.

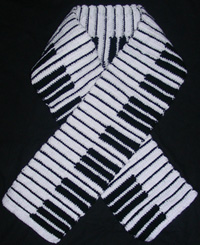
crochet piano-scarf

The piano key scarf is perfect for any piano lover. Take the piano anywhere and everywhere you go. This crocheted scarf is great for men, boys, ladies and girls. No matter who you are, this scarf is bound to keep you warm and fashionably in style. Just whip out your yarn and crochet hook and follow the crochet pattern below.

Skill Level:

Finished Size: 5’’ (13 cm) wide, and as long as you want it to be (follow the instructions within the pattern to adjust the length)

crochet piano-scarf
Materials:
Medium Weight Yarn (Black and White) approximately 200 yards each
Recommended yarn brand: Caron Simply Soft Yarn
Crochet hook K (6.50 mm)
Scissors
crochet yarn size 4

Gauge:
11 sc = 3’’
6 rows = 2’’
Gauge Swatch: 3’’w x 2’’h (7.5 cm x 5 cm) ch 12.
Row 1: sc in second ch from hook and in each ch across: 11 sc
Row 2 – 6: ch 1, turn, in front loop only, sc in each sc across: 11 sc
Finish off.

How to Change Colors in this Pattern
For this pattern, when you are instructed to change colors, make one chain with the color you are currently using, then cut the yarn and pull the loop on your hook so that the loose strand of yarn is pulled through the stitch. Pull the loose strand so that it creates a small knot. Your loose end should not be longer than 2 inches. With the new color, start with a slip knot on your hook, then make the stitches as indicated in the pattern. Carry the loose end of your yarns as indicated in the tips in the pattern. The knot made should not be noticed in your work.

How to Minimize the Number of Loose Ends
The tips included within the pattern instruct you to carry loose ends of yarn by crocheting over them to minimize the number of ends you have to weave in when you finish. If done correctly you will have only ONE loose end to weave in. Here is a link to a more detailed explanation of the technique used in this pattern: How to Minimize Weaving in Ends in Crochet

Crochet Pattern: Piano Key Scarf
Row 1: with white, ch 21, working in the back ridge only, sc in second ch from hook and in each ch across: 20 sc
Tip: before making your last few stitches on this row, hold the loose end created at the beginning of the chain, to the chain and crochet over it.

All stitches now and throughout are worked in the front loop only.

Row 2: ch 1, turn, sc in each sc across: 20 sc

One Key

Row 3: ch 1, turn, sc in next 10 sc, change to black, sc in next 10 sc: 20 sc
Tip: Carry the loose ends of the white and black yarn in your work until it is no longer sticking out.

Row 4: ch 1, turn, sl st in each sc across: 20 sl st

Row 5: change to white, turn, sc in next 10 sl st, change to black, sc in next 10 sl st: 20 sc
Tip: When crochet with white yarn at the beginning of row, carry the loose ends of the black and white yarn in your work until it is no longer sticking out. When you change to black, carry only the loose end of the black yarn in your work.

Row 6: change to white, turn, sc in each sc across: 20 sc
Tip: Carry the loose ends of the white and black yarn in your work until it is no longer sticking out. When you reach the loose end of the white yarn from the previous row, carry it in your work until it is no longer sticking out.

Work “One Key” (rows 3 – 6), 2 more times.

Space

Row 7: ch 1, turn, sc in each sc across: 20 sc

Row 8: change to black, turn, sl st in each sc across: 20 sl st

Row 9: change to white, turn, sc in each sl st across: 20 sc
Tip: Carry the loose ends of the white and black yarn in your work until it is no longer sticking out. Before making your last few stitches on this row, hold the loose ends of the black and white yarn from the previous row, to your work and crochet over it.

Row 10: ch 1, turn, sc in each sc across: 20 sc

Work “One Key” (rows 3 – 6), 2 times.
Work “Space” (rows 7 – 10), 1 time.
Work “One Key” (rows 3 – 6), 3 times.
Work “Space” (rows 7 – 10), 1 time.

Repeat the above 4 lines until the scarf is as long as you desire. When you choose to end your scarf, end after you compete your last row 7. You should only have 1 loose end to weave in when you are done.

For an extra perk, add black tassels on both ends of the scarf.

Do you need help crocheting the piano key scarf? No worries just leave a comment!

Free Crochet Pattern: Flower Hair Tie Scrunchie

Posted in Free Crochet Patterns on February 15th, 2009 by Rachel Choi – 30 Comments
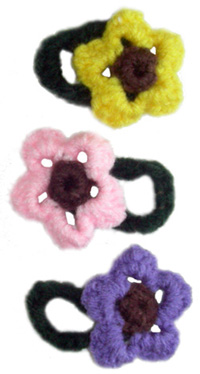
These bright flower hair ties are great for little girls! Use your scrap yarn to make these precious flowers and attach them to a nicely covered rubber band. They look great bouncing around on a child’s head and won’t pull hair like plain rubber bands do. Just grab a rubber band and some yarn and start crocheting.

Skill Level: crochet skill level easy

Finished Size: 2’’ (5 cm) diameter of flower, hair tie will vary based on rubber band size

Materials:
Medium Weight Yarn
Crochet Hook F (3.75mm)
Yarn Needle
Rubber Band(s)
crochet yarn size 4

Gauge: not very important

crochet flower-hair-tie

Need help understanding the abbreviations? Check out the crochet abbreviation chart.

Crochet Pattern: Hair Tie
Round 1: with green, sc in rubber band until the rubber band is fully covered, sl st in first sc made, finish off (the number of sc will vary based on rubber band size)

Flower
Round 1: with brown, ch 5, sl st in 5th ch from hook, 10 sc in loop, changing to flower color in last sc, place marker
Round 2: (ch 4, skip 1, sl st in next sc) around
Round 3: (sc, hdc, dc, dc, hdc, sc in next ch-4 loop, sl st in next ch-4 loop) around, finish off

Using photo as a guide, sew flower onto hair tie with a yarn needle.

Need help with this pattern? Just leave a comment!

Crochet Pattern: Flowered Ear Warmer

Posted in Free Crochet Patterns on February 13th, 2009 by Rachel Choi – 24 Comments
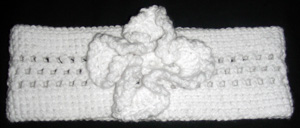
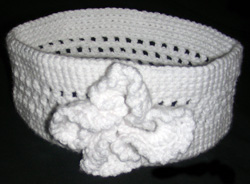
This crocheted ear warmer is great for the cold outdoors. Just slip it onto your head and over your ears for a nice, cozy sensation. But beware, this elegant ear warmer is bound to attract admiring attention. crochet earwarmer
Skill Level: crochet skill level easy

Finished Size: 3 1/4’’ (8 cm) tall, 9 3/4’’ (25 cm) diameter

Materials:
Medium Weight Yarn
Crochet Hook F (3.75mm)
yarn Needle
crochet yarn size 4
crochet earwarmer

Gauge:
17 sc = 3’’
8 rows = 2’’
Gauge Swatch: 3’’w x 2’’h (7.5cm x 5cm) ch 18.
Row 1: sc in second ch from hook and in each ch across
Row 2 – 8: ch 1, turn, sc in each sc across
Finish off.

Need help understanding the abbreviations? Check out the crochet abbreviation chart.

Crochet Pattern: Ear Warmer
Round 1: ch 91, sl st in first ch to form loop, place marker
Round 2-5: sc in each sc around
Round 6 – 8: (dc in next sc, chain one, skip one) around
Round 9 – 12: sc in each st around, sl st in next sc, finish off

Decorative Flower
Round 1: ch 8, sl st in first ch to form loop
Round 2: ch 1, 12 sc in loop, sl st in first sc
Round 3: (ch 10, skip 2 sc, sl st in next sc) around, sl st in starting sc
Round 4: ch 1, (sc, hdc, dc, 10 tr, dc, hdc, sc) around in all four 10 ch loops, sl st in starting sc
Round 5: (ch 3, sl st in next st) around, sl st in next st, finish off

Using photo as a guide, attach flower to ear warmer with a yarn needle.

If you have questions regarding this crochet pattern, feel from to leave a comment!

Crochet Flower Pattern: Rose

Posted in Best Crochet Patterns, Free Crochet Patterns on February 12th, 2009 by Rachel Choi – 149 Comments
The classic rose adds elegance to all crochet projects. Whether you add it to your afghan, beanie or purse, a rose is bound to bring out a nice feminine touch. In this crochet pattern you can create a nice, large, full rose.

Pattern Updated 3/15/2010
Need extra help with this pattern? Check out the detailed explanation of the crochet rose pattern.

crochet rose

Finished Size: 2 1/2” (6 cm) tall, 4” (10 cm) diameter of flower (not including leaves)

Skill Level:
Materials:
Medium Weight Yarn
Crochet Hook F (3.75mm)
Yarn Needle
crochet yarn size 4

Gauge:
17 sc = 3’’
8 rows = 2’’
Gauge Swatch: 3’’w x 2’’h (7.5cm x 5cm) ch 18.
Row 1: sc in second ch from hook and in each ch across
Row 2 – 8: ch 1, turn, sc in each sc across
Finish off.

Need help understanding the abbreviations? Check out the crochet abbreviation chart.

Crochet Pattern: Rose
Row 1: with pink, ch 51, (dc, ch 2, dc) in fifth ch from hook, (ch 2, skip 2 ch, [dc,
ch 2, dc] in next ch) across until 1 ch remains, dc in last ch
Row 2: ch 3, turn, (2 dc, ch 2, 2 dc) in first ch-2 space, *skip next ch-2 space,
(ch 2, 2 dc, ch 2, 2 dc) in next ch-2 space, repeat from * across until 1 dc
remains, dc in last dc
Row 3: turn, *9 dc in next ch-2 space, (sl st, ch 1, sl st, ch 1) in next ch-2 space,
repeat from * across, finish off.

Using photo as a guide, roll rose together and sew with yarn needle. Need a step-by-step tutorial? Check out How to Roll Up a Crocheted Rose

Leaf (Make 2)
Row 1: with green, ch 14, sl st in second ch from hook, sc in next ch, hdc in next ch, dc in next 2 ch, tr in next 2 ch, dc in next 2 ch, hdc in next 2 ch, sc in next ch, sl st in next ch
Row 2: ch 1, turn, sl st in next sl st, sc in next sc, hdc in next hdc, dc in next 2 dc, tr in next 2 tr, dc in next 2 dc, hdc in next 2 hdc, sc in next sc, sl st in next sl st, finish off.

With yarn needle, sew leaves to rose using photo as a guide.

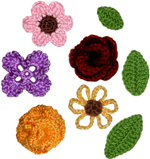
You may also like to check out more flower applique crochet patterns. This set has 5 different flowers and 3 leaf sizes.

You can find more flower patterns at the Crochet Spot Store.

If you have questions regarding this pattern, simply leave them here as a comment and I would be glad to help!

crochet flower appliques