Tutorials and Help

How to Crochet: Backward Double Crochet

Posted in Tutorials and Help on December 17th, 2013 by Candace – 8 Comments

Backward crochet stitches open up possibilities for variation in your crochet, and they are also convenient. Crocheting backward without turning is great for working on blankets. Best of all, it’s simple and only a slight variation from regular crochet. For an introduction to backward stitches, see the backward single crochet tutorial.

Left-handed crocheters can hover over the pictures to see a left-handed view of the backward single crochet.

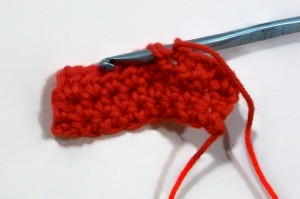
To start, yarn over (YO) and insert your hook into the next stitch from back to front. (The direction of the yarn overs does not matter; do what is comfortable for you.)

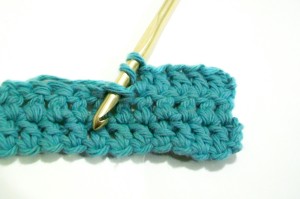
crochet_backward_dc_1
read more »

How to Crochet: Long Double Crochet (ldc)

Posted in Tutorials and Help on December 10th, 2013 by Amy Yarbrough – 9 Comments

There are certain things I do without intention and one of them is recognizing crochet or finding crochet inspiration in the movies. And I know I am not the only one. (See this post by Cami for example). What I noticed lately inspired me to design my new pattern, the Abigail Hat and Scarf. The pattern uses a very basic stitch to which I’ve added a “twist”. If you want to know how to make it follow along and I’ll show you.
read more »

How to Crochet: Backward Single Crochet

Posted in Tutorials and Help on November 12th, 2013 by Candace – 14 Comments

Crocheting backward is very simple to do, and once you learn it, it will open up more possibilities for your crochet. You can work without turning–great for blankets and other projects that get heavy and annoying to turn– or you can turn your work and have a more uniform look to your stitches. It is also a good technique for creating mirror images.

All you need to do is work from back to front as shown below.

Left-handed crocheters can hover over the pictures for a lefty view.

To start a backward single crochet, with your yarn in front of your work, insert your hook into the next stitch from back to front.

crochet_bkwd_sc_1
read more »

How to Crochet: Vertical Chains

Posted in Tutorials and Help on October 12th, 2013 by Candace – 8 Comments

While playing around with yarn and a hook, I came up with something I call the vertical chain. It’s simple: a chain that’s worked into a stitch so it stands up as opposed to going across your work. The chain is flatter than a normal crochet stitch, so it creates a thinner fabric.

The general idea behind it is that you insert your hook into the next stitch, make a few chains, then finish the stitch.
read more »

How to Crochet: Tunisian Reverse Stitch (Trs)

Posted in Tutorials and Help on October 8th, 2013 by Caissa "Cami" McClinton – 1 Comment

Hooray for Tunisian Crochet! Since I gave you 3 Reasons to Try Tunisian Crochet, have you done it yet? Well, if not, grab your long crochet hooks and join me! A while back, Rachel posted a great photo tutorial of the “setup row” of Tunisian crochet, which is the standard first row in each Tunisian crochet project. The tutorial can be found as steps 1-13 of the Tunisian Simple Stitch Tutorial.

Please note: Steps 11-13 of the Tunisian Simple Stitch Tutorial could also be called, “How to Work the Reverse Pass in Tunisian Crochet”. These steps remain the same in all basic Tunisian crochet patterns.

Rachel also posted the beautiful Tunisian Knit Stitch Tutorial! Today we’re going to add a stitch to our library by learning the Tunisian Reverse Stitch, abbreviated (Trs).

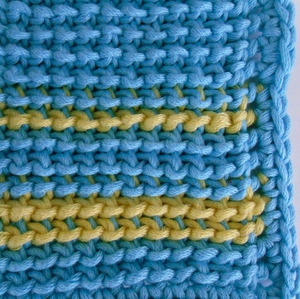
Tunisian reverse stitch swatch worked in bulky yarn with sc border.

Tunisian reverse stitch swatch worked in bulky yarn with sc border.

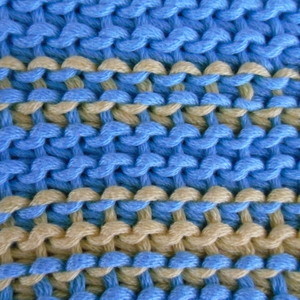
Close up of Tunisian Reverse Stitch Swatch

Close up of back of Tunisian Reverse Stitch Swatch


read more »

How to Wrap a Bracelet in Crochet

Posted in Tutorials and Help on September 24th, 2013 by Amy Yarbrough – 13 Comments
Hello everyone! This is Amy, Crochet Spot’s newest. Since March I have had many exciting opportunities to share with you my creations and today I am going to try my hand at a photo tutorial. Make sure and tell me what you think. Your feedback means a lot to me!

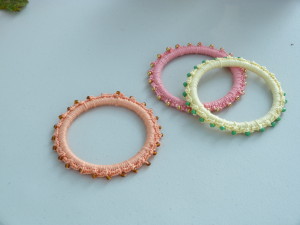
This is the photo tutorial for my original Beaded Bangles Crochet Pattern.

61-Beaded Bangles

read more »

How to Crochet a Floppy Ruffle

Posted in Tutorials and Help on September 5th, 2013 by Caissa "Cami" McClinton – 5 Comments

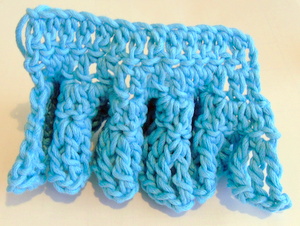
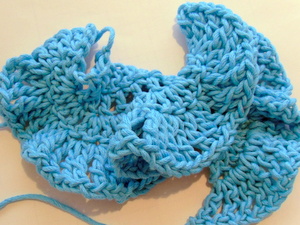
Ruffles can be a lot of fun! They are great to add to the bottom of a sweater, a hat, or even as a floofy fringe alternative on the ends or sides of a scarf! There are hundreds of ways to crochet ruffles, but we’re going to learn just one here. Excitingly, this version uses both the classic double crochet and the long, slim triple crochet!

Our ruffle relaxing.

Our ruffle relaxing. I could see this at the bottom of a skirt.

Our ruffle letting loose.

Our ruffle letting loose. I could see this on the side of a scarf.

As you can see, this is a versatile ruffle that can be used in different ways for different looks. For the purpose of practicing this skill, we’ll make a swatch in this tutorial. Yarn and hook size don’t matter for this practice swatch.
read more »

How to Crochet Over Single Crochets in a Circle

Posted in Tutorials and Help on August 20th, 2013 by Caissa "Cami" McClinton – 5 Comments

For this week’s tutorial, I’d like to riff on my last tutorial, How to Crochet Over Single Crochets in Rows by taking the same idea and working it in a circle. For the purpose of practicing this skill, we’ll make a small swatch in this tutorial. Yarn and hook size don’t matter for this practice swatch.

You may mouse over images for left-handed views.

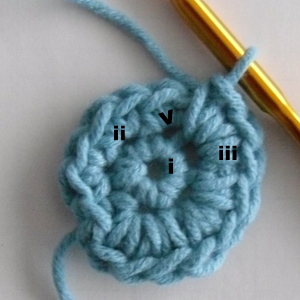
Round 1: Beginning with a magic ring, ch 1, 6 sc into ring, tighten loop, sl st in first sc: 6 sc

Round 2: ch 1, 2 sc in each sc around, sl st in first sc: 12 sc

Round 3: ch 1, working over the stitches of the last round, work 3 sc into each space below around: 18 sc

The photo below shows this in progress. The “i” symbol indicates round one, “ii” indicates round 2, and “iii” indicates round 3. The arrow is pointing to the space where the next stitches will be worked.


Note: In round 3, you are always working 3 sc over each set of 2 sc.
read more »

How to Make a Crocheted Granny Square into a Granny Rectangle

Posted in Tutorials and Help on July 9th, 2013 by Caissa "Cami" McClinton – 23 Comments

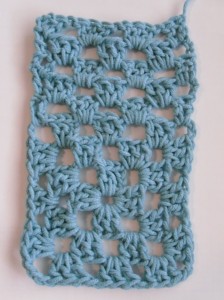
The inspiration for this week’s tutorial happened at my weekly crafts group meeting. A new friend of mine, Barbara, is an experienced knitter but recently learned to crochet. She told me that she is working on a continual granny square blanket, which would end up being one big square. She said she would like to make it into a rectangle without adding more squares to the end. I told her that it could be done and then figured out this pattern.

For the purpose of practicing this skill, we’ll make a small rectangular swatch. Yarn and hook size don’t matter for this practice swatch.

This is what your swatch will look like if you use only one color.

This is what your swatch will look like if you use only one color.


read more »

Crochet Basics: Understanding Turning Chains

Posted in Tutorials and Help on June 25th, 2013 by Caissa "Cami" McClinton – 15 Comments

Have you ever noticed that while double crocheting in rows, you need to “chain 3” before starting the next row? Have you ever wondered what this is called and why you need to do this?

Well, the chains at the end of the rows are called “turning chains,” abbreviated tch. They exist because they allow your crochet room to grow evenly. Later we are going to see what it looks like and feels like if you try to work back and forth without turning chains. As you can imagine, it gets pretty cramped and a little wonky!

Photo below shows a double crochet swatch with no turning chains!

artlikebread crochet tutorial caissa mcclinton_3077-001
read more »