Tutorials and Help

7 Ways to Staying Cool While Crocheting This Summer

Posted in Fun Ramblings, Tutorials and Help on June 22nd, 2010 by Rachel Choi – 19 Comments

I love crocheting in the summer, but I often come across people who say, “Are you crazy? It’s too hot to crochet!” For me, it’s never too hot to crochet! I think I’d go crazy if I couldn’t crochet just because it was hot. Here are some ways that I keep cool while crocheting in the summer. If you have ideas to share as well, feel free to leave them as a comment on this post so that other can read them too!
read more »

How to Crochet With Eyelash Yarn

Posted in Tutorials and Help on June 18th, 2010 by Rachel Choi – 9 Comments
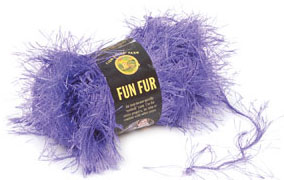
Eyelash yarn (popularly known as Fun Fur) and other novelty yarns can be difficult for beginners to crochet with since it is hard to see the stitches. These yarns aren’t like regular yarns you may be used to crocheting with. The strands of yarn are “furry” and textured causing your work to have a unique look that hides your stitches. eyelash yarn

To crochet with eyelash yarn and other fun novelty yarns you crochet the same way as you normally would. But because it may be a little tricky when you first start, here are some tips that can help you out:
read more »

Hand and Wrist Stretches for Crocheters

Posted in Tutorials and Help on June 1st, 2010 by Rachel Choi – 11 Comments

Do your hands or wrists get tired when you crochet? Do they get sore or cramped up? If so, you’re not alone, it happens to a lot of us. Here are some stretches that I found across the web that may help you stretch your hands and wrists. Of course, all stretches aren’t made for all people, so do what works for you. You can even take small breaks in the middle of crocheting (it always works for me).
read more »

7 Common Mistakes of a Newbie Crocheter

Posted in Tutorials and Help on May 24th, 2010 by A Guest Writer – 50 Comments

A Guest Post by Caren Wilson.

We all make mistakes, whether we admit it or not. Below are some of the mistakes that I’ve made when I was new to crocheting and also some mistakes that I’ve noticed from others. If you are a crochet newbie, hopefully this list will help you learn from my mistakes and the mistakes of others. If you have a mistake that you would like to share, feel free to leave it as a comment for others to read!
read more »

How to Crochet

Posted in Tutorials and Help on May 17th, 2010 by Rachel Choi – 47 Comments

You want to learn how to crochet? Great! Here you will find the tutorials to get you started. If you have no idea how to crochet, this is the perfect place to learn how. No matter how old (or young) you are, learning to crochet is pretty easy. Best of all, it doesn’t take much time to get started. I bet you can learn a basic stitch right now!
read more »

How to Whip Stitch in Crochet

Posted in Tutorials and Help on May 16th, 2010 by Rachel Choi – 19 Comments

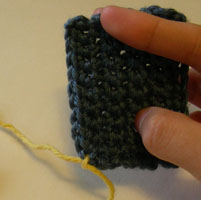
Whip stitching is a common method for sewing your crocheted items together. In this tutorial I’ll show you exactly how to whip stitch two pieces of crocheted material together. Whip stitches will create a seam, but shouldn’t be too noticeable when you’re done. In this tutorial I’ll be using different colors so that you can see exactly where the stitches are. Normally you will not use a contrasting color to sew your pieces together, you will use yarn that is the same color as your work.

This tutorial is for both right and left handed people. For left handed pictures, roll your mouse over the image and it will change for you.

Start by threading your yarn needle. Since I’m using a different color yarn for the sake of this tutorial I’ll also need to tie the opposite end of the yarn to one of the pieces I am sewing together. Depending on what you are sewing together you may like to leave a long tail of yarn at the end of your work so you can use that to sew the pieces together. But if you forget to or if you find it more convenient you can simply attach a new strand of yarn like I am doing here.

read more »

Crochet Pattern Copyrights

Posted in Best Crochet Patterns, Free Crochet Patterns, Fun Ramblings, News, Tutorials and Help on May 10th, 2010 by Rachel Choi – 40 Comments

This post contains very important information, so please read, especially if you are using, intend to use, or have used any Crochet Spot pattern. I appreciate you taking the time out to read the following copyright information.

Here are the basic guidelines for using crochet patterns on this site:

No pattern or other material may be reproduced — mechanically, electronically, or by any other means, including photocopying — without written permission of Rachel Choi. This applies for all content on Crochet Spot, all free patterns, all patterns for sale in the store, and even content such as tutorials.

For example:

You can NOT email a friend a copy of the pattern you downloaded.
Instead, you can send them the link to the pattern, so they can get their own copy.

You can NOT photocopy a pattern and redistribute it in any form.
Instead, you can tell others where they can go to get their own copy.

You can NOT copy a pattern (or part of a pattern) and publish it on another website or other publication.
Instead, you can publish a link to the pattern.

You may sell your finished crocheted items, but not the pattern. However, you are not allowed to sell items that are made commercially. The item must be handmade with your own hands. Please also give credit to where you found the pattern (although this is not required, it is much appreciated).

When in doubt, ask me. If you are not sure whether you will be infringing upon copyrights, then feel free to send me an email ([email protected]) to ask. I’ll be happy to answer your questions.

These copyrights can also be applied to other crochet patterns you find online from other designers, with the exception of selling crocheted items. Not all designers allow you to sell finished crocheted items made from their patterns, so be sure to ask before doing. Some folks will argue that you can sell any crocheted items made from any pattern whether the designer allows you to or not, but I would recommend being polite and respectful of whatever restrictions the designer chooses.

Right Side and Wrong Side in Crochet

Posted in Tutorials and Help on May 3rd, 2010 by Rachel Choi – 11 Comments

When crocheting your projects you may have come across the terms right side and wrong side. In a nut shell, right side refers to the side that is the front of the work. Wrong side refers to the back side of the work. The right and wrong side of your project is determined by what the designer wants the project to look like.

If you are working in rows, each side of your work will look the same if you are turning after each row and crocheting the same stitches, so it will not matter which side is the right side or wrong side. If you are working in the round without turning, typically (but not always – it depends on how you hold your work), the side that faces you when you are crocheting is the right side.

In crochet patterns, the designer may indicate the first row of the right side. The right side is often the side that faces you when you are working the first row or round in a pattern. You may want to use a stitch marker to mark the right side of your work.

Personally, I don’t like to make a big deal about which side is the right side or wrong side. Most of the time it really doesn’t matter. Just have fun crocheting!

Amigurumi Tips and Tricks

Posted in Tutorials and Help on April 30th, 2010 by A Guest Writer – 14 Comments

A Guest Post by Ivory Herman.

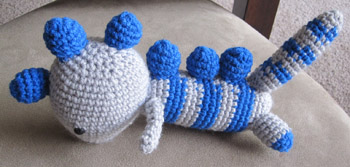
So you’ve found these super cute crocheted stuffed creations called “amigurumi”, fell in love with them, and have stuffed your house full of them with intentions of finding “homes” for all of them? Has this obsession lead you to the internet to search for tips and tricks to make your creation look nice and spiffy? Perhaps this is just something that I do; however, I would like to share a little of what I have learned when making these super cute creations.

Sewing limbs and pieces onto an amigurumi can make for much frustration. This was a very frustrating thing to me, especially when I sew a leg on and it can be mistaken for a tail because of where I sewed it. Or when you have several individual pieces, like in the picture of the dinosaur that I made for my son! As you can see, none of the scales are evenly spaced.

crochet dinosaur

Then one day, I discovered straight pins, and wondered why in the world I hadn’t thought of this earlier! You can get these from any store, even grocery stores. Before you sew a piece onto your creation, pin it up, look at it, and if it’s awkward, just move it around and then sew it on. While you’re sewing, remove the pins as you sew so that way they will keep your piece in place while you’re attaching it to the body of your work.
read more »

Crochet Patterns for Mother’s Day Gifts

Posted in Best Crochet Patterns, Free Crochet Patterns, Tutorials and Help on April 24th, 2010 by Rachel Choi – 3 Comments
Mother’s Day gifts don’t have to be over the top or take a long time to crochet. I’m not saying that you shouldn’t put a lot of thought into it. You should think of something that your mom would like. Maybe it’s a new handbag, shawl, or home decorative piece? Use what you know about your mom to crochet her something special!

Below are some of my ideas that are simple and can be made as an added bonus to any mom’s present.

mother's day gift

read more »