How to Sew Amigurumi Parts Together
Posted in Tutorials and Help on April 11th, 2010 by A Guest Writer – 13 CommentsA Guest Post by Stacey Trock.
When making amigurumi and other crocheted toys, one thing you’re going to have to do is sew pieces together, such as attach a leg to a body. Here’s how I do it, step-by-step.
First, you will crochet the pieces according to the instructions in the pattern. I’ve crocheted a little blue head and a yellow beak. As instructed, I left a long tail when I fastened off the beak, and I’m going to use this yarn to attach the beak to the head. To attach pieces, you’re also going to need a tapestry needle, also known as a yarn needle.
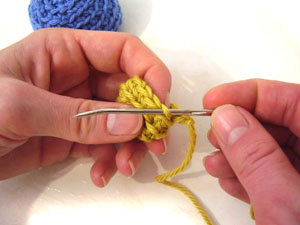
Thread the tapestry needle with the long tail of the piece that you want to attach. The first thing I do is I pull the tail through the next stitch on the beak, as pictured below. Doing this isn’t necessary, but it helps to hide the little knot that you get from fastening off.

