Tutorials and Help

How to Hold a Crochet Hook

Posted in Tutorials and Help on July 2nd, 2009 by Rachel Choi – 26 Comments

This isn’t going to be a tutorial on how to hold a crochet hook. I believe there isn’t one correct or incorrect way to do it! I mean if you can hold the hook with your foot and crochet, that’s amazing! There are however, some popular ways to hold your hook. Here are some examples (mouse over the pics for left handed pics):

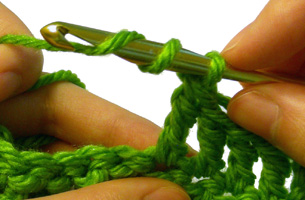
The Pencil Method…yes you hold it like a pencil (although some people hold pencils differently)
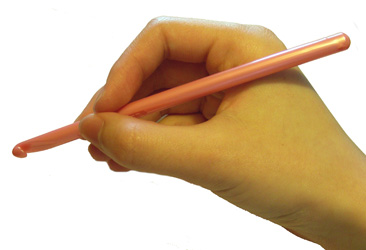


The Knife Method…yup, you hold it as if you are using a knife (although knifes can be held differently too)
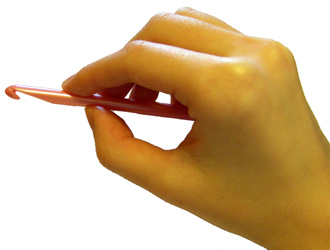


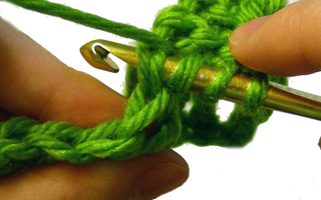
The Rachel Method…well it’s more of a modified Knife Method, being that I don’t actually cut my vegetables like this. Also my pinky finger has a weird obsession with wrapping around the hook!
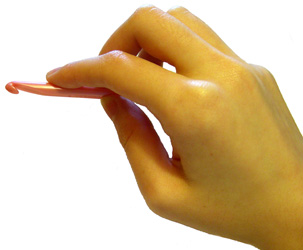
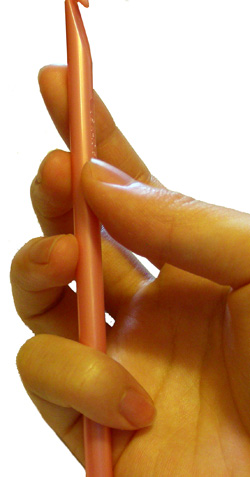


So the moral of the story is to just try out different ways to find what’s comfortable for you! If you already have a way that works, by all means don’t change it.

How do you hold your hook?

How to Crochet: Foundation Single Crochet (fsc)

Posted in Tutorials and Help on June 26th, 2009 by Rachel Choi – 118 Comments

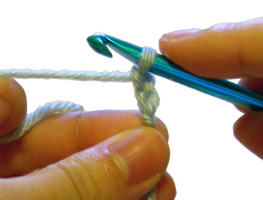
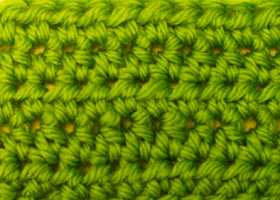
The foundation single crochet (fsc) is a stitch that can replace the foundation chain and the first row of single crochets in your work by completing them at the same time! This is also known as chain free crocheting!!!

But what’s the point?

  • Often times crochet foundation chains are tighter than the rest of the work, but with fsc it will have the same tension without having to use a larger hook.
  • With some yarns (such as boucle) it is hard to see the stitches in a traditional foundation chain, but with fsc you don’t have to crochet on a chain.
  • Even if you prefer making a traditional foundation chain. You can use fsc to add extra stitches to your work without having to take the whole thing apart if you accidentally miss count the number of chains.
  • It’s faster if you do it right! Being able to complete a chain and a row of single crochets at one time can save you time.

Here is a picture tutorial for making the foundation single crochet. This tutorial is for both right and left handed people. For left handed pictures, roll your mouse over the image and it will change for you.

Step 1: Start with a slip knot on your hook and chain 2.


read more »

How to Crochet: Half Double Crochet Stitches (hdc)

Posted in Tutorials and Help on June 17th, 2009 by Rachel Choi – 36 Comments
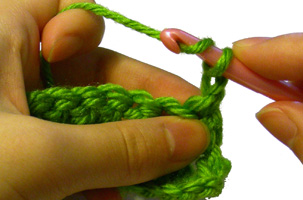
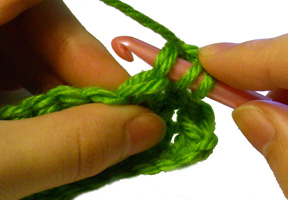
Half double crochet stitches are exactly what they imply! The are half of a double crochet stitch. Here is how to make a half double crochet stitch: Yo, insert hook into stitch, yo, draw through 1 lp, yo, draw through all 3 lps on hook

Here is a picture tutorial for a more detailed explanation. This tutorial is for both right and left handed people. For left handed pictures, roll your mouse over the image and it will change for you.

half double crochet hdc

Step 1: Yarn over (wrap the yarn around your hook)


Step 2: Insert your hook into the stitch you want to make your half double crochet in.


read more »

How to Crochet: Treble Crochet Stitches (tr)

Posted in Tutorials and Help on June 14th, 2009 by Rachel Choi – 38 Comments
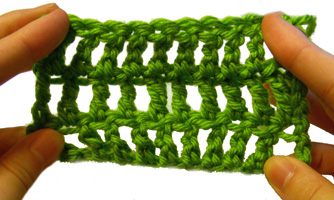
Treble crochet stitches are very similar to double crochet stitches. The photo to the right shows a small swatch of treble stitches. They are longer than double crochet stitches and normally create a more airy piece.

Here is how to crochet treble crochet stitches: yarn over 2 times, insert hook into stitch, yarn over, pull up a loop, (yarn over, pull up 2 loops) 3 times

For further explanation, here is a picture tutorial! This tutorial is for both right and left handed people. For left handed pictures, roll your mouse over the image and it will change for you.

Step 1: Yarn over ( wrap the yarn around your hook) 2 times


Step 2: Insert your hook into the stitch you want to make your treble crochet stitch in


read more »

Crochet Plastic Bags

Posted in Tutorials and Help on June 9th, 2009 by Rachel Choi – 16 Comments

An interesting way to mix up your crochet life is to try crocheting with new material! Transforming plastic bags into crochet-able yarn is a fun adventure to try. If you hate it, then at least you can say that you tried, but if you love it, there is so much you can create by crocheting with plastic!

Why crochet with plastic?

  • A new adventure!
  • You can recycle your plastic grocery bags and turn them into something amazing!
  • Some things are just better when they are made with plastic, such as a crocheted soap dish.
  • Crocheting with plastic creates a very strong material, which can be great for making bags that will carry heavy objects.

How to crochet with plastic bags?
That’s simple! Here is a tutorial for “how to make plarn (plastic yarn)“. This post shows you the easy process of transforming your plastic bags into crochet-able plastic yarn, or as enthusiast say, plarn. Crocheting with plarn is just like crocheting with regular yarn. The only difference is the texture that may take a little while to get used to. There are even crochet pattern on my site and other sites that are specially designed as a plarn project. But don’t limit yourself to those patterns, regular crochet patterns can be made using plarn as well! Just make sure to check gauges when needed.

Most importantly, have fun with this new adventure in crocheting plastic bags! If you ever need any help or would like to share your knowledge in crocheting with plarn, feel free to leave a comment!

Crochet in Front, Back or Both Loops

Posted in Tutorials and Help on June 3rd, 2009 by Rachel Choi – 66 Comments

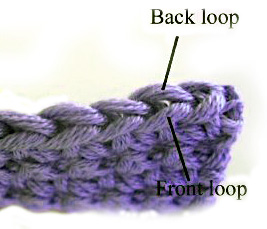
Sometimes it is confusing as to where you are suppose to insert your crochet hook, especially if you are a beginner. Here are some photos of what “loops” I’m referring to and what it looks like when you crochet in the front, back or both loops. For these examples I will be using single crochets.

This picture labels the front and back loops of a stitch. The front loop is the one that is closest to you and the back loop is the one that is furthest from you when you hold your crochet work.

crochet front and back loops

read more »

How to Felt

Posted in Tutorials and Help on May 28th, 2009 by Rachel Choi – 8 Comments

Felting is the process of agitating something made with natural animal fibers under heat to create a matted fabric called felt. Lots of crafters, crocheters and knitters, enjoy felting their projects to give them a new and different look. By felting your work, you create a smooth texture, erasing stitch definition and reducing the size of the finished object. A felted project is often times stronger and sturdier than before it was felted. Felting is a really easy process!

Although there are many techniques for felting, the basic idea is to agitate your item in hot water and let it dry. Here are some common methods to consider.
read more »

Blocking Crochet

Posted in Tutorials and Help on May 27th, 2009 by Rachel Choi – 23 Comments

Blocking crochet is the process of “molding” your finished work into the shape that you desire. For example, you may want to block your crocheted bag so that it keeps a nice, sharp bag shape. Different techniques can be used for blocking your work depending on the type of yarn you used and the shape of the object being blocked. Here are some general guidelines to follow.

Step 1: Lay the item you want to block into the shape you want it to be. You may choose to use pins to hold your item in place. Try using pins that won’t rust. There are also boards specifically made for blocking, but you can use any surface that works for you. A layer of towels is great for adsorbing water and placing pins into.

Step 2: Wet it. Blocking is done be wetting your item and letting it dry. The method for wetting your item will depend on the type of yarn you are using. Check the yarn label for special instruction to make sure that you don’t violate any. You may choose to use a spray bottle to wet your item. You can also choose to steam your item using an iron. Since some materials should not be ironed, the safest way to block is via the spray bottle. You can also switch steps 1 and 2 and use the sink to wet the item.

Step 3: Let it dry. After your item is dry, it should be blocked!

Do you have a blocking tip? Fell free the share it by leaving it as a comment!

How to Crochet: Double Crochet Stitches (dc)

Posted in Tutorials and Help on May 24th, 2009 by Rachel Choi – 89 Comments
Double crochets are like the long version of single crochets! If you are just beginning to learn how to crochet and have not learned single crochets yet, I would suggest learning how to crochet single crochets first. After that double crochets will be a piece of cake!

In a nut shell, here what you have to do: Yo, insert hook into stitch, yo, draw through 1 lp, yo, draw through 2 lps on hook, yo, draw through final 2 lps on hook

double crochet

If that doesn’t makes sense that’s okay! Here is a picture tutorial of what to do. This tutorial is for both right and left handed people. For left handed pictures, roll your mouse over the image and it will change for you.

First I’m going to start out with a small swatch. Just use a piece of work you want to practice your double crochets on. You can even start out with a chain as long as you desire. Note that when you make a new row of double crochets you must chain 3 before starting your double crochets. This ensures that the beginning of your row will be the same height as the rest of your row.

Step 1: Yarn over (wrap the yarn around your hook)


Step 2: Insert your hook into the stitch you want to make your double crochet in.


read more »

How to Crochet: Double Crochet Decrease

Posted in Tutorials and Help on May 23rd, 2009 by Rachel Choi – 90 Comments

A double crochet decrease is the same thing as double crocheting a number of stitches together; for example, dc2tog. You may also see a double crochet decrease abbreviated as “2-dc dec” in a crochet pattern. However, you can do decrease on more than just 2 stitches at a time.

In a nut shell, here what you have to do: (Yo, insert hook, yo, draw lp through, yo, draw through 2 lps on hook) in each of the sts indicated, yo, draw through all lps on hook.

If that doesn’t makes sense that’s okay! Here is a picture tutorial of what to do. This tutorial is for both right and left handed people. For left handed pictures, roll your mouse over the image and it will change for you.

First I’m going to start out with a small swatch of double crochets. (You don’t have to. Just use a piece of work you want to practice your decreases on)

Step 1: Yarn over (wrap the yarn around your hook)


Step 2: Insert your hook into the first stitch that you want to work the decrease on.


read more »