Tutorials and Help

How to Crochet: Single Crochet Stitches (sc)

Posted in Tutorials and Help on May 15th, 2009 by Rachel Choi – 89 Comments

A Single crochet stitch is the most popular, basic and common crochet stitch. Single crochet stitches are used everywhere in the crochet world, so this is a great stitch to learn. If you are a beginner, this should be one of the first crochet stitches that you encounter. In this example of how to crochet a single crochet stitch, we will assume that you already created a foundation chain.

This tutorial is for both right and left handed people. For left handed pictures, roll your mouse over the image and it will change for you.

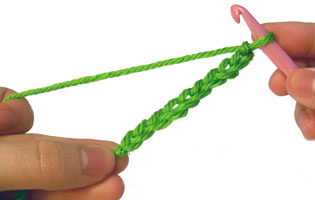
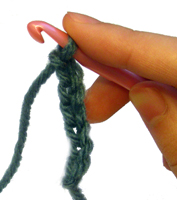
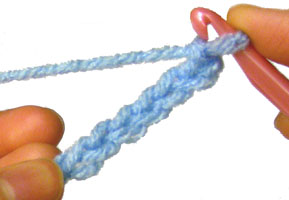
Let’s start with a foundation chain like this. (How to Crochet a Chain)

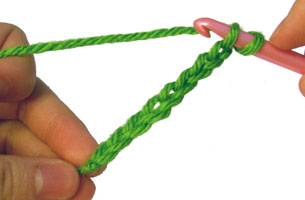
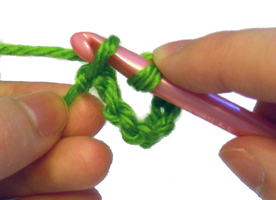
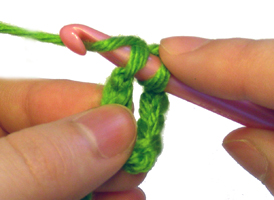
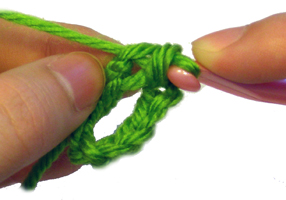
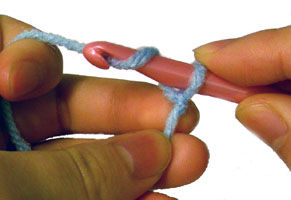
Insert your hook into the 2nd chain from the hook. You would now have two loops on your hook. You insert your hook into the 2nd chain and not the 1st because 1 chain is equivalent to the height of a single crochet. This way, your corner will be the same height as the rest of the row.


read more »

How to Roll Up a Crocheted Rose

Posted in Tutorials and Help on May 10th, 2009 by Rachel Choi – 29 Comments

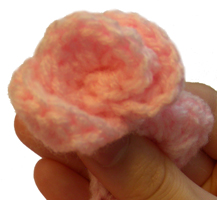
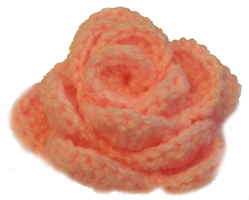
Recently I’ve gotten quite a few request for some pictures of how to roll up the crocheted rose. The rose that I will be rolling up is from my original crochet rose pattern. If you are new to reading crochet patterns, you may find the detailed explanation of the crochet rose pattern useful, since it explains the rose pattern without the abbreviations.

There isn’t an absolute right or wrong way to roll up a rose. Here is the way that I did it.

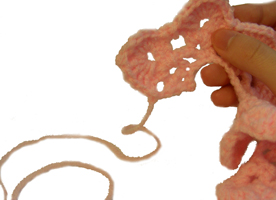
First I leave some extra yarn at the end of the rose for sewing later.


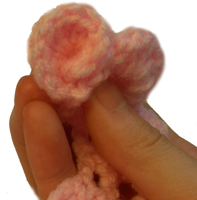
I start with the end that doesn’t have the extra yarn and roll the first petal to make the center.


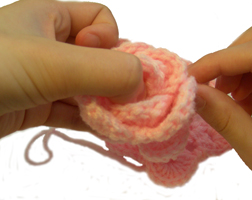
I wrap the next 2 petals around it.


Then the next 3 petals around that. Each time I wrap around I try to hold the center tight and make each round looser and looser. (don’t mind my thumb, I was trying to hold the rose from unraveling)


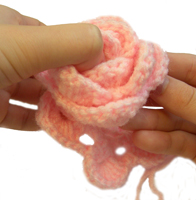
Then the next 4 petals around that. Try to stagger your petals so that petals from each around don’t line up with petals from previous rounds.


Then lay the rest of the petals underneath the other rose petals.


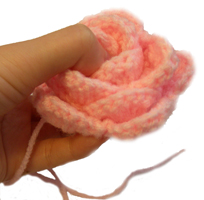
Lastly, use the extra yarn and sew the flower together. Weave the yarn needle through the bottom of the rose and also into the different rounds of petals made. Remember there isn’t an exact science for rolling up a rose, so just play around with it and find what works best for you.


If you still need help with rolling up a crocheted rose, let me know by leaving a comment and I would be glad to help!

How to Change Colors in Crochet

Posted in Tutorials and Help on April 23rd, 2009 by Rachel Choi – 155 Comments

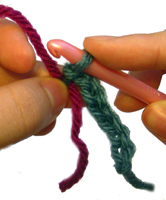
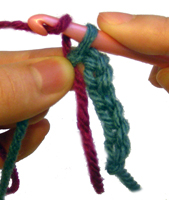
If you are new to crochet, here are some tips on how to change colors in your crochet work. The basic idea is to simply let go of the yarn you are currently using and pick up the new yarn that you want to use. Sounds easy enough, right? Let’s explore some examples!

This tutorial is for both right and left handed people. For left handed pictures, roll your mouse over the image and it will change for you.

Changing Colors In a Chain
Suppose you want to change the color in the middle of a chain. Just let go of the color your are using and pick up the new yarn and hold it against your work and start chaining with it.


Changing Colors in Crochet Stitches
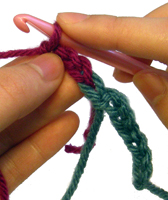
Sometimes you may want to change colors after a certain crochet stitch. You change colors the same way, but you do it during the last step of a stitch. Here is an example using single crochet.
read more »

How to Crochet a Sphere

Posted in Free Crochet Patterns, Tutorials and Help on April 17th, 2009 by Rachel Choi – 51 Comments
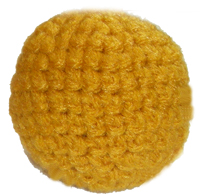
Spheres are the universal shape for balls, amigurumi, stuffed animal parts and plenty of other things that you may want to crochet. There are many ways that you can crochet a sphere; here is a tutorial for one of them. You are going to start off by crocheting a circle, then you are going to make the middle of the sphere and decrease it to finish. Below is a pattern for a very small sphere. You can increase it by following the notes to increase the initial circle and increase the number of rounds made for the middle. crochet sphere

Finished Size: 2” (5 cm) diameter, you may increase this sphere to make it the size you prefer

Materials:
Medium Weight Yarn
Crochet Hook F (3.75 mm)
Polyester Fiberfill

Crochet Pattern: Sphere
Round 1: ch 2, 6 sc in second ch from hook, place marker: 6 sc
Round 2: 2 sc in each sc around: 12 sc
Round 3: (2 sc in next sc, sc in next sc) around: 18 sc
Round 4: (2 sc in next sc, sc in next 2 sc) around: 24 sc
Round 5: (2 sc in next sc, sc in next 3 sc) around: 30 sc
Note: to increase the size of the sphere, continue to increase this circle.

Round 6 – 9: sc in each sc around: 30 sc
Note: rounds 6 – 9 make the body of the sphere. In general, the number of rounds to make the body should be the number of rounds completed thus far minus one. For example, there are five rounds before round 6 in this pattern. Therefore, there are four repetitions of the above line. The amount of repetitions for a different sized sphere also depends on a crocheter’s style. Some crochet tighter than others.

Round 10: (decrease, sc in next 3 sc) around: 24 sc
Round 11: (decrease, sc in next 2 sc) around: 18 sc
Round 12: (decrease, sc in next sc) around: 12 sc
Fill sphere with fiberfill.
Round 13: decrease around: 6 sc
Note: if you increased the size of the sphere you will also need to decrease the sphere as much as you increased it by.

If you need help crocheting this sphere, just leave a comment and I would be glad to help!

How to Crochet: Slip Stitches (sl st)

Posted in Tutorials and Help on April 9th, 2009 by Rachel Choi – 17 Comments

Slip stitches are the smallest stitches in crocheting. They are great for joining ends. In this example of how to crochet a slip stitch, we will assume that you already created a foundation and we will be using a slip stitch to join two ends to create a circle.

This tutorial is for both right and left handed people. For left handed pictures, roll your mouse over the image and it will change for you.

Let’s start with a foundation chain like this. (How to Crochet a Chain)

Insert your hook into the first chain on the chain. You should now have 2 loops on your hook.


Yarn over (wrap the yarn over your hook).


Pull the strand of yarn through the 2 loops that are on your hook. You should now have only one loop on your hook.


Congrats! You just made a slip stitch! Slip stitches are used for more purposes than just to make circles. You can also slip stitch across rows if desired. The idea is to insert your hook into the stitch that you want to make your slip stitch in, then yarn over and pull your strand of yarn through all the loops on your hook.

Was this helpful? Do you still need more help? Leave a comment to let me know!

Types of Yarn and Recommended Crochet Hooks and Gauges

Posted in Tutorials and Help on April 8th, 2009 by Rachel Choi – 39 Comments

There are many categories for yarn and types of yarn that fall into each category. Yarn weights are labeled from 0 to 6 with 0 being the thinnest of yarns and 6 being the most bulky. There are many different types of yarn in each category. The table below shows a general gauge for each of the yarn weights along with some recommended crochet hooks to use with that type of yarn. The information in the chart is the most commonly used gauges and crochet hook sizes for each yarn category. You can always use a crochet hook or create a gauge that is not listed on the chart.

Yarn Weight Symbol lace super fine fine light medium bulky super bulky
Types of Yarn In Category Fingering, 10-count crochet thread Sock, Fingering, Baby Sport, Baby DK, Light Worsted Worsted, Afghan, Aran Chunky, Craft, Rug Bulky, Roving
Gauge in Single Crochet 4″ (10 cm) 32-42 double crochets 21-32 sts 16-20 sts 12-17 sts 11-14 sts 8-11 sts 5-9 sts
Recommended Hook Sizes (metric) Steel 1.6-1.4 mm 2.25-3.5 mm 3.5-4.5 mm 4.5-5.5 mm 5.5-6.5 mm 6.5-9 mm 9 mm and up
Recommended Hook Sizes (U.S.) Steel 6, 7, 8 or B-1 B-1 to E-4 E-4 to 7 7 to I-9 I-9 to K-10 1/2 K-10 1/2 to M-13 M-13 and up

When you buy yarn a recommended crochet hook size and gauge may be listed on the packaging. If you are following a crochet pattern, it may also have the recommended crochet hook size and gauge in it.

This information was requested by a Crochet Spot Newsletter Subscriber!
If you would like to receive the free newsletter too, just fill out the orange box at the top of this page.

Crochet Hook Sizes

Posted in Tutorials and Help on April 5th, 2009 by Rachel Choi – 10 Comments

Lots of crocheters get confused about crochet hook sizes since hooks are labeled with variations of letters or numbers. Here is a table that I hope will help everyone convert millimeter hook sizes to popular letter and number sizes.

As you can see in the chart, U.S. hook sizes use letters and numbers that are not very consistent. Millimeters are more reliable in labeling the size of a hooks since it is an actual measurement of how big or small a hook is. All patterns that I publish on CrochetSpot will have crochet hook sizes in millimeters.

Crochet Hook Sizes

Millimeter
U.S. Size
2.25 mm B-1
2.75 mm C-2
3.25 mm D-3
3.5 mm E-4
3.75 mm F-5
4 mm G-6
4.5 mm 7
5 mm H-8
5.5 mm I-9
6 mm J-10
6.5 mm K-10 1/2
8 mm L-11
9 mm M/N-13
10 mm N/P-15
15 mm P/Q
16 mm Q
19 mm S

This information was requested by a Crochet Spot Newsletter Subscriber! If you would like to receive the free newsletter too, just fill out the orange box at the top of this page.

How to Crochet: Tunisian Simple Stitch (TSS)

Posted in Tutorials and Help on April 2nd, 2009 by Rachel Choi – 127 Comments

This tutorial is for both right and left handed people. For left handed pictures, roll your mouse over the image and it will change for you.

Tunisian stitches also known as afghan stitches, create a very elegant basket weaved look. Tunisian stitches are like a cross between crocheting and knitting because in crocheting these stitches it involves leaving loops on your hook when you are crocheting forward and then removing them when you crochet in reverse. Don’t let this confuse you! This tutorial will walk you through creating a small crocheted piece using Tunisian simple stitch.

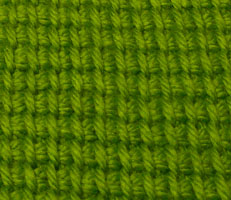
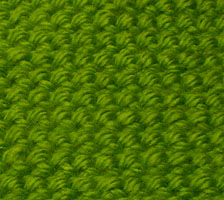
Here is what Tunisian simple stitches look like:

Front
Back

Below is a step by step tutorial that will slowly walk you through crocheting a few rows of Tunisian simple stitches. If you need help with any of the steps, don’t be afraid to ask by leaving a comment on this post!
read more »

How to Crochet: Chain (ch)

Posted in Tutorials and Help on March 22nd, 2009 by Rachel Choi – 38 Comments

This tutorial is for both right and left handed people. For left handed pictures, roll your mouse over the image and it will change for you.

Chain stitches are the foundation of everything that is crocheted. Learning how to crochet a chain stitch is really easy and is one of the first things that anyone learning to crochet should do. Simply follow the instructions below to learn how to crochet chain stitches.

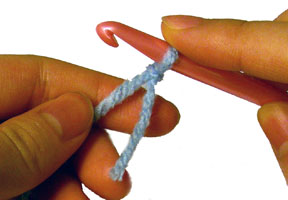
Step 1: Always start by making a slip knot and place the knot on your hook.


Step 2: Yarn over (wrap the yarn over your hook).


Step 3: Pull the strand of yarn through the loop.


Congrats! You just made one chain! Continue to yarn over (yo) and pull the strand of yarn through the loop to create more chains, repeating steps 2 and 3. Here is what a series of chains look like.


If you decide to follow a crochet pattern, it will tell you how many chains to make. Note that you should always have at least one loop on your hook the whole time. From time to time you may have to count the number of chains you made. When you are counting the number of chains you made, do not count the chain on your hook.

Was this helpful? Do you still need more help? Leave a comment to let me know!

How to Read Crochet Patterns

Posted in Tutorials and Help on March 18th, 2009 by Rachel Choi – 105 Comments

I bet every crocheter remembers the dreadful first time they read a crochet pattern and had no clue what they were reading. I know for sure that happened to me! Let’s get rid of all that frustration and decrypt crochet patterns once and for all. Here is a basic guide to start reading crochet patterns.

Basic Crochet Abbreviations
For some reason pattern writers are too lazy to spell every word out. So they use abbreviations for just about every single word in the pattern. The master list of crochet abbreviations is always handy, but here are the basics to get started.

Abbreviation
Description
ch chain stitch
ch- refers to chain or space previously made: e.g., ch-1 space
ch-sp chain space, the space made by the chain
dc double crochet
dec decrease/decreases/decreasing
hdc half double crochet
inc increase/increases/increasing
lp(s) loops
MC main color
pm place marker
rep repeat(s)
rnd(s) round(s)
sc single crochet
sk skip
sl st slip sitich
sp(s) space(s)
st(s) stitch(es)
tr treble crochet
yo yarn over

Basic Crochet Symbols
Not only do pattern writers use abbreviations, they also use special symbols. Most symbols are used to indicate what parts of the pattern are to be repeated. Here are the primary ones.

Abbreviation
Description
[ ] work instructions within brackets as many times as directed
( ) work instructions within parentheses as many times as directed
* repeat the instructions following the single asterisk as directed
* * repeat instructions between asterisks as many times as directed or repeat from a given set of instructions

Crochet Syntax
Now that we know basic abbreviations and symbols, lets take some examples and examine them.

Example 1
Row 1: With red, ch 21, turn, sc in second ch from hook, sc in each ch across: 20 sc

This is the first row you are crocheting and you will be using your red colored yarn. Make a chain that is 21 chains long. Then turn you crochet work to work in the opposite direction. Make a single crochet stitch in the second chain from your hook. Then make a single crochet in each of the chains across the row. When you finish this row, you will have made 20 single crochet stitches.
Note: When you count the second chain from your hook. Do not count the loop that is on your hook. The first chain from your hook is the chain right after the loop on your hook. So the second would be the chain after that.

Example 2
Round 1: With Beige, ch 2, 8 sc in second ch from hook, place marker: 8 sc

This is the first round that you will be crocheting and you will use your beige colored yarn. Round means that you will be crochet in a circle shape.

Start by making a chain that is 2 chains long. Remember that the loop on your hook does not count as a one of the chains. Next, make 8 single crochet stitches in the second chain from your hook. Then place a marker. At the end of this round you will have crocheted 8 single crochet stitches.
Note: Markers are used to keep track of where the round ends and a new round begins. When you crochet around a circle, it is very easy to loose track of where to stop and start a new round if you do not use a marker. A marker can be a small scrap piece of yarn. To place a marker, just insert it into the loop that is on your hook. At the end of every round, you should move the marker and put it into the new loop that is on your hook.

Example 3:
Round 5: (2 dc in next dc, dc in next 3 dc) around: 30 dc

This is the fifth round of a crochet project. Make 2 double crochet stitches in the next crochet stitch, which was a double crochet in the previous round. Then make a double crochet stitch in the next 3 stitches. Repeat this all the way around, until you reach the end of this round. You will have completed 30 double crochets in this round.
Note: You will know you reached the end of this round when you reach your marker. For this round, do not crochet in the loop that has the marker in it, stop in the stitch right before it, since the loop with the marker represents the beginning of the next round.

There are unlimited amounts of examples that can be placed here. Even expert crocheters have trouble reading crochet patterns from time to time. Just remember to not get frustrated, and to ask for help when you need it! If you need help with a pattern always ask the designer of the pattern since he/she would know the most about it. If it is one of my Crochet Spot patterns, you can always ask me for help anytime!!! Just leave a comment on the crochet pattern’s post and I’ll be sure to answer.