Tutorials and Help

Detailed Explaination of Crochet Rose Pattern

Posted in Tutorials and Help on March 17th, 2009 by Rachel Choi – 65 Comments
As a request from a Crochet Spot reader, here is a detailed explanation for the crochet rose pattern. The following instructions are intended for beginners to understand and do not use any short hand crochet abbreviations. The original crochet rose pattern can be found here. crochet rose

Rose Explained
Row 1: make a chain that is 51 chains long. Double crochet in the fifth chain from your hook, then chain 2, then double crochet again in the same chain you made the first double crochet in. Chain 2, skip 2 chains on your foundation chain, double crochet in the next chain, chain 2 again, double crochet in the same chain that you made the previous double crochet in. Repeat the previous sentence all the way across the row. You will then have 1 chain felt on the row. Double crochet in the last chain.

Row 2: chain 3, turn to work in the opposite direction. In the space created by chaining 2 in row 1, make 2 double crochet stitches, then chain 2, then make 2 more double crochet stitches in the same space. Chain 2, skip the next 2 stitches, in the next space created by chaining 2 in row 1, make 2 double crochet stitches, then chain 2 and make 2 more double crochet stitched in the same space. Repeat the previous sentence all the way across the row. You will then have 1 stitch felt on the row. Double crochet in the last stitch.

Row 3: Turn to work in the opposite direction. In the space created by chaining 2 in row 2, make 9 double crochet stitches, slip stitch in next space created by chaining 2, then chain 1, then slip stitch in the same space as the previous slip stitch, then chain 1 again. Repeat the previous sentence for all the spaces across the row.

Leaf Explained
Row 1: Chain 14, in the second chain from your hook (loop on hook does not count as a chain), make a slip stitch. In the next chain make a single crochet stitch. In the next chain make a half double crochet stitch. Make a double crochet stitch in each of the next 2 chains. Make a treble crochet stitch in each of the next 2 chains. Make a double crochet stitch in each of the next 2 chains. In the next chain make a half double crochet stitch. In the next chain make a single crochet stitch. In the next chain make a slip stitch.

Row 2: Chain 1, turn to work in the opposite direction. Repeat row 1, working the same stitches in the same order into the stitches across the row.

If you would like another pattern on this site further explained, just leave a comment on that crochet pattern and I would be happy to provide further explanation for it!

How to Crochet: Slip Knot

Posted in Tutorials and Help on March 12th, 2009 by Rachel Choi – 28 Comments

This tutorial is for both right and left handed people. For left handed pictures, roll your mouse over the image and it will change for you.

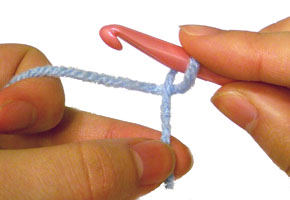
Every crochet project you start starts with a slip knot. So here is a fast and easy way to make a slip knot using your crochet hook. This method is a lot faster than making the slip knot with just your hands.

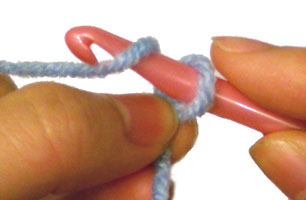
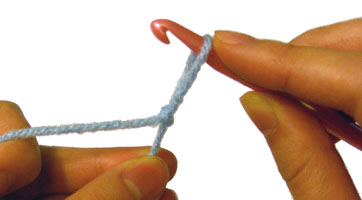
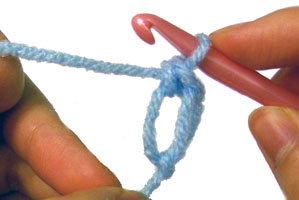
Wrap the yarn around your hook as show in the picture.


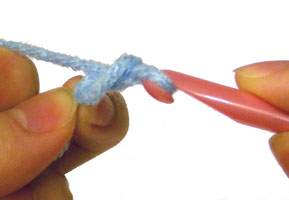
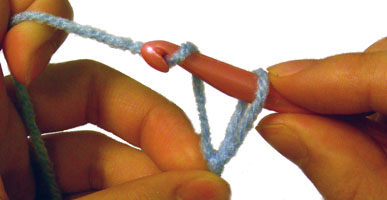
Yarn over (wrap the yarn over your hook) while holding the bottom loop steady.


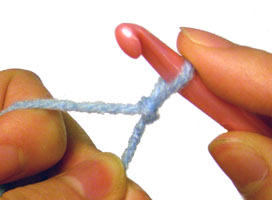
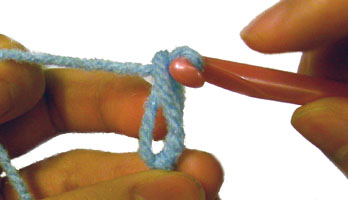
Pull the strand of yarn through the loop.


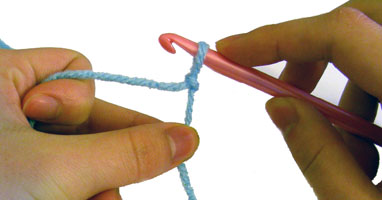
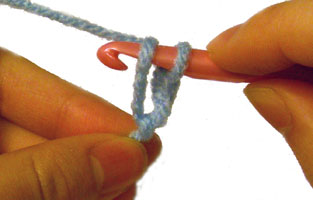
Tighten your slip knot.


Woohoo! You just saved yourself time. No more making knots with your hands. Just wrap it around your hook and get crocheting!

Was this helpful? Do you still need more help? Leave a comment to let me know!

How to Crochet: Knot Stitch

Posted in Tutorials and Help on March 10th, 2009 by Rachel Choi – 59 Comments

This tutorial is for both right and left handed people. For left handed pictures, roll your mouse over the image and it will change for you.

The knot stitch has many different names: Love Knot, Lovers’ Knot, True Lovers’ Knot, Solomon’s Knot or Hail Stone. The knot stitch is composed of a long loop with at knot at the end. When you make several knot stitches in a pattern, it give a very light, elegant and lacey look.

Step 1: Start with a slip knot on your hook.


Step 2: Pull loop that is on your hook to the desired length. Try ½ to 1 inch.


Step 3: Yarn over and pull through. This creates an elongated chain stitch.


Step 4: Single crochet in the back ridge of the chain. In the image for right handed crocheters the ridge is located on the far left and vice versa in the left handed picture.


This image shows the hook inserted into the back ridge.

This image shows the complete knot stitch after the single crochet.

Repeat step 2 to 4 to make a chain of knot stitches.

To make rows of knot stitches, you can slip stitch or single crochet in the knots of previous knot stitches.

If you need help with how to crochet the knot stitch, leave your question as a comment and I would be glad to help!

How to Crochet a Blanket

Posted in Tutorials and Help on March 7th, 2009 by Rachel Choi – 9 Comments
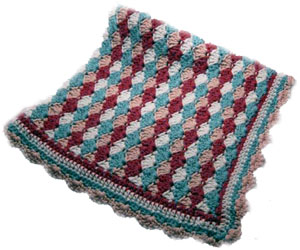
Learning how to crochet a blanket can be very rewarding. Many people who crochet blankets like to follow a crochet pattern. But you do not always need a pattern to crochet a blanket. All you need to know is the basic idea of how a blanket is crocheted. Here are some steps to follow to crochet your very first blanket.

Step 1: decided whether you want to crochet a blanket from a pattern you like or you want to make your own original creation.

crochet blanket

If you choose to use a crochet pattern:
Step 2: Gather all the materials needed. The materials should be specified at the beginning of your crochet pattern. This includes, yarn type, crochet hook size, scissors, and any other special materials you may need.

Step 3: Make sure you can understand the pattern. Some crochet patterns can be confusing. So it is a good idea to skim over the pattern to understand the designer’s style. If you have trouble understanding the pattern, ask someone for help! Once, you understand the basic idea of you blanket’s pattern, you are ready to move on to the next step. This helps prevent frustration later on and helps you finish your crocheted blanket in a timely manner.

Step 4: Make sure that you know the crochet stitches that are used in the pattern. Some patterns will specify the stitches used in the pattern, before the pattern starts. If your pattern does not do this, then just skim the pattern for the crochet stitches. If you do not know how to crochet a stitch, then you can either ask someone for help or simply look it up online. The internet is a great source for crochet tutorials.

Step 5: You are now ready to start crocheting! Just follow the instructions in your crochet pattern.

Here is the link to the crochet pattern for the sample blanket used in this post: Crochet Pattern: Shell Stitch Blanket

If you choose to make your own original blanket design:
Step 2: Decide what shape and size you want your crochet blanket to be. Lots of blankets are square shaped, but yours can be any shape you desire: circle, star, ripple.

Step 3: Draw what you want the blanket to look like. Not everyone can visualize everything in their head. So go ahead and draw what you want. It doesn’t have to be perfect, it’s just a rough sketch.

Step 4: Choose colors. A good color scheme is what makes blankets pretty. You can choose to use several colors or just one. It is all up to you, since this is your design.

Step 5: Choose crochet stitches you want to use. You may need to use different crochet stitches to obtain the blanket shape that you chose and to fit the sketch that you drew.

Step 6: Write your pattern down. By writing your pattern down, you get a clearer picture of exactly how you are going to crochet your blanket. Plus, once you have a solid pattern you can share it with others or even sell it.

Step 7: Gather other materials that you will need, such as a crochet hook, scissors etc.

Step 8: Now it is time to start crocheting. If you find that there are mistakes on your pattern, just correct those as you go.

If you have questions about how to crochet a blanket or if you would like to add something to these steps, just let me know by leaving a comment!

How to Crochet a Cube

Posted in Free Crochet Patterns, Tutorials and Help on March 6th, 2009 by Rachel Choi – 21 Comments
A crochet cube can be used for many projects. You can make baby blocks, dice, tissue box covers or gift boxes. The ideas are limitless. Crocheting a cube can be done using multiple methods. You can either crochet all 6 sides of the cube separately then sew them together, or you can crochet your cube in the round. This tutorial explores crocheting your cube without sewing pieces together, thus crocheting in the round. crochet cube

The basic idea is to start by creating a square and then make it three dimensional by crocheting around it with out increasing the amount of stitches in each round. To make the bottom of the cube, each round is slowly decreased to close the bottom. To make different sized cubes, just make the initial square the size that you want it.

Crochet Pattern: Cube
Note: stitches are crocheted in the back loop only unless otherwise indicated.
Top Square
Round 1: ch 2, 4 sc in second ch from hook, place marker
Round 2: 3 sc in each sc around: 12 sc
Round 3: sc in next sc, (3 sc in next sc, sc in next 2 sc) 3 times, 3 sc in next sc, sc in next sc: 20 sc
Round 4: sc in next 2 sc, (3 sc in next sc, sc in next 4 sc) 3 times, 3 sc in next sc, sc in next 2 sc: 28 sc
Round 5: sc in next 3 sc, (3 sc in next sc, sc in next 6 sc) 3 times, 3 sc in next sc, sc in next 3 sc: 36 sc
Round 6: sc in next 4 sc, (3 sc in next sc, sc in next 8 sc) 3 times, 3 sc in next sc, sc in next 4 sc: 44 sc
Round 7: sc in next 5 sc, (3 sc in next sc, sc in next 10 sc) 3 times, 3 sc in next sc, sc in next 5 sc: 52 sc
Round 8: sc in next 6 sc, (3 sc in next sc, sc in next 12 sc) 3 times, 3 sc in next sc, sc in next 6 sc: 60 sc

Sides of Cube
Round 9: sc in both loops of each sc around: 60 sc
Round 10 – 23: sc in each sc around: 60 sc

Closing Bottom
Round 24: sc in both loops of each sc around: 60 sc
Round 25: sc in next 6 sc, (decrease by inserting hook into next 3 sc, yo, pull through all 4 loops on hook, sc in next 12 sc) 3 times, decrease by inserting hook into next 3 sc, yo, pull through all 4 loops on hook,, sc in next 6 sc: 52 sc
Round 26: sc in next 5 sc, (decrease by inserting hook into next 3 sc, yo, pull through all 4 loops on hook, sc in next 10 sc) 3 times, decrease by inserting hook into next 3 sc, yo, pull through all 4 loops on hook, sc in next 5 sc: 44 sc
Round 27: sc in next 4 sc, (decrease by inserting hook into next 3 sc, yo, pull through all 4 loops on hook, sc in next 8 sc) 3 times, decrease by inserting hook into next 3 sc, yo, pull through all 4 loops on hook, sc in next 4 sc: 36 sc
Round 28: sc in next 3 sc, (decrease by inserting hook into next 3 sc, yo, pull through all 4 loops on hook, sc in next 6 sc) 3 times, decrease by inserting hook into next 3 sc, yo, pull through all 4 loops on hook, sc in next 3 sc: 28 sc
Note: stuff cube, while decreasing.
Round 29: sc in next 2 sc, (decrease by inserting hook into next 3 sc, yo, pull through all 4 loops on hook, sc in next 4 sc) 3 times, decrease by inserting hook into next 3 sc, yo, pull through all 4 loops on hook, sc in next 2 sc: 20 sc
Round 30: sc in next sc, (decrease by inserting hook into next 3 sc, yo, pull through all 4 loops on hook, sc in next 2 sc) 3 times, decrease by inserting hook into next 3 sc, yo, pull through all 4 loops on hook, sc in next sc: 12 sc
Round 31: (decrease by inserting hook into next 3 sc, yo, pull through all 4 loops on hook) 4 times: 4 sc
Finish off

If you need help on how to crochet a cube just leave a comment!

How to Crochet a Square

Posted in Tutorials and Help on March 5th, 2009 by Rachel Choi – 39 Comments
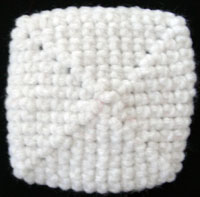
Squares can be crochet “in the round” or row by row. When crocheting in the round, you start by creating the center of the square and then crochet around the center to make your square larger. When you crochet a square row by row, you start by creating one side of the square which is as long as the width. Then you keep adding rows on top of it until your square is the proper length. In this tutorial, I will show you both ways. crochet square

Need help understanding the abbreviations? Check out the crochet abbreviation chart.

Crochet a Square in the Round
Round 1:ch 2, 4 sc in second ch from hook, place marker
Round 2: 3 sc in each sc around: 12 sc
Round 3: sc in next sc, (3 sc in next sc, sc in next 2 sc) 3 times, 3 sc in next sc, sc in next sc: 20 sc
Round 4: sc in next 2 sc, (3 sc in next sc, sc in next 4 sc) 3 times, 3 sc in next sc, sc in next 2 sc: 28 sc
Round 5: sc in next 3 sc, (3 sc in next sc, sc in next 6 sc) 3 times, 3 sc in next sc, sc in next 3 sc: 36 sc
Round 6: sc in next 4 sc, (3 sc in next sc, sc in next 8 sc) 3 times, 3 sc in next sc, sc in next 4 sc: 44 sc
Round 7: sc in next 5 sc, (3 sc in next sc, sc in next 10 sc) 3 times, 3 sc in next sc, sc in next 5 sc: 52 sc

Continue this pattern until the square is the desired size.

The basic idea is to put 3 single crochets in each of the four corner, while just 1 single crochet in each single crochet on the sides of the square.

Crochet a Square Row by Row
Row 1: chain until chain is width of desired square
Row 2: ch 1, turn, sc in each sc across

Repeat row 2 until length of square is the same as the width of the square. With this pattern, you can also create a rectangle.

These examples of creating a square only use single crochet. Squares can be crocheted in any crochet stitch that you want. Just make sure you account for the length of a crochet stitch when you make your square. For a fun square pattern, try crocheting a granny square!

If you need help on how to crochet a square, just leave a comment and I would be glad to help you!

How to Make Plarn (Plastic Yarn)

Posted in Tutorials and Help on February 21st, 2009 by Rachel Choi – 58 Comments
Why use yarn when you can have plarn?
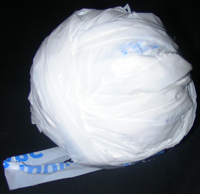
Inspired by eco-friendly crafts, I decided to make my first ball of “plarn”. Plarn is plastic yarn. The image to the right is my first proud ball of plarn. The ball contains about 10 plastic grocery bags. You can use plarn to crochet just about anything. To make plarn, all you need is a bunch of old plastic bags and a pair of scissors. Here is how I made it.
plarn-ball

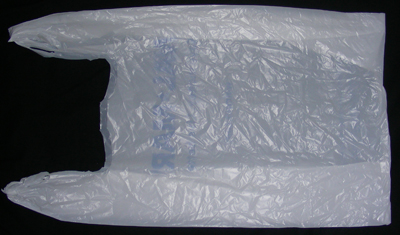
Step 1: Lay bag flat

plarn

Step 2: Fold bag in half
plarn

Step 3: Fold bag in half again
plarn

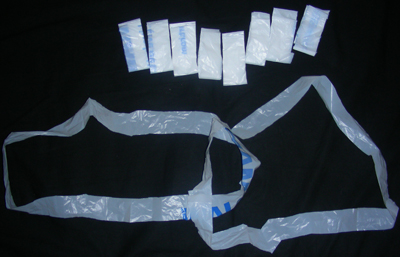
Step 4: Cut off handles and bottom of bag. Discard them into a recycling bin.
plarn

Step 5: Cut bag into 1 inch strips. It doesn’t have to be perfect. You can also make thicker or thinner strips if desired. Just remember that thinner strips are more likely to tear.
plarn

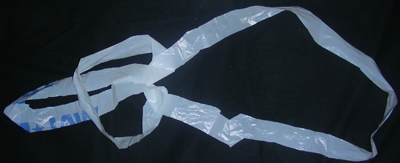
Step 6: Open two strips and lay one on top of the other
plarn

Step 7: Take the loop that is on the bottom and pull it through itself
plarn

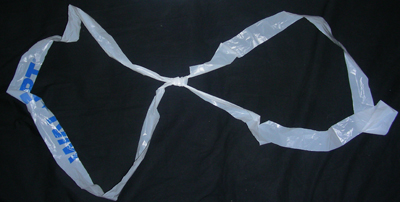
Step 8: Continue to add more loops to the end as desired
plarn

Once you have a nice ball of plarn, you are set to start making your first plarn crochet project!

If you need help making plarn, just leave a comment!

How to Make Pom Poms

Posted in Tutorials and Help on February 17th, 2009 by Rachel Choi – 38 Comments

Pom poms are easy and fun to make. All you need is yarn and scissors. Follow the four simple steps below to learn how to make a pom pom. In this example, the finished pom pom is 3 inches (8 cm) in diameter.

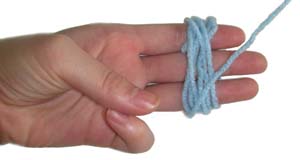
Step 1: Continuously wrap yarn around 3 fingers, about 100 times around

yarn pom-pom  yarn pom-pom

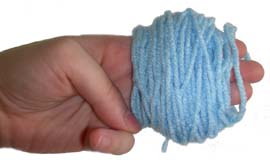
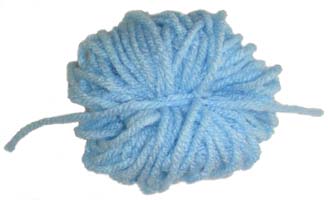
Step 2: Gently slide bundle of yarn off of hand

yarn pom-pom

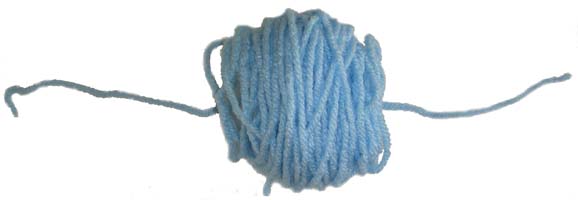
Step 3: With same colored yarn, tie bundle tightly together in the middle

yarn pom-pom

yarn pom-pom

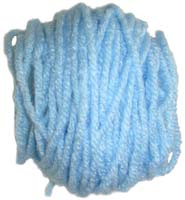
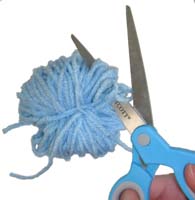
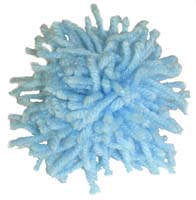
Step 4: Cut all the loops on the yarn, then trim and shape as desired

yarn pom-pom yarn pom-pom


To make a bigger or small pom pom, use more or less fingers in step one, as needed. To change the fullness of the pom pom, change the number of times the yarn is wrapped around your fingers.

Pom poms go great with hats and beanies. To add a pom pom to your hat or beanie, simple use a yarn needle and sew your pom pom on.

If you need help making a pom pom, just leave a comment and I will be sure to help!

How to Crochet a Scarf

Posted in Free Crochet Patterns, Tutorials and Help on February 17th, 2009 by Rachel Choi – 2 Comments
Learning how to crochet a scarf is so simple. There are tons and tons of crochet patterns on the internet and in books that you can follow or you can always make up your own pattern. Once you know the basics of crocheting, it will be very easy for you to crochet any scarf that you desire.

The basic instructions for crocheting a scarf are to start out with a foundation chain that is as long as the width of the scarf you want to crochet. Using the foundation chain, you can continue to make rows of crocheted stitches, using any crochet stitch that you like.

crochet scarf

Each row you add will make your scarf longer, so just keep adding rows until it is the perfect length for you. When you determine that you added enough rows, simple cut your yarn and tie the end, so your scarf does not unravel. To finish off, weave the end of the yarn as neatly as possible into your scarf.

There is an infinite number of ways you can crochet a scarf. Here is a very basic, easy to follow pattern for beginners.

Crochet Pattern: Scarf
Row 1: ch 31, sc in second ch from hook, sc in each ch across
Row 2: ch 1, turn, sc in each sc across
Repeat row 2 until the scarf is as long as you desire. Finish off the scarf by cutting the yarn and weaving the end into your scarf.

Need help understanding the abbreviations? Check out the crochet abbreviation chart.

To make a different scarf, try using other crochet stitches or a variation of crochet stitches. You can also create patterns by changing yarn colors or adding tassels.

If you need help on how to crochet a scarf, just leave a comment with your question!

How to Crochet a Hat

Posted in Free Crochet Patterns, Tutorials and Help on February 9th, 2009 by Rachel Choi – 42 Comments
Hats are easy and simple to crochet, once you have the basic idea. That is to start with a small circle and crochet around it, while slowly increasing the number of stitches in each round around the hat. Once the hat is as wide as you want it, it is time to simply make your hat longer by continuing to crochet around the hat but without adding additional stitches in each round. Here is a basic crochet hat pattern for you to follow that uses double crochet stitches. crochet hat
Skill Level: beginner crochet skill level

Finished Size: 4 1/2’’(12 cm) tall, 7’’ (18 cm) diameter (not including pom pom and ear covers)

Materials:
Medium Weight Yarn
Crochet Hook F (3.75 mm)
Yarn Needle
crochet yarn size 4

Gauge:
17 dc = 3’’
4 rows = 2’’
Gauge Swatch: 3’’w x 2’’h (7.5cm x 5cm) ch 20.
Row 1: dc in forth ch from hook and in each ch across
Row 2 – 4: ch 3, turn, dc in each dc across
Finish off.

Need help understanding the abbreviations? Check out the crochet abbreviation chart.

Crochet Pattern: Hat
Round 1: ch 5, sl st in 5th ch from hook forming a loop, 10 dc in loop, place marker
Round 2: 3 dc in each dc around
Round 3: (2 dc in next dc, dc in next dc) around
Round 4: (2 dc in next dc, dc in next 2 dc) around
Round 5: (2 dc in next dc, dc in next 3 dc) around
Round 6: (2 dc in next dc, dc in next 4 dc) around
Round 7 – 15: dc in each dc around
Finish off.

Note: If you want to make your hat longer, just continue crocheting until it is the length that you want.

Ear Covers (Make 2) (Optional)
Row 1: ch 15, dc in third ch from hook, dc across
Row 2 – 3: ch 2, turn, dc across
Row 4: ch 1, hdc in next dc, 11 dc across, hdc in next dc
Row 5: turn, ch 1, skip 1, sc, hdc, 7 dc, hdc, sc, sl st
Row 6: turn, 3 sl st, sc, hdc, 2 dc, hdc, sc, 3 sl st
Row 7: turn, 3 sl st, sc, 2 hdc, sc, 3 sl st, finish off

Tie Strap (Make 2) (Optional)
Row 1: ch 82, dc in third ch from hook, dc across

With yarn needle, sew tie straps to ear covers using photo as a guide.

Pom Pom (Optional)
Step 1: Continuously wrap yarn around 4 fingers 100 times around
Step 2: gently slide bundle off of hand
Step 3: with same colored yarn, tie bundle tightly together in the middle
Step 4: cut both the loops on the yarn open and shape

Confused? Check out the how to make pom poms tutorial!

With yarn needle, sew pom pom to hat using photo as a guide.

Note: for smaller pom poms use less fingers and for fuller pom poms revolve yarn more times

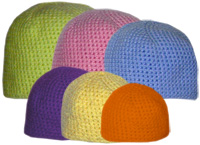
You may also like to check out the Crochet Pattern: Family Beanie Set – 6 sizes. This pattern set has various beanies for you to crochet! Plus, you don’t have to worry much about how to increase or decrease the size of your beanie.

Be sure to check out the Crochet Spot Store for more beanie and hat patterns!

crochet beanies

If you need help on how to crochet a hat, just leave a comment and I would love to help!