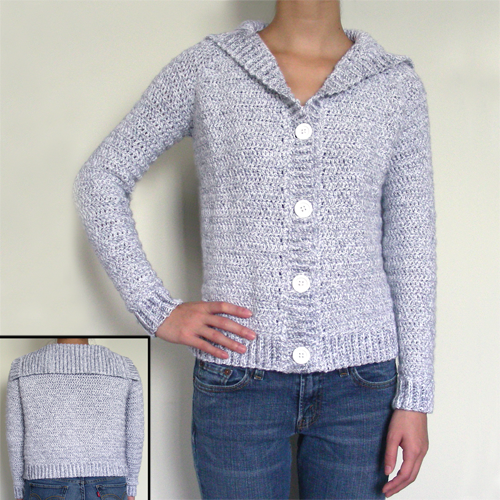
Crochet Pattern: Classic Cardigan Sweater
By Rachel Choi – 15 CommentsNew in the Crochet Spot Store, this pattern is for a classic cardigan with ribbed edgings that never goes out of style. This cardigan can be crocheted in 9 different sizes and every size in between. Crocheted from the top down, you can try on the cardigan as you crochet it to make sure it fits perfectly. You can adjust the size while you crochet making the bust and arm holes as wide or narrow as you like. The length of the body, sleeves and collar can all be adjusted as well to make shorter or longer cardigans. This pattern creates the cardigan in one pieces, so that the only sewing needed is for sew on the buttons.

All purchases help to support Crochet Spot and are greatly appreciated! Please log in or create a new account at the Crochet Spot Store to purchase this pattern. Premium Pattern Members may log into the store and download the pattern for free.


so cute!!
That´s really nice, Rachel!
OMGosh!! I love it!! I’m terrified to make clothes! I’ve never made anything like that before! I’m FINALLY working on my first hat. Oh my, it’s beautiful!!
This is absolutely gorgeous. Very nicely done. This seems to be one of those styles that is just so classic and tailored. For sure I would want one in every single color that I can think of.
Very stylish, Rachel! What yarn did you use? It looks like in the photo 2 strands held together.
The yarn used in the photo is called baby grey marble which is made by Bernat. When you look really close the yarn is a white and grey strand together to make one strand of yarn.
Just wondering…How often do you actually wear your crocheted creations?
This is so cute! I’ll definitely queue it up.
OMG. Rachel….this is great! I have been looking for a pattern for a plain pullover sweater with ribbed cuffs, bottom and collar. If you have time, someday (ha!) would you consider doing a pattern? A style similar to the cardigan would be just the ticket!
Hi Metta, it is on the to-do list. Just have to get around to it 🙂
In the pattern directions, the sleeve divide is accomplished by skipping a number of stitches without finishing off. How is this accomplished? Do you just lay the thread next to the stitches that are skipped?
Hi Cindy, you will skip the stitches and continue to crochet in the next stitches. There’s no need to leave any thread. The arm holes will be crocheted around later. For now just think of it as a sleeveless sweater until you get to the sleeve portion.
I finally see! At this step the sweater goes from two dimensional to three dimensional! I finally studied the picture long enough to see it. Is the sweater in the photo made using two strands of yarn? If so, is that the amount covered in the materials list or do I need to double it? I have now crocheted the sweater down to the shoulder split twice trying to get enough body. The second time I used a one size smaller crochet hook, which helped (had to play with the sizing), but the sweater still doesn’t have enough body for me. Wondering if I need to buy more yarn and crochet a double strand. I want a sweater I can throw on for cool summer evening. Thanks for all the help!
Hi Cindy, the sweater uses only one strand of yarn. It may look like 2 strands in the picture because the yarn I used has 2 colors in it. You can add more rows to the body if you want it longer.
I love, LOVE, this pattern!!!! I modified it a bit to make a hoodie cardigan for my six-year old. She chose a lovely royal purple color. The instructions are so easy to follow! It came out just beautifully for my first ever sweater!