Crochet Pattern: Pastel Hearts Mini Pillow
By Amy Yarbrough – 6 Comments
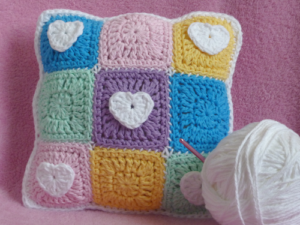
Hello again everyone! It’s so good to be back with Crochet Spot. I wanted to start out with an idea I’ve been nurturing for a long time — a mini pillow that reminds you of Valentine’s candy! This pillow is small and perfect for that extra special Valentine’s touch. Use the soft candy-like pastels as I did or choose your own, personalized palette. The pillow is made with small, square motifs crocheted in the round and joined together for the front and back. The hearts are made separate and then attached afterward. It’s a pattern you can’t say no to!
| Skill Level: |  |
Finished Size:
Pillow measures 10†(25.5 cm) square
Each motif measures 3†(7.5 cm) square
| Materials: Medium Weight Yarn (approximately 110 yards of main color, 18 yards each of 5 contrasting colors, such as pink, blue, purple, yellow, and green) Crochet Hook G (4.00 mm) Fabric Glue Yarn Needle Polyester Fiberfill |
Gauge:
8 dc = 2’’
3 rows = 2’’
Gauge Swatch: 2’’w x 2’’h (5 cm x 5 cm) ch 10.
Row 1: dc in fourth ch from hook and in each ch across: 8 dc
Note: beginning ch 3 counts as 1 dc
Row 2 – 3: ch 3, turn, dc in each dc across: 8 dc
Finish off.
Need help understanding the abbreviations and symbols? Check out the crochet abbreviation chart.

Crochet Pattern: Pastel Hearts Mini Pillow
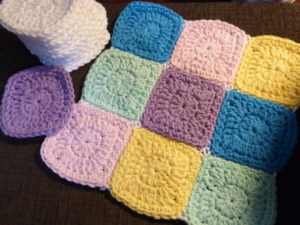
Motif (make 9 in main color and 9 in contrasting colors)
Round 1: make an adjustable ring, ch 3 (counts as 1 dc now and throughout), 11 dc in ring, sl st in top of beginning ch-3: 12 dc
Round 2: ch 3, dc in first dc, 2 dc in next dc, (dc, tr, dc) in next dc, *(2 dc in next dc) 2 times, (dc, tr, dc) in next dc, repeat from * around, sl st in top of beginning ch-3: 28 sts
Round 3: ch 1, sc in next 5 sts, 3 sc in next st, *sc in next 6 sts, 3 sc in next st, repeat from * around, sc in last st, sl st in first sc: 36 sc
Finish off.
Tip: Pull tail of adjustable ring on motifs tight before finishing for a compact pillow.

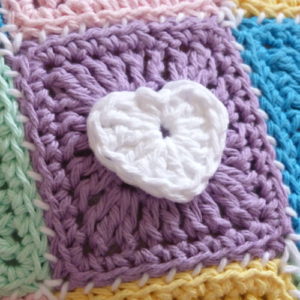
Heart Applique (make 5)
Round 1: with main color, make an adjustable ring, ch 1, (sc, dc, 2 tr, 3 dc, tr, 3 dc, 2 tr, dc) in ring, sl st in first sc: 14 sts
Finish off.
Front Panel
With main color, whip stitch contrasting motifs together for the front panel — 3 motifs across and 3 down for a square. Work through back loops of motif to provide the ridge on the front.
Tip: To prevent your stitches from stretching at the seam when working in back loops only, whip stitch through the back ridge of each stitch as well.

Back Panel
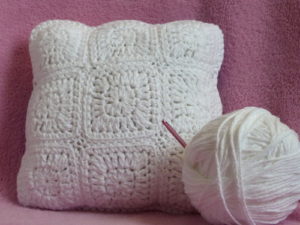
Repeat front panel instructions with main color motifs.
Assembling Pillow
Hold the backs of both panels together and single crochet around all four sides with MC, working through both loops this time, leaving a couple of inches open at the end. Stuff carefully with fiberfill, pushing the fluff into the corners. Once you are pleased with the amount of stuffing, single crochet to close. Glue or stitch hearts to select motifs on the front of the pillow.
I’m sure you will have as much fun making this pattern as I did designing it. If you run into any problems, just leave me a comment below and I’ll see what I can do!


What a sweet pillow!!! And it would make such a nice gift,,,,on Valentine’s as well as other occasions Thanks for sharing this little gem with us SMILE
Hi Helen,
I am so glad you like it! It was so fun to design, I hope it will be equally fun to crochet for others.
Keep Crocheting,
Amy
Can the mini pillow pattern be printed?
Hi Stephanie! Each page on Crochet Spot is coded to be printer friendly, so you can use the print function in your internet browser. In most browsers you can go to File, then Print. Or use a keyboard shortcut such as Ctrl+P. Let me know if you need more help with it.
Thank you for such a gorgeous pattern!
I just finished making a pink and white version for my neice, she just decided to do her bedroom shabby chic style, and I made her a little coaster to match it.. lovely little cushion
What a lovely idea, Ally! You are very welcome. I’m pleased you like the pattern!
Best wishes,
Amy