Crocheting Hats Without Patterns
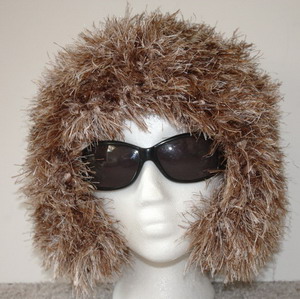
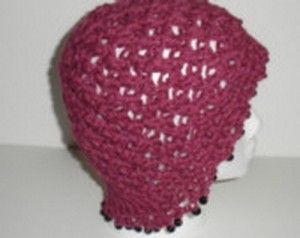
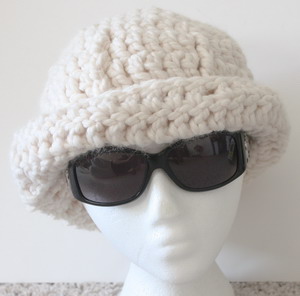
By Corinne Munger – 26 Comments| Hats are one of my favorite accessories – they help me express my mood on any particular day. If it’s super cold, it’s the “furry, no-named animal” hat that says I’m feeling “a little wild” today. My bulky yarn rolled brim says “I’m feeling preppy!†Then there’s my flat top, large flowered, multi-colored, multi-fiber yarn that states that I’m feeling artistic and love color! And there’s always the “Bad Hair Day Beanie†that I can just throw on and head out the door without spending an hour getting to know my curling iron better. |
Whatever your likes, there’s a pattern out there. In my experience in crocheting, there are really only 3 styles of hats you need to learn to make a very wide array of different hats.
1) The Beanie Shape – generally shaped as a cone with a rounded top. These are great, easy to make hats for everyone and probably the most common one in the pattern world. You can adjust the beginning of the pattern to make the top of the hat pointed. You can make it short to wear as a cap, a little longer will give you a brim to fold up, longer than that and you can roll the brim – and longer still, and you have more of a stocking cap (remember those?). This is a very adaptable shape to make a wide variety of hats.
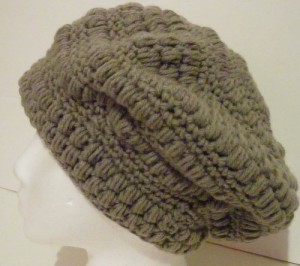
2) The Beret – is shaped with a “larger-than-the-circumference-of-your-head” circle and then tapered down to fit your head snugly. The most recent, popular version of the beret is the Tam or “Slouchy Beretâ€. This later style was brought into light from Rastafarians as they wear this type of hat to encompass their thick dreadlocks. The look is relaxed and carefree. The more colorful, the more authentic they are. This style has become very popular in recent years and is seen worn by a variety of people. The beret, still worn by many, is much smaller in diameter than the authentic Tam, but the concept is the same – a large circle that’s tapered down to fit the head. You may know this style through photos of artists wearing them slightly cocked on the side of their heads.
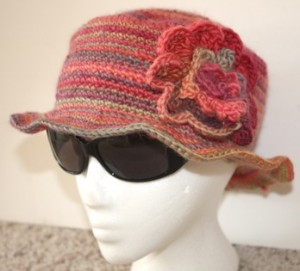
3) The “Top Hat†– I call it this because of its cylinder shape. The pattern generally starts out with a circle about the same size as your head’s circumference, it has straight edges down the side and has a brim. The length of the sides and the brim greatly change the whole look of this style of hat. A long side with a short brim would remind most of the type of hat that Abraham Lincoln wore – or a formal Top Hat seen on a man in a tuxedo. A shorter side with a medium brim is a very cute, stylish hat for any woman and can probably be adapted for a man as well (maybe made in natural fiber as a fishing hat?). A short side with a very large brim is considered a Sun Hat. You can also make this same wide brim to be wavy – very feminine and a great protector from the sun. There are many variances of this style as well – which is probably why it’s my favorite.
Crocheting Hats without Patterns
A) When making a beanie, you will start with a small circle (usually 6 or 8 stitches) crocheted into the first sc of a ch 3. As you add rounds you will increase by that many stitches in every row. In other words, if you start with 6 stitches the next row is 12 stitches, then 18, then 24, then 30 and so on (increasing by 6 stitches every row at the same spot as you increased in the previous row). Once you reach the size of the head you’re crocheting for, you stop increasing to begin construction of the sides, for as many rows as you want the length to be. Remember: a short side will just be a cap, longer will give you a brim to fold and even longer will allow you to roll.
B) For the beret shape, you will make a circle that is very large. You will increase as if making a beanie – but don’t stop when you reach the size of the wearer’s head – keep crocheting and making it larger. How much larger is a personal preference. A little bit larger and you will have more of a French Beret – a lot larger, a Tam. It depends on what look you’re after. If you’re making it to hold a head of dreadlocks, keep measuring the size by holding it up to the wearer’s head of hair to make sure it’s large enough. Once you’ve crocheted to the size you want your circle, it’s time to taper it down towards the actual size of the head. The average, adult head size is 22â€. If you’ve made a circle that’s 26†(use a FABRIC tape measure to find out – or use your old pi equation), then you would need to bring the hat in by about 4†– by decreasing your stitches – in the same place where your increases were in the previous rows. One way to determine when that is, is by making a chain that fits your head. Count the number of chain stitches and decrease your hat to that many stitches (or close to it). Remember, crocheted hats really stretch! If you want your hat to be snug, then make less stitches. This will all vary to the type of yarn and size crochet hook you’re using.
C) For the top hat shape, you will start with a circle the same circumference as your head – this is roughly 22†for an adult. After which you simply stop increasing and continue to crochet around to the desired length of your side. To add a brim, you will need to start increasing again, generally in the same way you increase to make the initial circle. If you want it to be a wavy brim, you’ll increase more than usual.
There are thousands of hat patterns available on the internet – both free and for purchase. Once you get the basic patterns down, you’ll be creating your own designs with ease. Or just take a crack at it WITHOUT a pattern. I’m sure you’ll be surprised with your result! Good or bad, you’ll learn from it! Happy crocheting and experimenting!
Need help while crocheting? Feel free to leave a comment below and I’ll help you out!


For the beanie style… how do you measure the head size correctly and how do you measure the size of the beanie to know when to stop increasing?
Hi Jan, Here’s the best reply I can think of…… Measure the head so that the tape measure goes across the forehead and around the widest part of the back of the head. For example, the average adult head is 22″. As you’re making your increasing rows, fold your hat flat after the end of each row. When you’ve got 1/2 the measurement you need, do not increase anymore. So if you’re making an adult’s hat, when your hat measures 11″ when you lay it flat (measure the last row you crocheted), you’ll be at the circumference you need. Even if it’s a little smaller, you’ll be good because the hat will stretch. Hope this makes sense!
Thanks for the tips Corinne. I am going to try making some beanies.
hi! i would like to ask if its ok if i’m going to use only wool yarn instead of cotton. coz i have lots of wool yarn.
Of course! You can use whatever yarn you have. I have made some really nice hats by MIXING the types of yarns – of course you have to be careful how you clean them when you do that. But wool is great for keeping you warm!
thank you so much.
Oh I love the Flat Top or Top Hat, do you have a pattern :)?
Good job! This is a great tutorial on making hats of all types.
Thank you Sandie! I hope you use it to create something wonderful!
Love the article on hats. I will have to try a couple of those.
I really like that slouchy beret. Is there a pattern? I’m not good enough to figure that one out by myself. 🙂
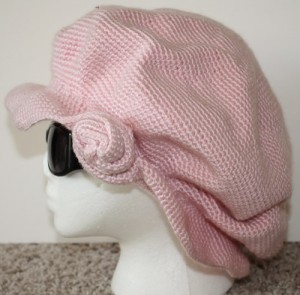
oh this Oversized beret – superfine crochet reminds me of those caps women use to wear when going swimming
It’s kind of funny but I wear this hat a lot, and it always reminds me of the “night caps” little girls wore back in the day! Ha ha ha!
I so appreciate the increase directions. This is the most simple, understandable way i have come across and will help me immensely! Can’t thank you enough!
Thank you Stephanie! It took me a while to write this one, so I’m very happy it helped!
Thank you for a great article. I love hats and felt intimidated about crocheting them. After reading you article, I feel I can do this. I really liked the fun fur beanie. What a great idea for using fun fur. All the hats were wonderful. Thanks, again
So glad you all like this article – makes me feel warm and fuzzy like my hat! Ha ha ha! A few of you have mentioned this hat so I’d like to take a minute to explain how this was done (you’re going to think I’m out of my mind – but here goes..) After crocheting a beanie with ear flaps, I then cut HUNDREDS of pieces of yarn about 3″ long and, yes, attached EACH STRAND to one stitch on the hat – that’s how it came out so full. I HATE crocheting with the fuzzy yarn, it’s too hard to see your stitches, but I love this yarn at the same time. So this is how I made this work. There’s more than one way to skin a cat, right? Happy crocheting everyone!
So glad to read this article ,specially the way you explain the decrease in the beret.wonderful!I plan to make and donate chemo- caps so this is a great help.thanks again.
What a wonderful way to spend your time crocheting! You know, there’s a story behind “prayer shawls” that I believe should be adapted to all things created for someone else. You simply “infuse” your creations with thoughts of kindness, maybe a blessing, as you’re making them, repeating it over and over. When you give your item away, be sure to include a little note with it saying that it was made with a blessing for their well-being and happiness!
When I followed your instructions for the beanie, I ended up with a flat circle. I don’t understand then the difference between the beanie and the top hat other than the brim.
I recommend working the first round of the brim in the front loops only to give it a sharper angle.
I really like the look of your long beanie and the Oversized Beret superfine crochet. Do you have a pattern or basic instructions for the beret. I love it. Thank you so much
G
Hello,
I love all of your hats, but most of all the oversized beret. Do you have a pattern?
Thanks!
Teresa
Hi Teresa!
You can find hats in the hat section: http://www.crochetspot.com/store/?category=3
There is a slouchy beanie pattern there that might be similar to what you are looking for.
Thank you so Corinne for this information. It has helped me to understand much of how to make different styles of hats. God Bless you
When crocheting a hat, once I’ve stopped increasing is there a way to calculate how much yarn will be needed per round? I realize there will be a variance depending on the stitch being used; for instance a puff stitch seems like it would require more yarn than say a double crochet.
Thanks for any help you can give!
Diane
Hi Diane! This may sound tedious, but you can measure the yarn for that one round by measuring it with a measuring tape as you use it.