How to Crochet a Flat Circle while Double Crocheting between Stitches
By Caissa "Cami" McClinton – 5 CommentsAs a follow up to my two previous tutorials, How to Double Crochet Between Stitches, and How to Begin and End Rows while Double Crocheting between Stitches, this week we’ll focus upon how to crochet a flat circle while crocheting between stitches. For the purpose of practicing this skill, we’ll make a circular swatch in this tutorial. Yarn and hook size don’t matter for this practice swatch.
You may mouse over images for left-handed views.
Abbreviations:
ch – chain
dc – double crochet
rep – repeat
sl st – slip stitch
tch – turning chain
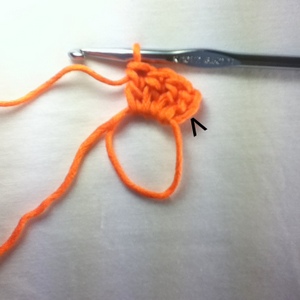
Round 1: Begin with the magic adjustable ring, ch 3 (tch made), 9 dc into ring. Picture below shows arrow pointing to tch and 3 dcs in ring.
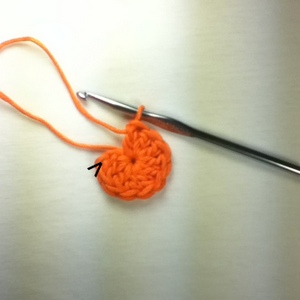
Pull tail to tighten ring. Picture below shows the tightened ring, with an arrow pointing to tch.
sl st into tch to join. Picture below shows this done, with an arrow pointing to the tch.
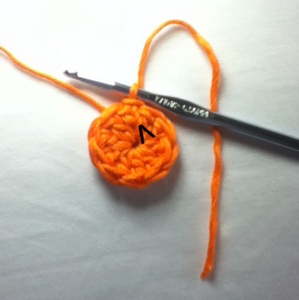
Do not turn. Stitch count for this round is 9 dc + tch.
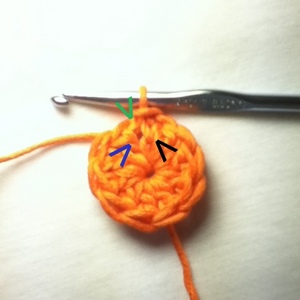
Round 2: sl st into space between tch and first dc on previous round. Picture below shows this done, with black arrow pointing to tch, blue arrow pointing to dc, and green arrow pointing to space in between them.
ch 3 (tch made), dc into same space as sl st. Picture below shows this done, with black arrow pointing to tch of previous round, blue arrow pointing to first dc on previous round, and green arrow pointing to the stitches in the space between them.
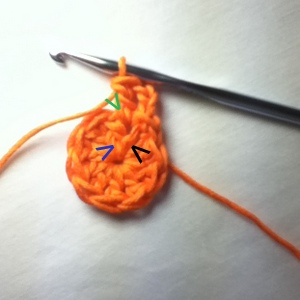
2 dc into each of next 8 spaces between dc, 2 dc into space between final dc on previous round and tch on previous round, sl st into tch of current round to join. Do not turn. Stitch count for this round is 19 dc + tch
Round 3: sl st into space between tch and first dc of previous round. Picture below shows this step in progress, with black arrow pointing to tch, blue arrow pointing to dc, and green arrow pointing to space in between them.
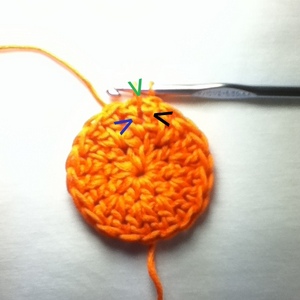
ch 3 (tch made), dc into same space as sl st, dc into the next space between dc, *2 dc into next space between dc. Picture below shows this done, with lower-case roman numerals indicating the number of dc in each space.
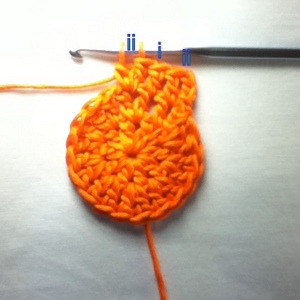
1 dc into following space between dc, repeat from * 7 more times, 2 dc into next space between dc, dc into space between final dc on previous round and tch on previous round, sl st into tch of current round to join. Do not turn. Stitch count for this round is 29 dc + tch. Picture below shows round 3 done.
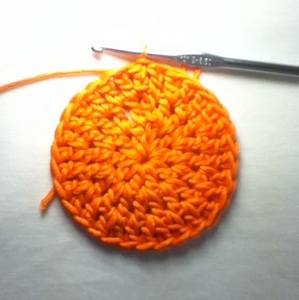
Round 4: sl st into space between tch and first dc of previous round, ch 3 (tch made), dc into same space as sl st, 1 dc into the next 2 spaces between dc, *2 dc into next space between dc, 1 dc into the next 2 spaces between dc, repeat from * 7 more times, 2 dc into next space between dc, dc into the next space between dc, dc into space between final dc of previous round and tch of previous round, sl st into tch of current round to join. Finish off. Stitch count for this round is 39 dc + tch. Picture below shows round 4 done.
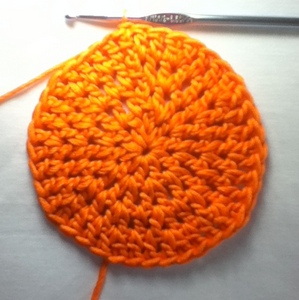
You can make your circle larger by adding rounds in the same manner. To keep the circle flat, simply add an additional dc to each round between increases.
After learning this technique, you can use it to modify any crochet patterns with stitches in the round for a different look. If you’d like, make your swatch a little bigger to make a cute washcloth.
Additional Resources:
How to Crochet: The Magic Adjustable Ring
How to Crochet a Circle
How to Crochet a Beanie


This would have been a PERFECT tutorial I needed about two weeks ago… I made my grandmother some place mats for her birthday. However, I like they way this looks much better than just increasing in stitches.
Thanks for the tutorial though!!
Although this is great for a backpack I’m going to make my nephew! It gives it a sturdier feel to it, which will be good. Thanks again!!
Thanks for the comments, Lane! I am so glad you find the tutorial useful! Feel free to share pictures of your projects!
Your tutorial makes it seem so easy! Must try it.Always made a mistake before and dc moves fast so it’s easier.Thanks a lot.
That is very nice to hear. Thank you!