How to Crochet: Spike Cluster Stitch
By Amy Yarbrough – 8 Comments| A few months back I borrowed a crochet stitch book from my grandmother who has a whole library of wonderful crafting books. I’ve used it so many times for reference in designing my patterns, I am loath to return it. I believe every crocheter needs their own guide to crochet stitches. Understandably, many of us don’t have one, or can’t borrow one from their grandmother. That’s why we are here at Crochet Spot. To help you learn new things! | 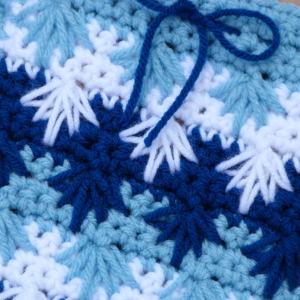 |
My most recent fascination is the spike cluster stitch, abbreviated SPC. Keep reading for a step-by-step guide to how it’s done.
Mouse over each picture for a left-handed view.
Creating a Swatch
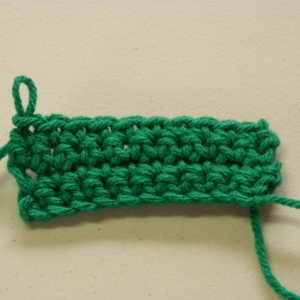
The spike cluster requires about 5 stitches total. For a practice swatch, ch 10 and sc for 4 rows.
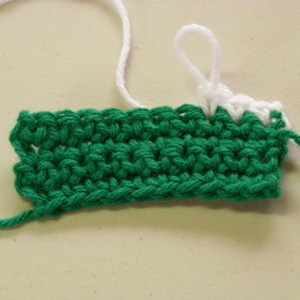
Join a new color, ch 1, turn and sc in next 3 sc. Over the next sc is where you will be working the SPC.
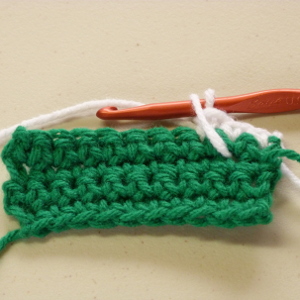
Count down one row and pull up a loop in the third sc to the right.
Tip: When pulling up the loops for the spikes, be sure your stitches have a light tension. If not your fabric will pull down on itself and ruin the effect of the stitches.
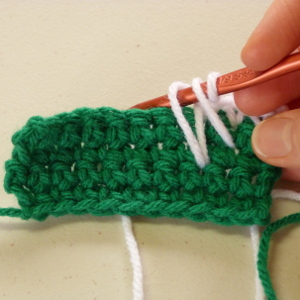
Next, count down 2 rows and pull up a loop in the 2nd sc to the right.
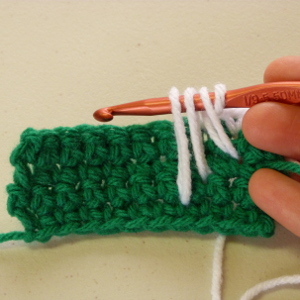
For the third spike, count down 3 rows and pull up a loop in the sc directly below.
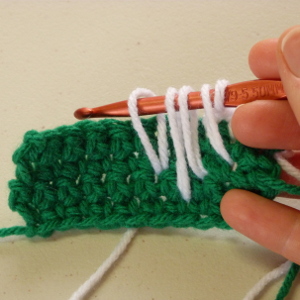
Then count down 2 rows and pull up a loop in the 2nd sc to the left.
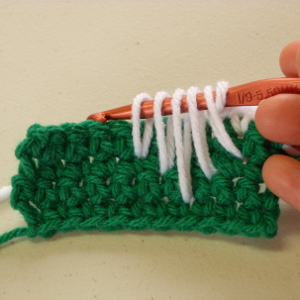
And lastly, count down one row and pull up a loop in the third sc to the left.
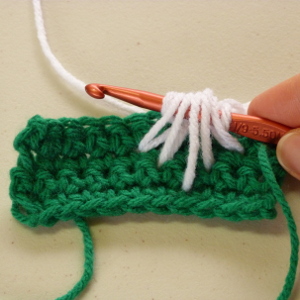
Insert hook in the unworked sc, yarn over and pull up a loop. You should now have 7 loops on your hook.
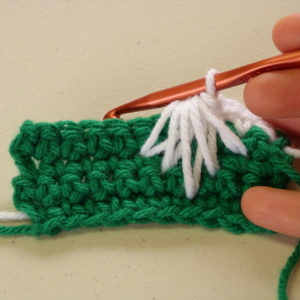
Yarn over and pull through all loops on the hook.
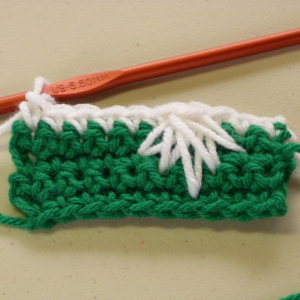
Sc in the remaining sc across the row. And you have completed a spike cluster!
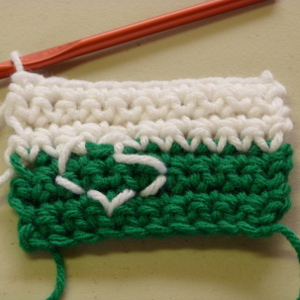
With the same color, sc for another 3 rows. This is how the back should look like at this point.
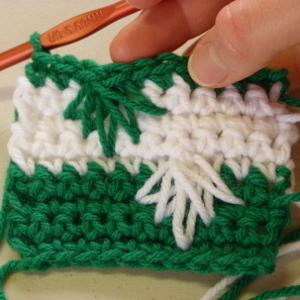
Join a contrasting color once more, and sc in next 6 sc this time. Repeat instructions as before for SPC, then sc in last 3 sc.
You can continue this way, alternating spikes, for as long as you like. In the crochet pattern, Frosted Drawstring Pouch, work a spike cluster over every fifth sc, alternating between rows to achieve a varied look. Check out the pattern for it, if you haven’t already, to see what I mean.
Thanks for reading! I’ve really enjoyed being able to share this with you. If you have any problems or questions, leave them in the comments below and I’ll get back with you promptly.


Thanks for adding this tutorial! I was trying to make the Frosted Drawstring Pouch, but the spike stitch had me tearing my hair out. I was going to look for it in my stitch books, but hadn’t gotten around to it yet.
Well, I am glad you could use it. Sometimes it’s the hardest thing following stitch instructions. 🙂
Yes, I needed pictures for this one. 🙂 The photos are very clear and helpful. Ready to try it again!
This is a wonderful & innovative crochet tutorial! Way to go, Amy!!!
Thanks, Cami! I appreciate it. 🙂
I like how the back of the stitch looks like a stylized heart. Hmmm…a reversible design…hmmm. Great tutorial, makes the complicated simple.
So how many stitches would I need to make an adult scarf?
Hello Deb,
It depends on how wide you want your scarf to be. Try doubling the swatch pattern and work a few rows to see if you like the width. Hope this helps!
Amy