How to Crochet: Stretch-Free Cord
By Claire Golden – 8 Comments
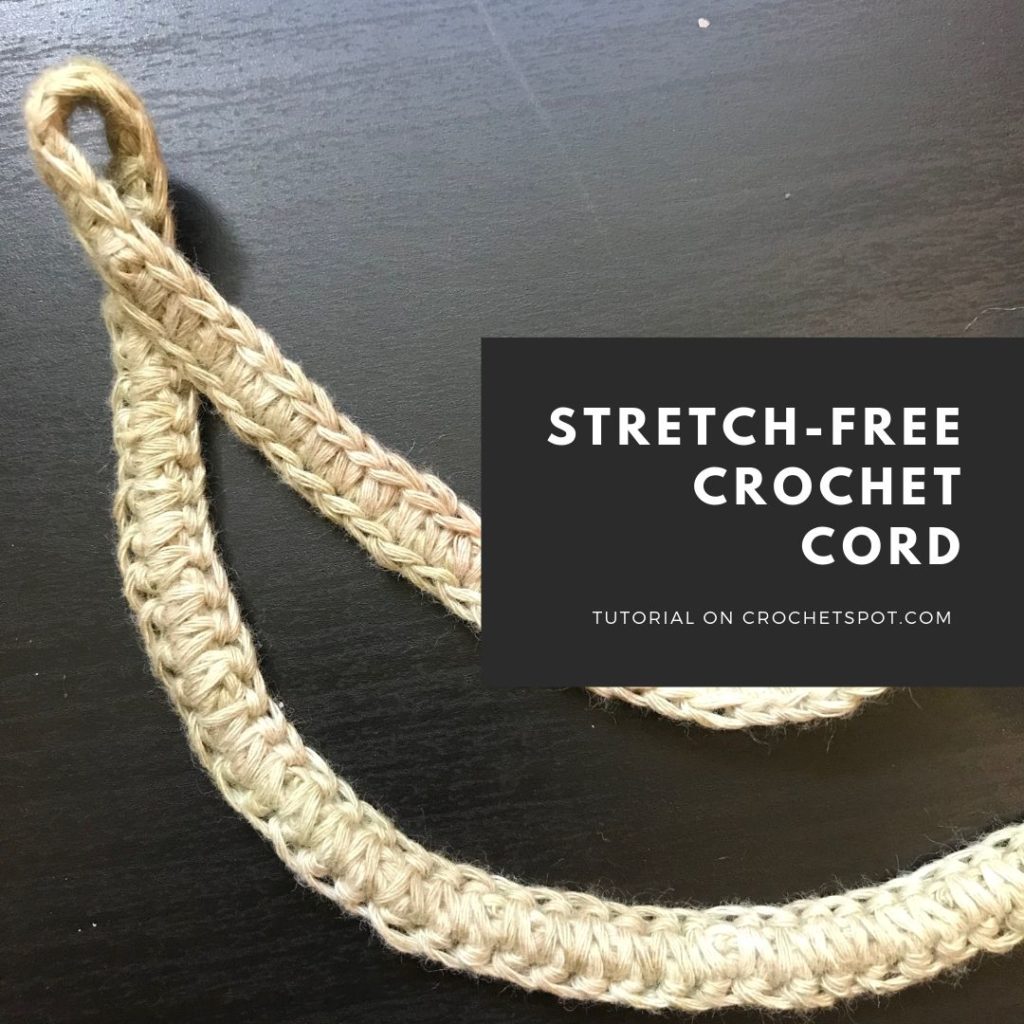
Sometimes you need a cord to complete a crochet project. Recently I was making a bag that needed a drawstring, and I couldn’t find a stitch that worked. The trouble is that crochet is stretchy by nature and sometimes you need a non-stretchy cord. So I experimented for a while and came up with an easy method to make a stretch-free cord.
You’ve likely seen tutorials for crochet icord that resembles the knitting counterpart. This tutorial is different, but it achieves a similar result. All you need is your crochet hook. I suggest using a smaller size than the yarn recommends: for example, worsted-weight yarn recommends anywhere from an H (5.00 MM) hook to an I (5.50 MM) hook, and I used a G (4.00 MM) to make this cord.
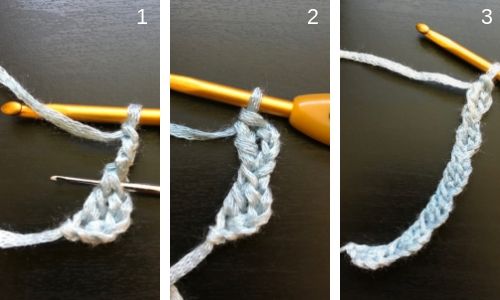
To begin, ch 4, dc in 4th chain from hook (Photo 1).
Next, ch 3, and make a dc in the front 2 loops of the previous dc (Photo 2).
Repeat the previous step until the cord is the desired length. The cord will curl, so give it a good tug to straighten it out. This is the only time when your cord will stretch, so make sure it’s the right length before continuing. (Photo 3)

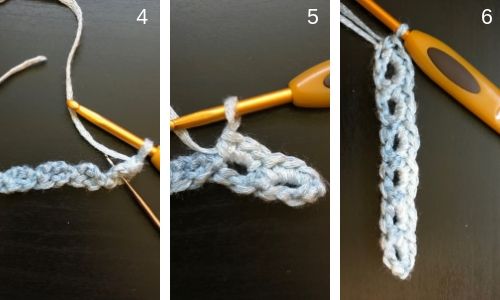
Next, ch 1 and turn. You’ll be working into the chain-3 loops that were formed in the foundation row. Make 3 sc into each loop. (Photos 4 and 5)
When you reach the very last loop, make 3 sc as normal. Then make 1 sc into the very first chain (the one with your starting slipknot). (Photo 6)

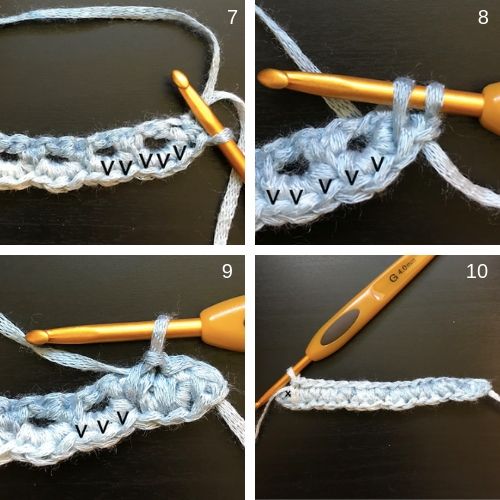
Turn to work across the other side of the loops. This is where things get different. Instead of making your stitch into the loop, you’ll make it into the sc from the previous row. Photo 7 shows where to insert your hook. Pull up an extra-long loop, but make sure it isn’t too loose (Photo 8). Then yarn over and complete your sc as usual.
Continue along the row making a sc into each of the sc below (Photo 9 indicates the next few stitches).
When you reach the end, do not work into the last sc (which is actually the first sc you made at the beginning of the cord). Instead, sl st into the loop right under your hook (Photo 10).
Fasten off, leaving a long tail if you need to sew the ends of the cords together. Weave in ends.

The finished cord is prone to curling, but it’s sturdy and as non-stretchy as crochet can be. I hope you find this method useful for your future crochet projects, and please let me know if you need help along the way!


Just what I needed to complete my project. Many thanks for the pattern!
Definitely saving this for later. Spent a few hours over the weekend trying to make a nice strap. Got some good results but it always has some stretch. Ended up using my husband’s spare camera strap and giving up. This looks promising!
I can’t wait to try this!
I have tried to save to Pintrest, but it doesn’t work. (Just to let you know.)
I am going to save this just in case I ever need it 😉 thanks so much!!
I’ve been crocheting for half a century; this post was a real find. Thank you!
If the cord was being used as a drawstring for a circular opening, the curling factor would be in its favour, wouldn’t it?
That’s a good point, Jodiebodie, I think the curling factor could be useful in that case. I’d love to hear how it works for you!
I tried this as an experiment expeting to be disappointed, but it worked better than I could have hoped. I didn’t think crochet could be so firm. As a fellow crochet experimentor, I thank you for saving me so much time.