How to Join Crochet Pieces (or Seam) Using Slip Stitches and the Outside Loops
By Caissa "Cami" McClinton – 4 CommentsThere are many ways to join crocheted pieces together. This tutorial will focus upon joining two granny squares together using slip stitches and the outside loops. This particular technique can be used to join any crocheted pieces together, including seams on garments or accessories. The resulting seam is very strong and will make your pieces look like they are sitting side by side. I like this seam for modular pillows, blankets, and bags.
For the purpose of this tutorial, I will be using pieces and joining yarn in contrasting colors. If all of the pieces and joining yarn are of the same color, this seam should be invisible. Yarn and hook size do not matter for this practice tutorial.
If you’d like to follow along step by step, you may first use the granny square crochet pattern to make two 2-round granny squares. Then use your remaining yarn and your hook to follow along. If you need to review the slip stitch, check out the slip stitch tutorial.
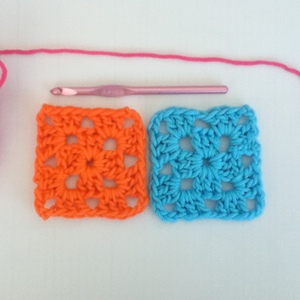
You may mouse over images for left-handed views.
Step 1: Place the pieces right sides together, and align the stitches one to one. Note: To achieve the desired look, you will be slip stitching the two loops that are furthest from each other (the “outside loops”) together.
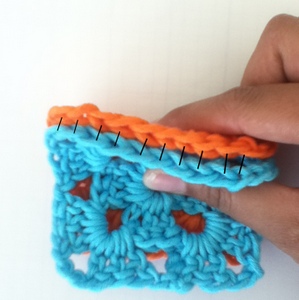
The arrows point to outside loops in the photo below.
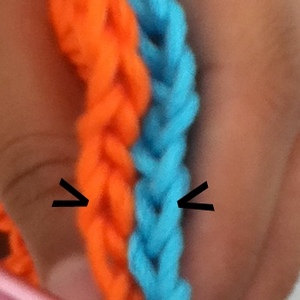
Step 2: Holding the work with one hand, insert the hook through the outside loops of the first stitches to be joined.
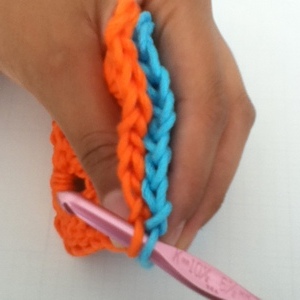
Pull the joining yarn through both loops and secure. The photos below show this process.
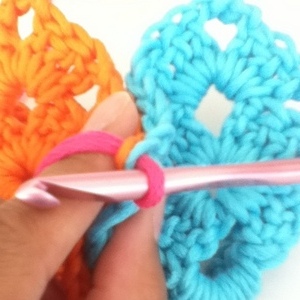
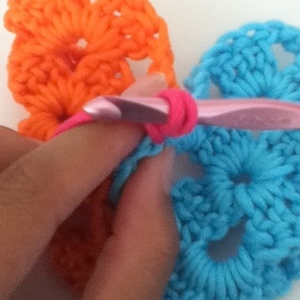
Step 3: Insert hook through the next set of outside loops. Position the joining yarn on the hook side of the work as shown below.
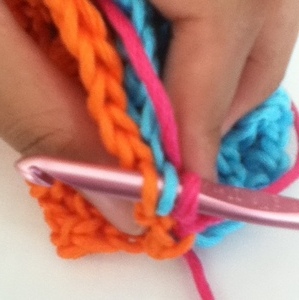
Cross the working yarn over the top of the hook.
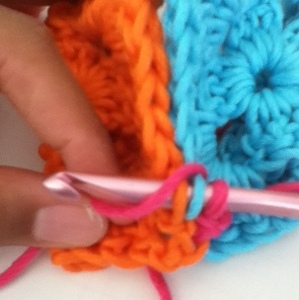
Pull the working yarn through all three loops. (Slip stitch completed.)
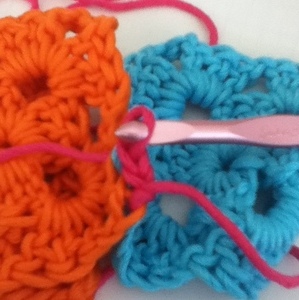
Repeat the process for the entire seam.

Cut working yarn and finish off.

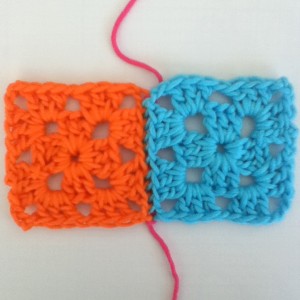
This is the front. Notice how the pieces appear as though they are sitting side by side.
This is the back.
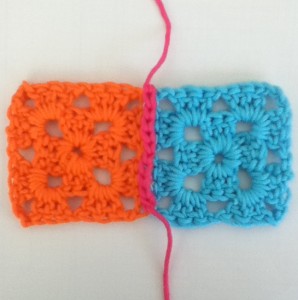
This is what the seam looks like when pulled.
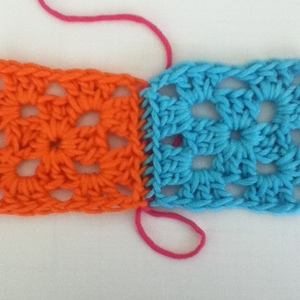
For a similar technique with a different look, check out Claire’s tutorial, How to Slip Stitch Crocheted Pieces Together.
If you have any questions or need any help with this technique, please leave a comment below!


I enjoy crocheting animals but I can’t sew the parts together so they will stay together. I want my grandchildren to be able to play with them without them falling apart. I need help, Please.
Hi Joyce! Here’s a tutorial that will show you how to sew parts together: http://www.crochetspot.com/how-to-sew-amigurumi-parts-together/
I don’t understand the third photo in Step 2. What does “and secure” mean? How do you end up with 2 pink loops on the hook? Thanks for your help.
How would you crochet star motifs together?