How to Use a Safety Pin as a Pin Back for Brooches
By Claire Ortega-Reyes Р11 CommentsBrooches make for very flexible accessories. They are both functional and eye-catching. Unlike appliqu̩s which are permanently attached to an item, brooches are easily transferable. It can instantly jazz up a plain outfit, while holding two pieces of clothing together at the same time.
Crocheted items like flowers and other appliqués can easily be turned into cute brooches. Pin backs of varying sizes and colors are made just for this very purpose. But don’t dismay–any ordinary safety pin can also be used!
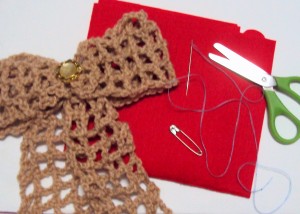
Materials:
Appliqué or other crocheted item to be attached to pin
Safety pin
Scissors
Sewing needle
Thread
Felt sheet
Important Notes:
- Make sure that the safety pin is the right size for the brooch. If it is too small, the brooch will turn out unstable.
- This tutorial uses contrasting colors of felt, appliqué, and thread; this is done to clearly show the steps of the process. It is actually better to use the same color for these materials, though, so the outcome appears neater.
 Place the appliqué on a clean surface, face down. Place the safety pin in the middle of its back. It’s your call whether or not the safety pin is big enough for the brooch to be stable for everyday use.
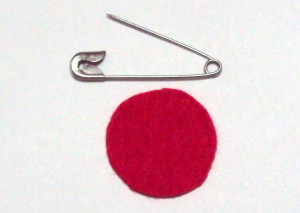 Cut a circle from the felt sheet, making sure that it measures approximately 2/3 the total length of the pin. If the circle is too small, the brooch will not turn out stable; and if it is too big, the pin might not be able to close.
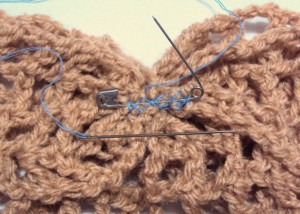 Sew one side of the safety pin (the side with its head) onto the back of the appliqué. It’s ideal to use thread the same color as the appliqué, but for this tutorial we’ve done otherwise, just so readers can see the stitches more clearly.
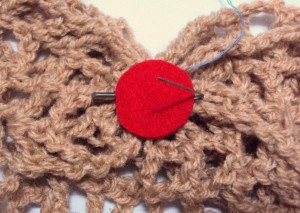 Place the felt over the safety pin. You may use glue or pins to keep it in place while sewing.
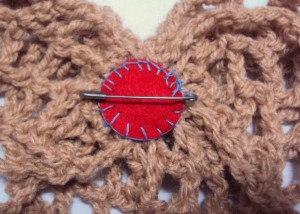
Sew around the circle, attaching the appliqué to the felt, and trapping one side of the safety pin in between. To anchor the backing better, you may choose to sew across the felt, too. Knot the thread securely and finish off.
There we have it! I hope that was helpful. If you need any help, just leave a comment below.


Wow! I am interesting of this. It’s beautiful job.
Thanks for this tutorial! I used to just put a pin on the back of the appliques, but this a way better way to do it.
[…] New in the Crochet Spot Store, this pattern includes directions for making this roomy striped tote and the ribbon brooch. So, you get not one, but two patterns! The sweet bag is crocheted seamlessly in one piece – no assembly or sewing required. The instructions for the optional bow brooch include step-by-step photographs for your convenience. This bow was actually used in a recent tutorial: How to Use a Safety Pin as a Pin Back for Brooches. […]
Can you do a pattern on how to make this bow?
Hello Squirrely Girly, the bow is part of the Bow Peep Tote pattern, you might like to check it out!
Good luck to everyone with their brooch projects!
i just buy those little brooch backs with the locking round thing on them – they are safer . i have given the grandaughter different lovely butterfiles to put on her beret i really dont want her to be stuck in the head with a safety pin
i always find safety pins pop open AND stick into me – but that is a nifty idea
Jenni,
Try the curved basting pins for quilting, they are less likely to pop open.
The next time I finish off my flower corsage, I’ll do just this. I attached the safety pin without the felt paper in my last projects. Thanks for this tip!
This is a good idea. The felt is a nice touch.! Rachel, I love your blog. Please keep the great ideas coming!
Wonderful idea with backing has made app the difference. Tks
Thank you for this lovely tutorial. I’ve been making fabric broaches for a while now but my pins never seemed to be right and very hard to close once I had them on. I think your tutorial has made me understand why this has been a problem. It’sy our little round felt; I’m going to try it and see if it doesn’t give it more stability! Thank you so much!