By Veronica Smith – March 22nd, 2011
9 Comments
So you’re in a hurry for a personalized present or maybe you have lots of presents to do and not enough time. Do you need lots of cute little things in a hurry, maybe for your child’s scout group or her little friends, the office people or play group mums who you’d like to give a little gift to at Christmas?
Then all you need to do is stick a flower on it. Figuratively speaking.
Click Here To Read More »
By Rachel Choi – March 20th, 2011
4 Comments
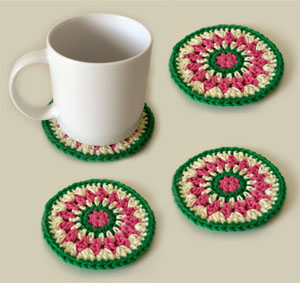
| New in the Crochet Spot Store, this coaster design is inspired by the fun colors and shapes you see when looking into a kaleidoscope! The Kaleido coasters are easy and fast to crochet. Make a bunch to create a entire set. Feel free to mix and match your favorite colors to customize the coasters to your liking. This pattern includes tips for making smooth color changes.
Also, feel free to check out the other kaleidoscope inspired patterns: Kaleido Blanket and the Kaleido Messenger Bag.
|
 |
Click Here To Read More »
By Erin Burger – March 18th, 2011
9 Comments
This simple flowers and leaves is perfect for embellishing belts, beanies, purses and many more items. Sew or glue it to the back of a plain hair clip and create a fun and unique Easter gift for a daughter or friend. 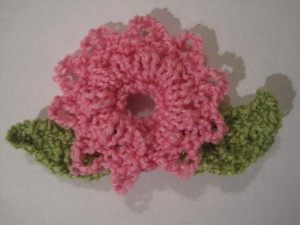
| Skill Level: |
 |
Finished Size: Flower measures 3 inches (7.62 cm) in diameter, each leaf should be approx 1 inch (2.54 cm) long
Materials:
2 yards Color A, 1 yard Color B-DK weight yarn
H hook (5.00 mm)
yarn needle
|
 |
Click Here To Read More »
By Robin Beers – March 17th, 2011
11 Comments
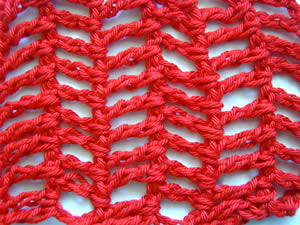
| This lacy stitch is a open crochet stitch like a fish net with slanted rows. It looks more complicated than it really is – simply rows of triple crochet (also known as treble crochet). For a refresher on that stitch, see the triple crochet tutorial. Use this stitch to make an interesting scarf or a pretty table runner. I use cotton yarn in a light weight (3) in this tutorial, but you can use worsted weight yarn or any weight in between if you like. With these fancy stitches, the thinner yarn shows up the most detail. |
 |
Click Here To Read More »
By Claire Ortega-Reyes – March 16th, 2011
55 Comments
| I know we already have a post about how to crochet granny squares, but I thought that some would appreciate a step-by-step tutorial. We’ll be using the same pattern in that post, but more pictures will be included. As with all other tutorials here at Crochet Spot, mousing over the images shows the photos for the left-handed tutorial.
Need help understanding the abbreviations? Check out the crochet abbreviation chart. |
 |
Click Here To Read More »
By Veronica Smith – March 15th, 2011
14 Comments
How to sort your yarns – method 2, a follow on to method 1 (funny that). This is another way to manage your yarns and can be used with method 1 or instead of. This is a wonderful system and it really works, as does method 1. It works in the hands of somebody organized, although I must admit even I have employed this system with great success, I use it in conjunction with method 1 (method 1 is still is stored in the bedroom) and I think I am getting on top of things finally.
Click Here To Read More »
By Erin Burger – March 13th, 2011
8 Comments
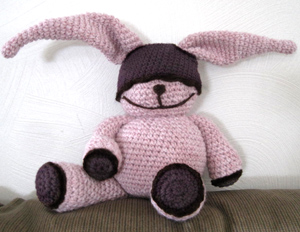
New in the Crochet Spot Store, this pattern is for an adorable stuffed bunny rabbit. Looking for something unique for a special child’s birthday? Customize this simple bunny in the child’s favorite colors. You could also make a great handmade Easter Bunny!
|
Skill Level: |
 |
Finished Size: Bunny is 12†(30.5 cm) tall when standing, and 5†(12.5 cm) across body
|
|
Click Here To Read More »
By Robin Beers – March 12th, 2011
15 Comments
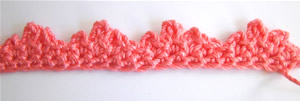
This is a variation on a picot edge that looks like little crowns, thus the name, “crown picot”. It is basically 3 picots together to form a crown. The 2 outer ones are smaller and the middle one is larger. For more information on picot stitches, check out the picot stitches tutorial. You can use this stitch to edge a doily or a blanket.
Start with a row of single crochet. In this tutorial, I am using crochet thread size 3 with a D crochet hook.
Note: If you are left handed, just put your mouse over the photo for a left-handed view.
|
 Â Â |
Click Here To Read More »
By Claire Ortega-Reyes – March 11th, 2011
18 Comments
If you’re anything like me, you’ll find the most difficult part in crocheted projects is the assembly. If I had my own way, I would crochet all the pieces in one piece–but of course this wouldn’t work for every single crochet project I would like to make. This tutorial will show you an easy way to join crochet motifs or parts together: slip stitch away all the seams!
This particular method is ideal for projects with double thicknesses like trivets, hot pads, and hat brims. Aesthetically, this method is very flexible–one side looks like a chain-embroidered border, while the other side renders the seam virtually invisible.
Click Here To Read More »
By Erin Burger – March 10th, 2011
28 Comments
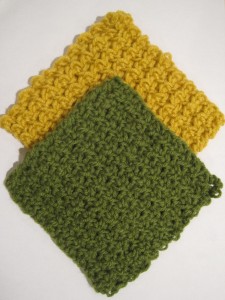
This washcloth is a great beginner’s pattern and also a very satisfying project because a few washcloths can usually be finished in one sitting. Give a set of these as a gift for housewarming or make a set in many bright colors to add some fun to a child’s bathroom.
Bathroom and Kitchen crochet is best done in cotton and organic materials. For more crocheting for the bathroom see this post: Going Green in the Bathroom
| Skill Level: |
 |
Finished Size: Approx. 5 1/2″ (14 cm) by 5 1/2″ (14 cm)
|
 |
Click Here To Read More »


 Â
 
