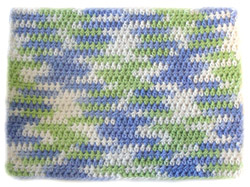
Crochet Pattern: Granny Square Dishcloth

By Rachel Choi – May 12th, 2010 13 Comments
Crochet 4 little granny squares then sew them together to create this dishcloth. You can also use this dishcloth as a trivet or hot pad. There’s nothing like a handmade touch to brighten up your kitchen! Below are the instructions for crocheting each of the granny squares. Once you make four squares, use a yarn needle and sew them together. 100% cotton yarn is recommended for extra absorbency.

Skill Level: crochet skill level easy

Finished Size: 6 3/4″ (17 cm) square

crochet granny square dishcloth

Click Here To Read More »

Crochet Bikinis and Bathing Suits?

By Rachel Choi – May 11th, 2010 55 Comments

I love crochet, because just about anything can be crocheted! But to be honest I haven’t tried crocheting a bikini or bathing suit yet. A few request for a bathing suit pattern have come up over the year, and I just can’t wrap my head around creating a functional bathing suit pattern. My worries aren’t really about crocheting the shape of a bikini or other bathing suit styles, but with how it would hold up in the water.

In my bikini wearing experience, even the regular store bought bikini’s have a chance of falling off (no one wants that). Once, I was playing in the waves at the beach and a big one hit, knocking me off my feet and popping a boob out of my top! Was I embarrassed? Heck ya! I’m glad to tell you I’ve never worn that bikini since.

My point is if an ordinary bikini can have malfunctions, a crochet bikini may have some too. I’ll have to give some though to the material and design if I were to create a crochet pattern for one.

If you’ve crocheted a bikini or other type of bathing suit before, how did it go? If you haven’t do you think you would like to crochet a bikini or bathing suit?

Crochet Pattern Copyrights

By Rachel Choi – May 10th, 2010 40 Comments

This post contains very important information, so please read, especially if you are using, intend to use, or have used any Crochet Spot pattern. I appreciate you taking the time out to read the following copyright information.

Here are the basic guidelines for using crochet patterns on this site:

No pattern or other material may be reproduced — mechanically, electronically, or by any other means, including photocopying — without written permission of Rachel Choi. This applies for all content on Crochet Spot, all free patterns, all patterns for sale in the store, and even content such as tutorials.

For example:

You can NOT email a friend a copy of the pattern you downloaded.
Instead, you can send them the link to the pattern, so they can get their own copy.

You can NOT photocopy a pattern and redistribute it in any form.
Instead, you can tell others where they can go to get their own copy.

You can NOT copy a pattern (or part of a pattern) and publish it on another website or other publication.
Instead, you can publish a link to the pattern.

You may sell your finished crocheted items, but not the pattern. However, you are not allowed to sell items that are made commercially. The item must be handmade with your own hands. Please also give credit to where you found the pattern (although this is not required, it is much appreciated).

When in doubt, ask me. If you are not sure whether you will be infringing upon copyrights, then feel free to send me an email ([email protected]) to ask. I’ll be happy to answer your questions.

These copyrights can also be applied to other crochet patterns you find online from other designers, with the exception of selling crocheted items. Not all designers allow you to sell finished crocheted items made from their patterns, so be sure to ask before doing. Some folks will argue that you can sell any crocheted items made from any pattern whether the designer allows you to or not, but I would recommend being polite and respectful of whatever restrictions the designer chooses.
Flower Crochet Pattern: Sunflower (updated)

By Rachel Choi – May 9th, 2010 3 Comments
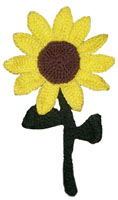
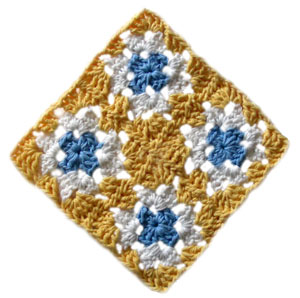
Just a quick note to let you know that the sunflower crochet pattern has been updated! This was a pattern I wrote a long time ago so I went back and made some improvements on it. You’ll still get the same awesome sunflower when you’re done, but it should be easier to read and follow now!

If you’re interested in trying out the newly revised sunflower crochet pattern here it is: Crochet Flower Pattern: Sunflower

Enjoy, and let me know if you still need help with it 🙂

crochet sunflower

Crochet Pattern: 3 Ring Binder Pouch Version 2

By Rachel Choi – May 7th, 2010 5 Comments
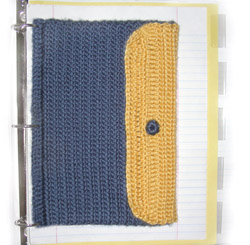
This pattern is available in the Crochet Spot Store, but free for all Premium Pattern Members to download. Crochet this pouch to hold your pencils, pens, erasers, calculators or any other supplies you need. Then store the pouch in your 3 ring binder so that you’ll never forget it. Even if you toss your binder around, the secure flap will ensure your items will not fall out. No sewing is required, other than for attaching the crocheted button. crochet binder pouch
Skill Level: crochet skill level easy

Finished Size: 6 1/2” (16.5 cm) wide, 8 3/4” (22 cm) tall

Materials:
Medium Weight Yarn (approximately 100 yards of main color, 50 yards of contrasting color)
Crochet Hook G (4.00 mm)
Yarn Needle
crochet yarn size 4

Download the pattern at the Crochet Spot Store. (free for all Premium Pattern Members)
Non members may purchase this pattern. Your purchase helps to support Crochet Spot and is greatly appreciated.

Need help crocheting your binder pouch? Just ask and I’ll help!

Crochet Pattern: 3 Ring Binder Pouch

By Rachel Choi – May 5th, 2010 6 Comments
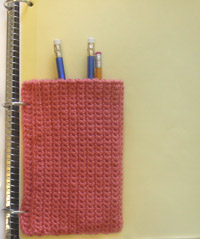
Crochet this pouch and insert it into your 3 ring binder to store your pencils and other small school/work supplies. This pattern is good for beginners, but be sure to read through the pattern before you begin so that you will understand how the pouch is made. If you are looking for a larger binder pouch with a closure, check out the Crochet Pattern: 3 Ring Binder Pouch Version 2!

Skill Level: beginner crochet skill level

Finished Size: 4″ (10 cm) wide, 6 1/4″ (16 cm) tall

crochet binder pouch

Click Here To Read More »

Crochet Bicycle Cozy

By Rachel Choi – May 4th, 2010 23 Comments

If you’ve been visiting Crochet Spot for some time, you’d know that I love featuring fun, quirky, and out of the ordinary crochet items. Here is another one to add to the list!

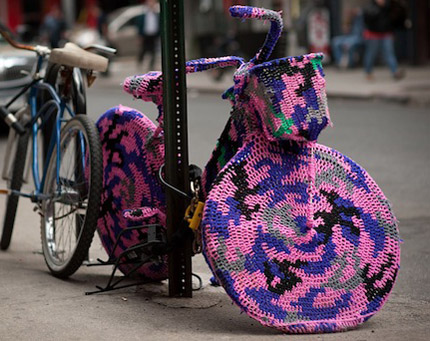
This is a crochet bicycle cozy. I’m not sure if it’s just for show or if it’s suppose to be functional. I’m going to take a wild guess and say it is for show since it’s eye catchingly, neat to look at. I love cozies as much as the next person, but to crochet a cozy for a bicycle must have taken some good creativity and patience. I probably would never crochet one of these myself, but I am glad that crochet is expanding.

crochet bicycle cozy

Photo by Joe Holmes.

What do you think about this bicycle cozy?

Right Side and Wrong Side in Crochet

By Rachel Choi – May 3rd, 2010 11 Comments

When crocheting your projects you may have come across the terms right side and wrong side. In a nut shell, right side refers to the side that is the front of the work. Wrong side refers to the back side of the work. The right and wrong side of your project is determined by what the designer wants the project to look like.

If you are working in rows, each side of your work will look the same if you are turning after each row and crocheting the same stitches, so it will not matter which side is the right side or wrong side. If you are working in the round without turning, typically (but not always – it depends on how you hold your work), the side that faces you when you are crocheting is the right side.

In crochet patterns, the designer may indicate the first row of the right side. The right side is often the side that faces you when you are working the first row or round in a pattern. You may want to use a stitch marker to mark the right side of your work.

Personally, I don’t like to make a big deal about which side is the right side or wrong side. Most of the time it really doesn’t matter. Just have fun crocheting!

The Ships Project

By Rachel Choi – May 2nd, 2010 5 Comments

Founded in October 2001, The Ships Project is dedicated to sending handmade (crocheted and knit) hats, slippers, and Cool-Ties to Soldiers, Sailors, Airmen and Marines deployed across the world in the War on Terror.

Here are some free crochet patterns that you can use when making items for The Ships Project or other projects:
Crochet Pattern: Beanie (using double crochet stitches)
How to Crochet a Beanie (with single crochet)
Easy Adjustable Slippers

If you are interested in donating some of your crocheted items, head on over to The Ships Project site to see their regulations and guidelines for creating items for Soldiers, Sailors, Airmen and Marines. The list of needed items is constantly changing so be sure to check the list before you get your hook moving. Visit The Ships Project to learn more.

For more charities to donate your crocheted items to, check out the Crochet Spot Charity page.

Crochet Pattern: Basic Rectangle Placemat

By Rachel Choi – May 1st, 2010 6 Comments
Here is a beginner level crochet pattern for a basic rectangle placemat. This simple crochet pattern is easy to spruce up and make your own. Try using yarns with lots of colors or mix and match as you see fit. You can also add a simple edging if you desire. Make a placemat that is as large or small as you desire, just use the instructions in the pattern as a guide. crochet rectangle placemat
Skill Level: beginner crochet skill level

Finished Size: 12″ (30.5 cm) wide, 9″ (23 cm) tall
Size can be adjusted to make a larger or smaller placemat by following the directions within the pattern.
Click Here To Read More »