By A Guest Writer – March 23rd, 2010
6 Comments
|
A Guest Post by Sarah Maccarelli.
It’s upsetting to hear people say, “It’s cute, but what is it?” when referring to something you spent a lot of time and effort to make.
I’m writing this article today to inform you that all those adorable, crocheted items really can be functional. All it takes is a little creative thinking.
|
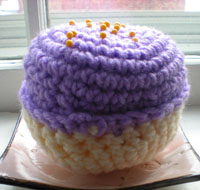 |
I enjoy making all sorts of crocheted items, including obviously functional scarves, handbags, and jewelry. On the flip side, amigurumi animals and other cute items are so much faster and easier to make, but they can do more than just sit on a shelf and look cute.
Click Here To Read More »
By Rachel Choi – March 22nd, 2010
4 Comments
Woohoo!
I want to say thanks to everyone who became a fan of Crochet Spot on Facebook. It really means a lot to me that so many people would support this site! So far we have a group of over 1000 people that became a fan.
If you have not already joined me on Facebook, no worries, it’s never too late. Use the button below to join!
Thanks again for all the support folks! It is truly appreciated.
By Rachel Choi – March 21st, 2010
18 Comments
| I’m so glad that spring time is here!!! It’s been a rough winter with the record breaking snow storms of 2010. If you live in the northeastern part of the U.S. you know what I’m talking about. Now it’s time for the spring flowers, warm weather, and warm weather crocheting. I hate it when people say crocheting is only for the winter. Heck, I crochet all year around and I hope you do too! |
 |
Do you think the change in weather changes the crochet projects you work on?
What are some things you would like to crochet during the spring?
I’m really interested to find out what kind of patterns you’re looking for and to get started on designing them!
By Rachel Choi – March 19th, 2010
5 Comments
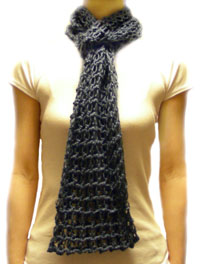
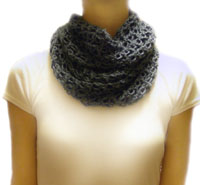
New to the Crochet Spot Store, the Lover’s Knot Loop Scarf is light weight and lacy! It’s a fun scarf for spring, but can still be warm enough for winter. Loop scarves can be worn as fashionable loops around your neck, as a traditional scarf, or as a cowl.
|
Skill Level: |
 |
Finished Size:
66†(167.5 cm) circumference,
7†(18 cm) wide
Size can be adjusted by using the instructions within the pattern.
Materials:
Medium Weight Yarn
(approximately 300 yards)
Crochet Hook H (5.00 mm)
|
 |
Download this pattern at the Crochet Spot Store.
If you are a Crochet Spot enthusiast you may become a Premium Pattern Member, to conveniently download all the patterns in the store. Be sure to read the membership page for more information before signing up.
If you are already a Premium Pattern Member, simply log into your Crochet Spot store account to download the pattern for free! Non members may purchase this pattern individually or sign up for a monthly membership.
Thanks in advance for purchasing this pattern or becoming a monthly Premium Pattern Member. Your support for Crochet Spot is greatly appreciated!
While crocheting your loop scarf, feel free to ask me for help if you need it!
|

 |
By Rachel Choi – March 18th, 2010
38 Comments
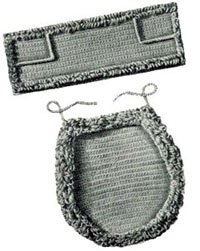
| … toilet seat cover! That’s my answer, what is yours?
As much as I love to crochet and I bet you do too, there has to be something that you don’t think you will ever want to crochet. For me it is a toilet seat cover. I know there are plenty of crochet patterns for toilet seat covers and many people do crochet them. You can even buy toilet seat covers in the store. But personally, I just don’t get the point of them (crocheted or not). I like my toilet seat just the way it is, without a cover.
What item will you never crochet? |
 |
By Rachel Choi – March 17th, 2010
38 Comments
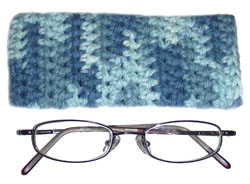
| Here is an easy glasses case pattern! Since glasses come in all sorts of sizes, this pattern can be adjusted to be longer or wider as you see fit. Be sure to choose a yarn that will not scratch or leave yarn residue on your lenses. 100% cotton yarn is used in the photo. The yarn in the photo is also variegated, containing multiple colors. |
 |
|
Skill Level: |
 |
Finished Size: 5 1/2″ (14 cm) long, 2 1/2″ (6.5 cm) wide, when flat
To adjust the size of the glasses case, follow the instructions within the pattern.
Click Here To Read More »
By A Guest Writer – March 16th, 2010
14 Comments
A Guest Post by Renske de Busschere.
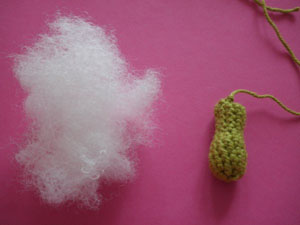
You just finished crocheting all parts of your amigurumi. So now you are ready to stuff them. This is a very important part of your work, because it determines what your finished doll will look like. I want to share some tips to help you get the best result.
First of all, stuffing actually begins before you even start with your amigurumi, by choosing the right crochet hook. You want to crochet as tight as possible, so the chance your filling will be showing through your crochet work is minimum. The tighter you crochet, the bigger hook you can use. For example, I am a very loose crocheter so I always choose a very small crochet hook.
Now back to your finished amigurumi parts. You have to use the right filling. Of course you can buy doll materials like fiberfill in your local shop but I like to use a more budget friendly version, filling from old cushions. I think it works great.
Try to stuff your amigurumi with one piece of filling, instead of adding a piece after piece. If you would add little pieces, your amigurumi would become very lumpy.
Click Here To Read More »
By Rachel Choi – March 15th, 2010
24 Comments
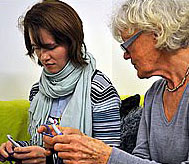
| Need help teaching a friend to crochet? Great! You’ve come to the right place. In this post I’ll share with you 8 tips to help you teach someone to crochet. From my own experiences, I’ve learned quite a bit, from situations that went horrible wrong to those that went right. Hopefully, these tips will give you more confidence in teaching others to crochet. There can never be enough crocheters in the world! |
 |
- Demonstrate first. If someone has no clue how to crochet, it may be a good idea to just show them before he/she even picks up the hook. Do a few rows, just so your student can get a visual of what crocheting looks like. He/she will be able to see how your hands and yarn move.
- Skip the technicalities, work on the basics. Don’t get caught up with the technical aspects of crochet. The chances that a newbie would actually remember are slim. Plus, too much information can be mind boggling! Just stick to the basics stitches and once your student gets the hand of it you can move on.
- Go slow. Everyone learns at their on speed. Start off slow so that your student can see exactly what you are doing. If need be, you can even work in slow motion. Once your student starts to get the hang of crochet, you can start to work faster.
-
Give step by step instructions. Remember to give all the instructions. As an avid crocheter, you may overlook even the smallest steps because you’re so used to doing it.
- Use proper terms. It will be easier for the student later, if you use proper terms now. Try to avoid describing steps by saying “that thingy”. When your student is familiar with crochet terms, it will be easier to learn more techniques and read crochet patterns in the future.
- Don’t be boring. The fastest way to make your student run away is to make crocheting seem boring! Just about anything can be crocheted, from toys, bags, clothing, and blankets. With so many options crocheting is definitely not boring. You may want to start with a small project that your student wants to crochet.
- Use tutorials. You don’t have to be an encyclopedia of crochet instructions! You can use tutorials such as the ones on Crochet Spot to assist you in teaching. Here are some great tutorials that you can use for beginners (both left and right handed): Learning to Crochet.
- Be patient. I’m sure there will be moments of frustration, especially if you are teaching someone who is brand new to crocheting. Just be patient and you and your student will have a good time!
Do you have a tip for teaching crochet you would like to share? Leave it as a comment for others to read!
By Rachel Choi – March 14th, 2010
31 Comments
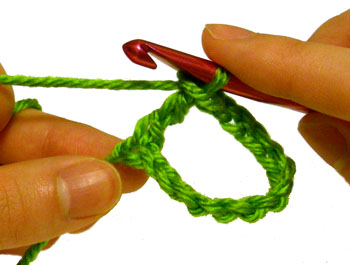
For those who have asked so kindly for detailed step by step photos of the Peace Sign Crochet Pattern, here it is! To see all the pattern specifications see the original pattern. This tutorial still requires you to know how to crochet the stitches and will not go into detail about every single stitch. If you need need help with the stitches or crochet language, check out the crochet abbreviations chart, since it has links to the stitch tutorials.
This tutorial is for both right and left handed people. For left handed pictures, roll your mouse over the image and it will change for you.
Round 1: ch 13
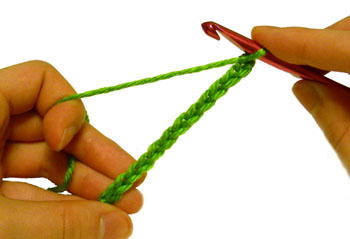
tr in first ch made
Click Here To Read More »
By Rachel Choi – March 12th, 2010
4 Comments
Crochet this bunny rabbit baby cocoon and use it as a newborn’s photo prop for Easter or a Halloween costume! This pattern includes both, hat and cocoon. If you need help with this pattern, just let me know and I’ll be glad to help you out! Visit the Crochet Spot Store to download.
|
Skill Level: |
 |
Finished Size
Cocoon: 20†(51 cm) long, 10†(25.5 cm) wide
Hat: 14†(35.5 cm) circumference, 5 1/2†(14 cm) long
Note: fits most newborns and should stretch
Materials:
Medium Weight Yarn (approximately 500 yards of white, small amount of pink)
Crochet Hook I (5.50 mm)
Yarn Needle
|
 |
This pattern can be downloaded at the Crochet Spot Store.
|
 |
If you are a Crochet Spot enthusiast, you may become a monthly Premium Pattern Member to conveniently access all the patterns in the store.


