By Rachel Choi – December 21st, 2009
9 Comments

Recently, I updated the popular Piano Key Scarf Crochet Pattern. So if you were having trouble with it, please take a look at the newly revised version. Here are the fixes I made:
No more stiffness. Using a much larger hook and a softer type of yarn, your scarf should not turn out to be stiff as cardboard anymore.
Only ONE loose end to weave in. Since the pattern require LOTS of color changes, there used to be a ton of loose ends to weave in when your done the scarf. Now this pattern requires you to carry your loose ends by crocheting over them. Learn more about this technique here: How to Minimize Weaving in Ends in Crochet
Clearer instructions. The first version of this pattern was one of the first patterns I’ve ever written, so of course it was horrible! Now, with more pattern writing experience (over 100 patterns written and counting), it should be crystal clear for you to understand. But if you still need help, I’m always here for questions 🙂
Even though I’ve revised the Piano Key Scarf Crochet Pattern, it still requires a lot of color changing, and for that reason I would not recommend it for beginners. I can tell you that you still need a ton of patience with the color changing and carrying the ends (even if you’re an expert).
Let me know if you need help with the new pattern!
By Rachel Choi – December 20th, 2009
8 Comments
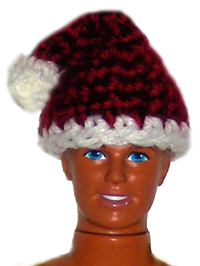
Crochet Pattern: Santa Claus Hat
Round 1: with red, ch 2, 4 sc in second ch from hook, place marker: 4 sc
Round 2: sc in each sc around: 4 sc
Round 3: 2 sc in each sc around: 8 sc
Round 4: sc in each sc around: 8 sc
Round 5: (2 sc in next sc, sc in next sc) around: 12 sc
Round 6: sc in each sc around: 12 sc
Round 7: (2 sc in next sc, sc in next 2 sc) around: 16 sc
Round 8 – 9: sc in each sc around: 16 sc
Round 10: sc in each sc around, changing to white in last sc made: 16 sc
Round 11: sc in each sc around, finish off: 16 sc
Pom Pom
Round 1: with white, ch 2, 4 sc in second ch from hook, place marker: 4 sc
Round 2: decrease 2 times, finish off: 2 sc
Using photo as a guide, sew pom pom to top of hat with a yarn needle.
If you would like a Santa Claus Hat that fits a baby, toddler, child, woman or a man, then see Crochet Pattern: Santa Claus Hat – 5 Sizes
By Rachel Choi – December 19th, 2009
4 Comments
The only reason I hesitate to give crocheted gifts is that I fear they would end up in someone’s closet collecting dust. This year, I decided to take a shot at making some of my gifts. Here are some of the precautions (mostly common sense) I’m taking so that my gifts don’t end up as useless stuff:
Ask them what they want. If I ask, they should give me some sort of clue, right? If you know the person well, you would probably already know if he/she would like what you’re making. But if not, it never hurts to ask.
Make what they ask for. Another no brainer! If they ask for it, there’s a good chance it is what they want. You can even take out all of your crochet patterns and let him/her pick from them.
Give hints. If you want your gift to be a surprise, try to give subtle hints as to what you are making to find out if he/she would like it.
Add a donation tag. I got this idea from a Crochet Spot reader! She advised to add a tag with information where the crocheted item can be donated if the gift was not to his/her liking. Just about any crocheted item can do donated somewhere! You can check out my crochet charity page for a list of places to donate to. So if all else fails, hopefully your recipient would donate your gift to a good cause.
I bet there are a bunch of other tips, that you have! Do you have a tip to share?
By Rachel Choi – December 17th, 2009
5 Comments
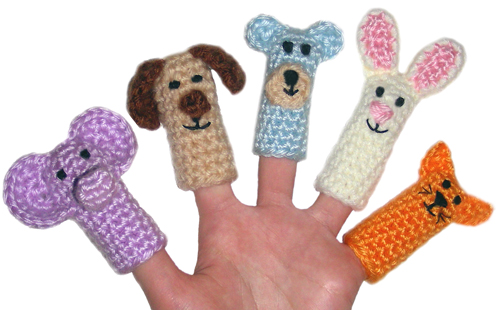
Get creative with these animal finger puppets! This set includes 5 crochet patterns: bear, bunny rabbit, cat, dog, and elephant. The animal finger puppets make fun toys for a child or even an adult. Some embroidery skills required to create the faces.
Download this pattern at the Crochet Spot Store.
(Free for monthly Premium Pattern Members)
|
Skill Level: |
 |
Finished Size: 2 1/2†(6.5 cm) tall – not including ears, 1 1/4†(3 cm) wide – at bottom when flat
Materials:
Medium Weight Yarn (small amount of each color)
Crochet Hook G (4.00 mm)
Yarn Needle
Embroidery needle and thread
|
 |
To download this pattern, visit the Crochet Spot Store.
By purchasing this pattern, you will be supporting Crochet Spot. Thanks in advance for all of your support!
Need help crocheting your finger puppets? Let me know as I’m always willing to help!
By Rachel Choi – December 16th, 2009
13 Comments
| Dishcloths can be fun, fast and environmentally friendly to make! But some of you out there may be hesitant to make them. I remember when I made my first crochet dishcloth, I was so scared to use it, because I thought that I would mess it up! Why would I work so hard to crochet something if I was going to wipe dishes and clean the counters with it? To my surprised the dishcloth worked great and I didn’t really mess it up, since I was able to toss it in the washing machine when I was done. Plus I could always make another if I wanted! |
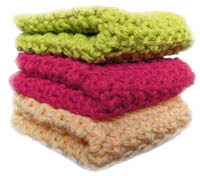 |
Now I find that I clean more than I used to, because I want to hold my crocheted dishcloth in my hand! I love using dishcloths for cleaning surfaces (counters, tables, etc). I find that they are great for picking up crumbs or scrubbing messes. Dishcloths aren’t just for dishes anymore. Depending on the pattern you use, they can be used for general clean around the house or even bathing.
One thing I don’t like about crocheted dishcloths is that they take a long time to dry. Most dishcloths are crocheted with 100% cotton yarn. If you haven’t noticed, it is pretty thick and absorbent. On a side note, you can make dishcloths with other yarns and materials.
If you are one of those people that doesn’t think crocheting a dishcloth is right for you, I think you should give it a try, at least one time! It’s okay if you end up not liking it, but what if you’re missing out on a good thing?
Here are some of my easy and simple dishcloth patterns for you to try:
Crochet Pattern: Dishcloth with Ridges
Crochet Pattern: All Purpose Mesh Dishcloth
Crochet Pattern: Surface Cleaning Cloth
Crochet Pattern: Facial Cleaning Pads
You can always ask me for help if you get stuck.
Are you a fan of crocheting dishcloths? Why or why not?
By Rachel Choi – December 15th, 2009
109 Comments
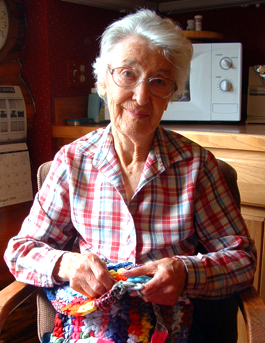
| Have you ever gotten tired of the stereotype that only old ladies in rocking chairs crochet?
Well, I am! Although I think most stereotypes have some truth behind it. Old ladies in rocking chairs do crochet, but I bet most of them learned when they were young. In my opinion, crocheting is a hobby that is timeless and once you learn it, it sticks with you for a long time. Maybe that is why lots of people think that it’s an old lady’s sport.
I learned to crochet sometime in middle school. I’m not exactly sure what my age was, but I’m going to guess I was around 10 years old, give or take a year or 2. I don’t think a 10 year old is considered an old lady.
|
 |
Now, lets prove this stereotype wrong once and for all! What age did you start to crochet?
By Rachel Choi – December 13th, 2009
3 Comments
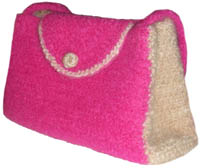
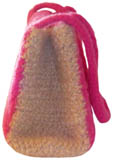
| The Casual Girl is designed to be over sized so that when it’s felted it shrinks to a cute, small purse. It’s the prefect size for carrying your essentials and great to use everyday on the go.
This pattern can be downloaded in the Crochet Spot Store.
(Free to download for all Premium Pattern Members)
|
Skill Level: |
 |
Finished Size
Not felted: 7″ (18 cm) tall, 11″ (28 cm) wide, 4″ (10 cm) deep
Felted: 6″ (15 cm) tall, 9 1/2″ (24 cm) wide, 3.5″ (9 cm) deep
Note: felted size may vary based on yarn used and felting method
|
|
Materials:
Medium Weight Yarn
Note: yarn must be 100% wool or other natural animal fiber in order to felt.
200 yards of main color
110 yards of contrasting color
Crochet hook I (5.50 mm)
Sewing needle
Sewing thread
|
 |
By Purchasing this pattern, you will be supporting Crochet Spot in purchasing supplied needed to create this site and its tutorials and patterns. Your support is greatly appreciated!
Please visit the Crochet Spot Store to download this pattern and to check out other patterns that you may enjoy!
By Rachel Choi – December 12th, 2009
14 Comments
Need a fast, yet cute bookmark? Well here’s your solution! This bookmark took me less than 5 minutes to make and I bet you can make it that fast too. Give this bookmark as a gift or use it yourself. The bookmark can be adjusted to so that you can make it longer or shorter as you see fit. Knowledge of how to change colors in crochet is require.

| Skill Level: |
 |
Finished Size: 1 1/2″ (4 cm) wide, 9″ (23 cm) long
Length of bookmark can be adjusted using the instructions within the pattern.
Materials:
Medium Weight Yarn (small amount of main color and green)
Crochet Hook H (5.00 mm)
|
 |
Gauge: not that important for this pattern.
Crochet Pattern: Bookmark
Round 1: with main color, ch 7, sc in first ch made, (ch 6, sc in same ch as previous sc) 4 times, changing to green in last sc made: 5 sc
Round 2: ch 40 or make a ch as long as you want your bookmark, finish off: 40 ch
For more fun bookmark patterns, please visit the Crochet Spot Store.
If you need help crocheting your bookmark, let me know and I’ll be glad to help!
By Rachel Choi – December 11th, 2009
4 Comments
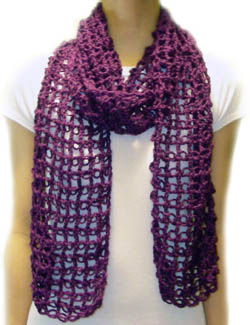
| Need a quick scarf to give as a gift or add to your outfit? This scarf is very easy and simple to crochet, yet still appears to be dainty, lacy and elegant.
Download this pattern by visiting the Crochet Spot Store. (Free to download for all Premium Pattern Members)
|
Skill Level: |
 |
Finished Size: 72†(183 cm) long, 8†(20 cm) wide
Size can be adjusted by using the instructions within the pattern. You can even make it big enough to be a shawl!
|
 |
Materials:
Medium Weight Yarn (approximately 300 yards)
Crochet Hook H (5.00 mm)
|
 |
By purchasing this pattern, you will be support Crochet Spot. Your support is truly appreciated! Please visit the Crochet Spot Store to download.
If you need help with crocheting your scarf, just let me know and I’ll be sure to help!
By Rachel Choi – December 10th, 2009
20 Comments
Decreasing while working with single crochet stitches is easy! Here is the link to the traditional method for making a single crochet decrease: How to Crochet: Single Crochet Decrease. The problem with the traditional method is that sometimes it leaves gaps and holes in your work. In this tutorial I will show you the “invisible decrease” method, which as the name implies is more invisible, and less noticeable.
You should not use this method all the time, as it works great in projects such as amigurumi, toys and stuffed animals, but for other projects you may want to use the traditional method for making a single crochet decrease. My rule of thumb is to always make a traditional decrease first, but if it is noticeable, then switch to an invisible decrease. I also find that making an invisible decrease takes longer than making a traditional decrease.
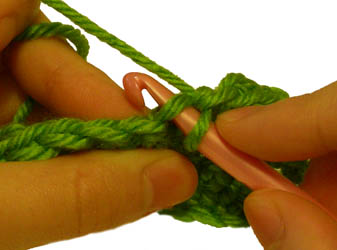
The invisible decrease is commonly abbreviated into the following steps: insert hook into front loops only of next 2 stitches, yarn over, pull through 2 loops on hook, yarn over, pull through final 2 loops on hook, counts as 1 single crochet.
The following is a step by step picture tutorial to help you visualize the steps. This tutorial is for both right and left handed people. For left handed pictures, roll your mouse over the image and it will change for you.
Start with a swatch to practice on. Below I used a square of single crochet stitches.
Insert your hook into the front loop only of the next stitch.
Click Here To Read More »


