By Rachel Choi – June 30th, 2009
16 Comments
You can visit the Crochet Spot Store at: //www.crochetspot.com/store/
Here is how to get started:
1. Create a Store Account
This is really important! By creating an account it will save all of the patterns you purchased so that you can download them whenever you want. If you accidentally lose your PDF file, you can just log in and download it again!
Please note that if you are a newsletter subscriber, the store account is different. So you will still need to create a store account. Creating the account is free and fast! Just fill out the big blue box at the upper right hand corner of the store page.
2. Buy Patterns, there are two options!
Premium Pattern Membership
You may decide to upgrade your account to a Premium Pattern Membership for $10/month. This will allow you to download all the patterns in the store, including all newly added patterns each month for as long as you are subscribed. Yes, there will be plenty of patterns added each month. To join the membership simply click the “Subscribe” button in the yellow box at the top of the store page when you log into your account.
One of the great things about the store is that everything works automatically! Once you pay you can automatically download patterns. You do NOT have to wait for me to email them to you like other stores do! Also be aware that the payment processing for the membership is automatic. If you sign up on the 1st of the month, the next payment will automatically be on the 1st of the next month.
There is no monthly obligation for being a member. You can cancel your membership at anytime by logging into your Paypal or other payment account. Note that upon canceling, you membership account will be closed automatically the same day and you will no long have access to all the patterns in the store.
Pay Per Pattern
If you are not apart of the Premium Pattern Membership you may pay the price listed for each pattern in the store. After logging into your newly created account you can add patterns to your shopping cart on the right hand side of your screen. Upon purchasing them you will be able to automatically download them! In addition, these patterns will be saved in your account in the “My Purchased Patterns” tab, so that you can re-download them later if you lose them.
General Information
- Payments are extremely secure since Paypal is used to process all payments. Paypal is the #1 most trusted payment processing service on the internet!
-
You can pay using PayPal, credit card or bank account. You do NOT need a Paypal account to make payments.
- All patterns in the store are my original designs and are written in U.S. terminology, just like all the patterns on this site.
- The goal of the store is to support Crochet Spot. Your support is greatly appreciated!
- If you ever need help with a pattern you purchased, let me know and I’ll be sure to help!
Visit the Crochet Spot Store to start shopping!
If you need help or have any questions about the store, feel free to let me know and I’ll be more than glad to help!
By Rachel Choi – June 29th, 2009
2 Comments
It’s been way too long and too much procrastination on my side, but finally it’s here!!! If you just stumbled upon my blog you might not know what I’m talking about, but in a nut shell, 3 months ago I said that I was going to open a store to help support funding all the supplies I need to keep making patterns for Crochet Spot and to get a new video camera so that I can start making video tutorials. So here I am today, so happy to finally have a Crochet Spot Store!!!
But don’t be scared!!! I still intend on making free patterns and tutorials. I just need a means to support doing it. The more money I can raise, the more I can make and share for free!
Any support that you can provide will be greatly appreciated! The store contains patterns that go above and beyond my previous patterns in quality. If you find some that you like, feel free to make a purchase knowing that your money will be used to support this site.
Also, if you like multiple patterns you may choose to opt-in on the “Premium Pattern Membership” to save you some money. The membership is $10 for all the patterns in the store. In addition, lots of new patterns will be added each month so you will also receive all the new patterns each month for $10 each month (or the equivalent in other currencies). Hopefully this membership option will make it easier to share patterns with you all without having you sell a kidney.
As I know from experience there is always someone that needs help more than I do. So to kick off the Grand Opening of the store, 50% of all Premium Pattern Memberships made during June 29th – July 31, 2009 will be donated to Project H.O.M.E. who’s goal is to end homelessness in Philadelphia (the city I’m from)! Feel free to check out their site. They do amazing work!!!
I love being able to share new and exciting things on this site with you all!!! All the money raised in the store will be a great help for me to continue to share what I love most: crochet!
So go on and check out the new store and let me know what you think!
By Rachel Choi – June 29th, 2009
56 Comments
| The sky is the limit to what these stars can be used for! Use it as an applique to embellish a bag, shirt, hat or blanket. Wear it as a pin for the forth of July. Or just stick a magnet to the back of it and put it on your fridge. Crocheting these stars are fast and you can even use scrap yarn to make them! |
 |
|
Skill Level: |
 |
Finished Size: 3″ (7.5 cm) diameter
To change the size of the stars, try using a smaller or bigger hook with different weights of yarn
Materials:
Medium Weight Yarn (small amount)
Crochet Hook I (5.50 mm)
|

|
Crochet Pattern: Star
Round 1: ch 3, 10 hdc in third ch from hook, sl st in top of beg ch: 10 hdc
Round 2: (ch 5, sl st in second ch from hook, sc in next ch, hdc in next ch, dc in next ch, skip 1 hdc, sl st in next hdc) 5 times, finish off
If you need help with crocheting the stars, let me know and I’ll be glad to help!
By Rachel Choi – June 26th, 2009
118 Comments
The foundation single crochet (fsc) is a stitch that can replace the foundation chain and the first row of single crochets in your work by completing them at the same time! This is also known as chain free crocheting!!!
But what’s the point?
- Often times crochet foundation chains are tighter than the rest of the work, but with fsc it will have the same tension without having to use a larger hook.
- With some yarns (such as boucle) it is hard to see the stitches in a traditional foundation chain, but with fsc you don’t have to crochet on a chain.
- Even if you prefer making a traditional foundation chain. You can use fsc to add extra stitches to your work without having to take the whole thing apart if you accidentally miss count the number of chains.
- It’s faster if you do it right! Being able to complete a chain and a row of single crochets at one time can save you time.
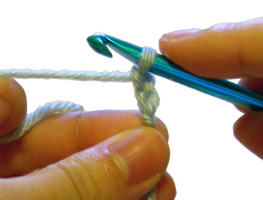
Here is a picture tutorial for making the foundation single crochet. This tutorial is for both right and left handed people. For left handed pictures, roll your mouse over the image and it will change for you.
Step 1: Start with a slip knot on your hook and chain 2.
Click Here To Read More »
By Rachel Choi – June 25th, 2009
114 Comments
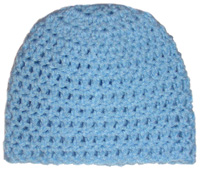
| Here is another hat/beanie that is great to make and donate to charities, hospitals or someone in need. It is designed to fit an average newborn head, and although baby heads may vary in size, there is extra length at the bottom of this hat to fold up and should stretch depending on the yarn you use. Feel free to change colors and get creative with this basic hat! |
 |
| Skill Level: |
 |
Finished Size: 5 1/2″ (14 cm) tall, 6″ (15 cm) wide when flat
Note: hat is meant to stretch
Materials:
Medium Weight Yarn (small amount)
Crochet Hook I (5.50 mm)
|
 |
Gauge: Rounds 1 – 3 in pattern creates a circle that is 3 3/4″ in diameter
Crochet Pattern: Newborn Baby Hat
Round 1: ch 4, 12 dc in forth ch from hook, sl st in top of beg ch: 12 dc
Round 2: ch 3, 2 dc in each dc around, sl st in top of beg ch-3: 24 dc
Round 3: ch 3, (2 dc in next dc, dc in next dc) around, sl st in top of beg ch-3: 36 dc
Round 4 – 10: ch 3, dc in each dc around, sl st in top of beg ch-3: 36 dc
Finish off.
By Rachel Choi – June 23rd, 2009
44 Comments
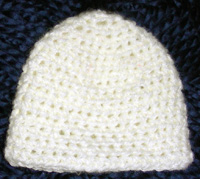
| Lots of people love to donate hats for preemies to charities and hospitals. Here is a basic, simple pattern that works up very fast. It leaves room for a lot of your own creativity and imagination. Feel free to change colors and decorate as you desire. Although preemies come in all sorts of tiny sizes, this hat should fit most, as the bottom can fold up to just the right length and depending on the type of yarn you use it can stretch. |
 |
| Skill Level: |
 |
Finished Size: 4″ (10 cm) tall, 4 1/2″ (11.5 cm) wide when flat
Materials:
Medium Weight Yarn (small amount)
Crochet Hook H (5.00 mm)
|
 |
Gauge: 8 hdc and 5 rows = 2″
Crochet Pattern: Preemie Hat
Round 1: ch 3, 6 hdc in third ch from hook, place marker: 6 hdc
Round 2: 2 hdc in each hdc around: 12 hdc
Round 3: (2 hdc in next hdc, hdc in next hdc) around: 18 hdc
Round 4: (2 hdc in next hdc, hdc in next 2 hdc) around: 24 hdc
Round 5: (2 hdc in next hdc, hdc in next 3 hdc) around: 30 hdc
Round 6: (2 hdc in next hdc, hdc in next 4 hdc) around: 36 hdc
Round 7 – 14: hdc in each hdc around: 36 hdc
Finish off.
If you need help with this preemie hat pattern, let me know and I’ll be glad to help!
By Rachel Choi – June 21st, 2009
16 Comments
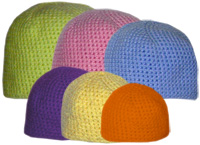
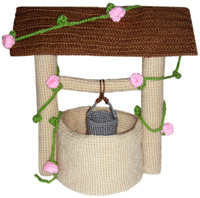
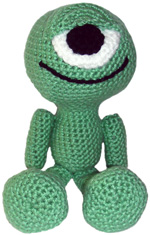
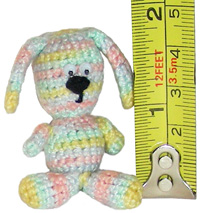
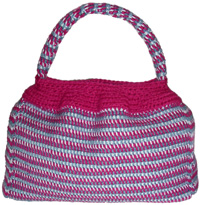
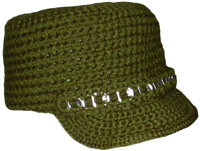
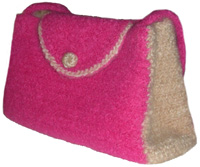
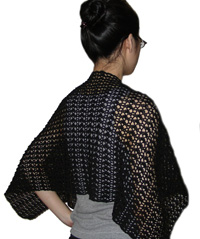
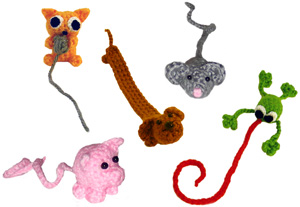
Woohoo!!! These are photos of some of the things that I’ve been working on for next week’s opening of the Crochet Spot Store on Monday June 29th. Woohoo!!! I’m so excited! I’ve been wanting to share these with you all for a while.
Also, I’m making a “Premium Pattern Membership” option that allows you to get all the patterns in the store for just $10 a month, which includes all the new patterns that I’ll be adding each month. This saves you money while giving you access to all the patterns in the store. Non Premium Pattern Members will still have the ability to purchase patterns individually as they desire.
This store will help to support running Crochet Spot and a portion of the earnings during the Grand Opening will be donated to charity!
Let me know what you think!
By Rachel Choi – June 20th, 2009
6 Comments
I bought some fun fur yarn on clearance not knowing exactly what to make with it. It turns out I made this fun little monster! The pattern it’s self is fairly easy, but if you’ve never worked with fun fur before, I would suggest playing around with it first before trying to make anything. Often times it can be hard to see the stitches in your work so try and push the “eyelashes” of the yarn back to help get a good visual of where to stick you hook. Other than that, have fun making this goofy monster!
|
Skill Level: |
 |
|
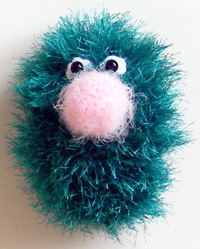 |
Note: if this is your first time working with fun fur yarn, it may be difficult to see the stitches in your work. It is recommended to practice using this type of yarn before attempting pattern.
Finished Size: 5 1/2″ (14 cm) tall, 3 1/2″ (9 cm) wide
Click Here To Read More »
By Rachel Choi – June 19th, 2009
22 Comments
I was surfing the web and look what I came across…
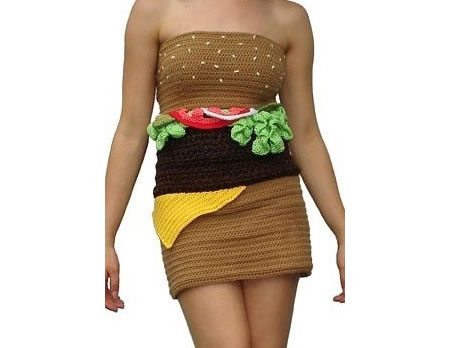
Yes, it’s a hamburger dress! I think it’s funny, cute, creative and a bit silly all at the same time. I just had to share this with you since it gave me a good smile.
What do you think?
By Rachel Choi – June 18th, 2009
Be the first to comment
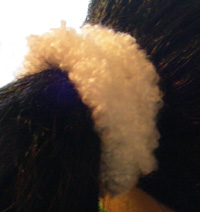
| The boucle hair tie scrunchie is very easy and fast to make! Sometimes when people hear the term “boucle yarn” they grab their crochet hook and run away. Why? Because crocheting with boucle makes it very hard to see the stitches. But for this pattern, that’s a good thing! You won’t need to hunt for any stitches here!
With this pattern you will be making very cost efficient, cute and not over the top crazy hair ties! The boucle yarn gives it a very soft feel hiding an elastic rubber band underneath so that it won’t pull your hair. The simplicity of the hair tie makes it great to wear everyday! |
 |
| Skill Level: |
 |
Finished Size: Will depend on the rubber band size
Materials:
Medium Weight Boucle Yarn (small amount)
Crochet Hook I (5.50 mm)
Rubber Band
|
 |
Crochet Pattern: Hair Tie Scrunchie
Round 1: sc in rubber band until the rubber band is fully covered (the number of sc will vary based on rubber band size)
Round 2: sc around in rubber band overlapping stitches made in previous round, sl st and finish off.
If you need help crocheting this hair tie scrunchie, let me know and I’ll be glad to help!


