By Rachel Choi – April 23rd, 2009
155 Comments
If you are new to crochet, here are some tips on how to change colors in your crochet work. The basic idea is to simply let go of the yarn you are currently using and pick up the new yarn that you want to use. Sounds easy enough, right? Let’s explore some examples!
This tutorial is for both right and left handed people. For left handed pictures, roll your mouse over the image and it will change for you.
Changing Colors In a Chain
Suppose you want to change the color in the middle of a chain. Just let go of the color your are using and pick up the new yarn and hold it against your work and start chaining with it.
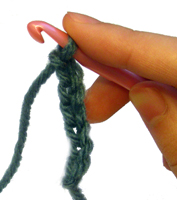
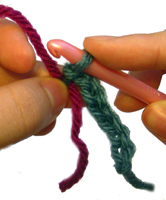
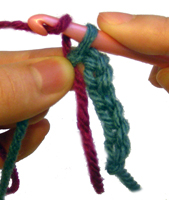
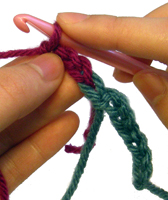
Changing Colors in Crochet Stitches
Sometimes you may want to change colors after a certain crochet stitch. You change colors the same way, but you do it during the last step of a stitch. Here is an example using single crochet.
Click Here To Read More »
By Rachel Choi – April 22nd, 2009
30 Comments
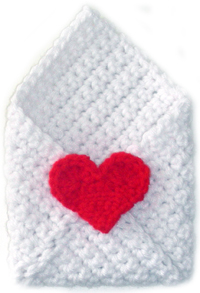
Here is a great beginner crochet pattern of a cute little envelope. You can use this envelope to package gifts or even use it as a change purse. This pattern is very simple to alter if you desire to make bigger or small envelopes. The basic idea is to crochet a perfect square. Then fold the square into the shape of an envelope and embellish it as you desire. Just follow the instructions below to get started!
| Skill Level: |
 |
Finished Size: 4 ¼†(11 cm) wide, 4 ¼†(11 cm) tall when closed
Note: To change the finished size of your envelope, follow the instructions within the pattern.
|
 |
Materials:
Medium Weight Yarn
Crochet Hook I (5.5 mm)
Yarn Needle
Scissors
|
 |
Need help understanding the abbreviations? Check out the crochet abbreviation chart.
Crochet Pattern: Envelope
Start by chaining 20 or a chain that is the length of the diagonal (measuring from upper right to lower left hand corner) of the envelope desired
Row 1: ch 1, sc in second ch from hook and in each ch across: 20 sc
Row 2: ch 1, turn, sc in each sc across: 20 sc
Repeat row 2 twenty-three times or repeat until your work is the shape of a square, then finish off.
Fold three corners to the center of the square and sew envelope with a yarn needle. The heart used in the photo is a previous Crochet Spot pattern: Crochet Heart Fridgie
If you need help with crocheting an envelope, just leave a comment and I would be glad to help!
By Rachel Choi – April 21st, 2009
13 Comments
I was surfing the crochet forums and found this video that I thought you all would like to watch. They focus more on knitting but the results correspond to crocheting as well. In fact all needlework related to knitting and crocheting is found to be good for your health. This probably isn’t a huge surprise for any of us, but at least now there is scientific evidence to support what we all knew. The repetitive action of crocheting helps manage stress, pain, and depression. It can also strengthen the body’s immune system and decrease the chances of memory loss by 50%. For more details, here is the video from CBS news!
By Rachel Choi – April 20th, 2009
7 Comments
| I’ve gotten quite a few request to make crochet video tutorials. I think that crochet videos will be a great addition to Crochet Spot! Even though there are some on the net already there is always room for more.
My one problem is that I don’t have a video camera or any money to purchase one at this time. So I decided to raise some funds by selling a few crochet patterns on Etsy or even make a “Store” page right here on Crochet Spot. Don’t worry, I still plan to have great patterns for free too. Right now I’m trying to come up with some ideas for sell-able patterns. I’ll let you all know how it comes along and if you have any suggestions that would be awesome! |
 |
I can’t wait to get that video camera (and maybe some yarn) and make something with it! This is going to be very exciting!!! Time to start saving some money.
By Rachel Choi – April 19th, 2009
42 Comments
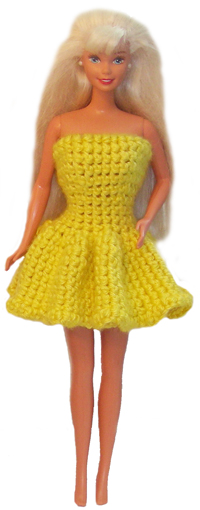
I pulled my Barbie doll out from my basement yesterday and remembered how much I loved dressing her up. Here is a very simple dress that just crocheted up for her. To make this dress, start out with a rubber band that fits snugly above the doll’s bust. This will help hold the dress up. Then single crochet inside the ring of the rubber band to start the dress. The crochet pattern below will walk you through each round of the dress as you make pretty ruffles for the bottom.
|
Skill Level: |

|
Finished Size: 4 ½†(11.5 cm) long, approximately 4†(10 cm) wide at bottom
Materials:
Medium Weight Yarn
Crochet Hook F (3.75 mm)
Rubber Band that fits snugly above doll’s bust
|
 |
Crochet Pattern: Dress
Round 1: 30 sc in rubber band, place marker: 30 sc
Note: Rubber band should now be completely covered
Round 2 – 5: sc in each sc around: 30 sc
Round 6: (decrease, sc in next 4 sc) around: 25 sc
Round 7: (decrease, sc in next 3 sc) around: 20 sc
Round 8 – 10: sc in each sc around: 20 sc
Round 11: 2 sc in each sc around: 40 sc
Round 12: 2 sc in each sc around: 80 sc
Round 13 – 19: sc in each sc around: 80 sc
Round 20: 2 sc in each sc around, sl st in next sc, finish off: 160 sc
If you need help with this pattern, let me know and I would be glad to help!
|
 |
By Rachel Choi – April 18th, 2009
37 Comments
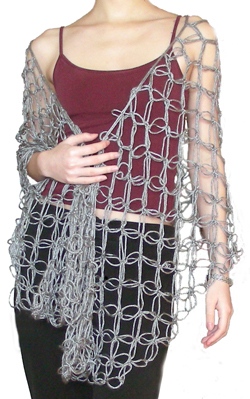
I love knot stitches! They are so easy and fast to make. This shawl is made completely with knot stitches that each measure 2 inches long. Of course you can make the knots stitches any length that you desire. To see what smaller knot stitches look like check out my knot stitch capelet that I made a while ago. The series of knots give a beautiful lacey and light look. If you don’t know how to crochet knot stitches yet, you can use the knot stitch tutorial. This shawl can be crocheted by beginners if you are just learning to do knot stitches.
| Skill Level: |
 |
Finished Size: 72†(183 cm) wide, 17†(43 cm) tall
Note: You may adjust the height and width, by following the instructions within the pattern
|
 |
Materials:
Medium Weight Yarn (approximately 200 yards)
Crochet Hook I (5.5 mm)
|
 |
Gauge: each knot stitch is 2†(5 cm) long
Crochet Pattern: Shawl
Start by making a chain of 36 knots or as many knots to form the desired width of the shawl
Row 1: make 2 knots, sl st in third knot from hook, (make 2 knots, sl st in next knot) across: 72 knots, 36 sl sts
Row 2: make 1 knot, turn, sl st in first knot, (make 2 knots, skip 1 knot, sl st in next knot) across: 71 knots, 35 sl sts
Repeat row 2 ten times or until shawl is the height that you want it. Note that for each row you do, there is 1 less knot and 1 less sl st than the previous row.
If you need help with crocheting this shawl, don’t worry! Just leave a comment and I would be glad to help.
This pattern was requested by a Crochet Spot Newsletter Subscriber! If you would like to receive the free newsletter too, just fill out the orange box at the top of this page.
By Rachel Choi – April 17th, 2009
51 Comments
| Spheres are the universal shape for balls, amigurumi, stuffed animal parts and plenty of other things that you may want to crochet. There are many ways that you can crochet a sphere; here is a tutorial for one of them. You are going to start off by crocheting a circle, then you are going to make the middle of the sphere and decrease it to finish. Below is a pattern for a very small sphere. You can increase it by following the notes to increase the initial circle and increase the number of rounds made for the middle. |
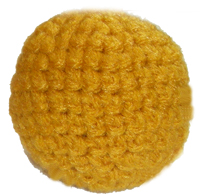 |
Finished Size: 2†(5 cm) diameter, you may increase this sphere to make it the size you prefer
Materials:
Medium Weight Yarn
Crochet Hook F (3.75 mm)
Polyester Fiberfill
Crochet Pattern: Sphere
Round 1: ch 2, 6 sc in second ch from hook, place marker: 6 sc
Round 2: 2 sc in each sc around: 12 sc
Round 3: (2 sc in next sc, sc in next sc) around: 18 sc
Round 4: (2 sc in next sc, sc in next 2 sc) around: 24 sc
Round 5: (2 sc in next sc, sc in next 3 sc) around: 30 sc
Note: to increase the size of the sphere, continue to increase this circle.
Round 6 – 9: sc in each sc around: 30 sc
Note: rounds 6 – 9 make the body of the sphere. In general, the number of rounds to make the body should be the number of rounds completed thus far minus one. For example, there are five rounds before round 6 in this pattern. Therefore, there are four repetitions of the above line. The amount of repetitions for a different sized sphere also depends on a crocheter’s style. Some crochet tighter than others.
Round 10: (decrease, sc in next 3 sc) around: 24 sc
Round 11: (decrease, sc in next 2 sc) around: 18 sc
Round 12: (decrease, sc in next sc) around: 12 sc
Fill sphere with fiberfill.
Round 13: decrease around: 6 sc
Note: if you increased the size of the sphere you will also need to decrease the sphere as much as you increased it by.
If you need help crocheting this sphere, just leave a comment and I would be glad to help!
By Rachel Choi – April 16th, 2009
20 Comments
After writing the post about the young women decorating the city with crochet, Patrice (a Crochet Spot reader) sent me a related article about a man who hangs his crocheted hats around the city.
Ernie (not really his real name) taught himself to crochet four months ago. Three times a week he crochets wool hats and hangs them up in the poorest neighborhoods of Grand Rapids, Michigan. It is even said that his hats get disbursed to some of Grand Rapids’ “most unapproachable residents”.
Here is a hat hanging on a tree waiting for someone to take it!
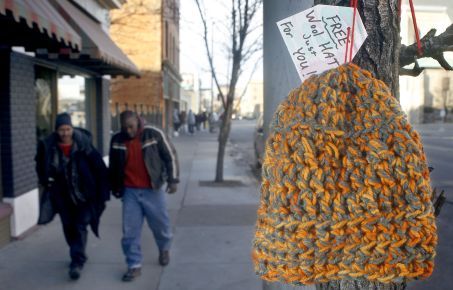
Each hat is hung with a friendly tag, which says something like:
“Take me, I’m free!”
“Free to a good head.”
“You deserve this.”
“Enjoy!”
“Smile!”
So far Ernie has hung 30 to 35 hats and counting. He doesn’t want credit or publicity from his actions. All he wants is to help people keep warm, no matter who they are.
Here is a picture of Ernie hanging a hat.

I believe that Ernie’s actions is something that everyday people can do. In fact, Ernie is an everyday person that takes an extra step to help others. In Ernie’s words, “I just think everybody should be treated as a human being. And if everybody did just one little thing, it would improve the lives of so many people.”
I agree!
Source: The Grand Rapids Press
By Rachel Choi – April 15th, 2009
4 Comments
I recently read about the “Hyperbolic Crochet Coral Reef Project” that has just opened to the public for viewing at The Gallery at Scottsdale Civic Center Library. It is a fabulous collection of crocheted coral reefs from thousands of volunteers around the world! Not only is a great accomplishment, huge attraction and super stunning to look at, it has a serious message behind it that we are losing natural coral reefs. This project is inspired by Margaret and Christine Werthheim, who are also co-creators of the “Hyperbolic Crochet Coral Reef Project.”
Here are some photos of the exhibit, which I think are just stunning!
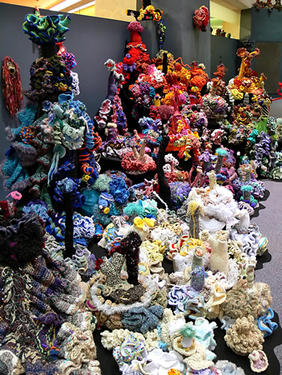 |
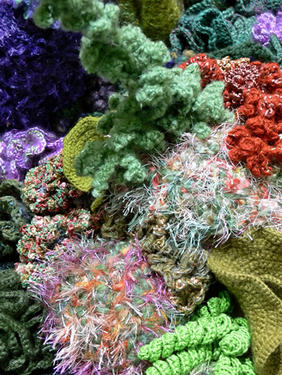 |
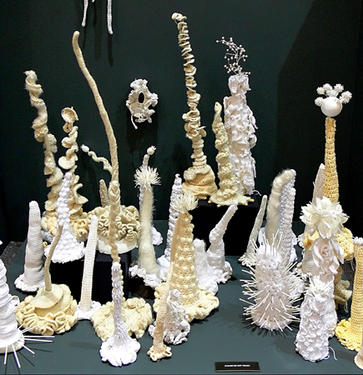
|
| Photos by Kathleen Vanesian |
I can definitely see that they were crocheted, but the way they resemble coral reefs so much is just amazing. This work isn’t just beautiful but it also has meaning. I wish I had the chance to see it in person!
By Rachel Choi – April 14th, 2009
14 Comments
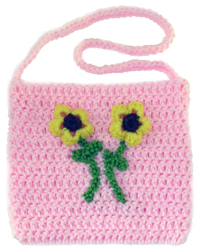
Brighten up a child’s day with this fun and flowery shoulder bag! It’s great for toting around some toys or playing dress up with. The shoulder bag is easy to crochet. You can even use scrap yarn for the flower appliqués. Just follow the crochet pattern below to make a great gift for a little girl.
|
Skill Level: |
 |
Finished Size: 8†(20 cm) wide, 7†(18 cm) tall, not including strap
|
 |
Click Here To Read More »


