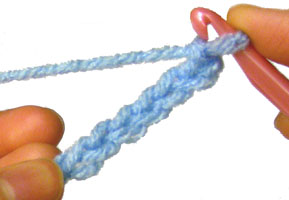
How to Crochet: Tunisian Simple Stitch (TSS)

By Rachel Choi – April 2nd, 2009 127 Comments

This tutorial is for both right and left handed people. For left handed pictures, roll your mouse over the image and it will change for you.

Tunisian stitches also known as afghan stitches, create a very elegant basket weaved look. Tunisian stitches are like a cross between crocheting and knitting because in crocheting these stitches it involves leaving loops on your hook when you are crocheting forward and then removing them when you crochet in reverse. Don’t let this confuse you! This tutorial will walk you through creating a small crocheted piece using Tunisian simple stitch.

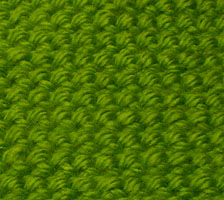
Here is what Tunisian simple stitches look like:

Front
Back

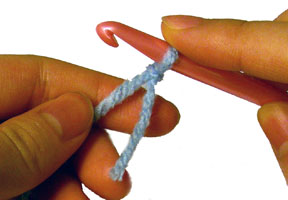
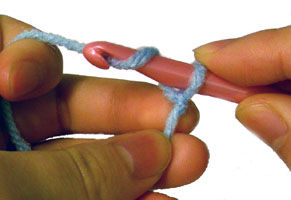
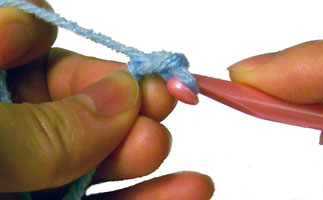
Below is a step by step tutorial that will slowly walk you through crocheting a few rows of Tunisian simple stitches. If you need help with any of the steps, don’t be afraid to ask by leaving a comment on this post!
Click Here To Read More »

April Fool’s Crochet Pattern: Spaghetti

By Rachel Choi – April 1st, 2009 13 Comments
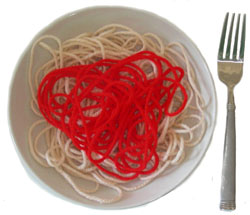
Who doesn’t love a nice warm bowl of homemade spaghetti? Well here is a crochet pattern to knock the socks off of anyone starving for a bowl. Whether you’re an avid cooker or a terrible cooker, you are guaranteed to make a spectacular spaghetti dish with these easy and fast not so crochet instructions.

Skill Level: crochet skill level easy
spaghetti

Finished Size: enough to satisfy your appetite

Materials:
Medium Weight Yarn (Beige, Red)
Index finger and thumb (or equivalent fingers as necessary)
Scissors
1 Bowl
1 Fork
1 person to play a trick on

Special Crochet Stitch: The Finger Grab
Place the indicated yarn between index finger and thumb.
Apply ample pressure to squeeze strand of yarn, such that it does not slip from between fingers.
Pull yarn the indicated distance then let go.
Note: the finger grab may be tricky for some, just remember that practice makes perfect!

Gauge: each finger grab should be 12” (30.5 cm) long

Crochet Pattern: Spaghetti
Start by placing bowl under work. By finishing off each finger grab, it should land in the bowl.
Row 1 – 50: With beige, finger grab, finish off.

Sauce
Row 1 – 10: With red, finger grab, finish off.

If you need help with crocheting spaghetti, no worries just leave a comment!

Free Crochet Pattern: Rainbow Coaster

By Rachel Choi – March 29th, 2009 5 Comments

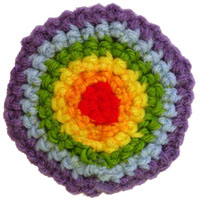
Inspired by the rainbow beanie that I made for my cousin the other day, I decided to make a quick rainbow coaster. I love the colors of the rainbow and I think that Mother Nature is so great at picking out colors that match! Here is the very simple, easy and fast pattern for you to crochet the rainbow coaster.

Skill Level: crochet skill 
level easy
rainbow-coaster

Finished Size: 3” (8 cm) diameter

Materials:
Medium Weight Yarn (Red, Orange, Yellow, Green, Blue, Purple)
Crochet Hook H (5.00 mm)

Need help understanding the abbreviations? Check out the crochet abbreviation chart.

Crochet Pattern: Rainbow Coaster
Round 1: with red, ch 2, 6 sc in second ch from hook, changing to orange in last sc made: 6 sc
Round 2: 2 sc in each sc around, changing to yellow in last sc made: 12 sc
Round 3: (2 sc in next sc, sc in next sc) around, changing to green in last sc made: 18 sc
Round 4: (2 sc in next sc, sc in next 2 sc) around, changing to blue in last sc made: 24 sc
Round 5: (2 sc in next sc, sc in next 3 sc) around, changing to purple in last sc made: 30 sc
Round 6: (2 sc in next sc, sc in next 4 sc) around, sl st in next sc, finish off: 36 sc

If you need help with this pattern, just let me know by leaving a comment!

Tunisian Crochet Adventure

By Rachel Choi – March 28th, 2009 21 Comments

Today I learned some Tunisian crochet!!!

I’ve heard great things about how wonderful it is to crochet Tunisian crochet and I got around to trying it for the first time. It was so much easier than I thought it was going to be. It reminds me of knitting since I have to leave loops on the hook when I work back and forth. For those who aren’t big fans of knitting like me, no worries it is definitely better than knitting and still faster, hehe.

I started my first crochet piece in Tunisian crochet, which is a neck warmer. I’ll post it as soon as I’m done. But first I have to run to the store and find a nice pair of buttons to match. I’ll also add a nice tutorial for Tunisian crochet to go along with it for anyone who hasn’t tried it yet. I’m so happy, because now I can make patterns using Tunisian crochet! Woohoo!

Any Tunisian crocheters out there? What do you like to make in Tunisian crochet?

Free Crochet Pattern: Bunny Egg

By Rachel Choi – March 27th, 2009 12 Comments
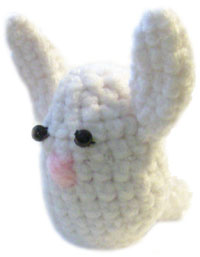
Here is a goofy, yet still cute bunny that is made using the crochet egg pattern. All that is added is a pair of ears, a tail and face. The bunny egg makes a great little gift for Easter or for someone who loves bunnies and eggs. This project is perfect for using your scarp yarn! Below are the instructions for you to follow.

Skill Level: crochet skill level easy

Finished Size: 3” (8 cm) tall, 2 1/2” (6.5cm) wide ear to ear

crochet bunny-egg

Materials:
Medium Weight Yarn
Crochet Hook F (3.75 mm)
Polyester Fiberfill
2 Beads
Yarn Needle
Sewing needle
Scissors

Gauge: not too important, just crochet tight enough so that the filling does not come out the bunny

Need help understanding the abbreviations? Check out the crochet abbreviation chart.

Crochet Pattern: Bunny Egg
Round 1: ch 2, 6 sc in second ch from hook, place marker: 6 sc
Round 2: (2 sc in next sc, sc in next sc) around: 9 sc
Round 3: (2 sc in next sc, sc in next 2 sc) around: 12 sc
Round 4: (2 sc in next sc, sc in next 3 sc) around: 15 sc
Round 5: (2 sc in next sc, sc in next 3 sc) 3 times, 2 sc in next sc, sc in next 2 sc: 19 sc
Round 6: sc in each sc around: 19 sc
Round 7: (2 sc in next sc, sc in next 6 sc) 2 times, 2 sc in next sc, sc in next 4 sc: 22 sc
Round 8 – 10: sc in each sc around: 22 sc
Round 11: (decrease, sc in next 6 sc) 2 times, decrease, sc in next 4 sc: 19 sc
Note: Fill egg with fiberfill while decreasing.
Round 12: (decrease, sc in next 2 sc) 4 times, decrease, sc in next sc: 14 sc
Round 13: decrease in each sc around: 7 sc
Finish off, weaving egg shut.

Ears (make 2)
Round 1: ch 2, 4 sc in second ch from hook, place marker: 4 sc
Round 2: (2 sc in next sc, sc in next sc) around: 6 sc
Round 3: (2 sc in next sc, sc in next 2 sc) around: 8 sc
Round 4 – 5: sc in each sc around: 8 sc
Round 6: (decrease, sc in next 2 sc) around, sl st in next sc, finish off: 6 sc

Using photo as a guide, sew ears to bunny with a yarn needle.

Tail
Create a small pom pom and sew to back of bunny. Here is the “How to Make Pom Poms” tutorial if you need it.

Sew on face as desired.

This pattern was requested by a Crochet Spot Newsletter Subscriber! If you would like to receive the free newsletter too, just fill out the orange box at the top of this page.

If you need help with this pattern, just leave a comment!
Free Crochet Pattern: Egg

By Rachel Choi – March 26th, 2009 33 Comments

Here is an egg, which is good for Easter or to put in your egg carton to replace the ones you’ve eaten. You can even make this egg, put arms and legs on it and make it dance around. Whatever you choose to do with this real size egg, it is super easy to crochet, so enjoy!

Skill Level: crochet skill level easy

Finished Size: 2” (5 cm) tall, 1 ½” (4 cm) wide, approximately the size of a regular egg

egg
Materials:
Medium Weight Yarn
Crochet Hook F (3.75 mm)
Polyester Fiberfill
crochet yarn size 4

Gauge: just make sure you crochet tight, so that the filling will not come out

Need help understanding the abbreviations? Check out the crochet abbreviation chart.

Crochet Pattern: Egg
Round 1: ch 2, 6 sc in second ch from hook, place marker: 6 sc
Round 2: (2 sc in next sc, sc in next sc) around: 9 sc
Round 3: (2 sc in next sc, sc in next 2 sc) around: 12 sc
Round 4: (2 sc in next sc, sc in next 3 sc) around: 15 sc
Round 5: (2 sc in next sc, sc in next 3 sc) 3 times, 2 sc in next sc, sc in next 2 sc: 19 sc
Round 6: sc in each sc around: 19 sc
Round 7: (2 sc in next sc, sc in next 6 sc) 2 times, 2 sc in next sc, sc in next 4 sc: 22 sc
Round 8 – 10: sc in each sc around: 22 sc
Round 11: (decrease, sc in next 6 sc) 2 times, decrease, sc in next 4 sc: 19 sc
Note: Fill egg with fiberfill while decreasing.
Round 12: (decrease, sc in next 2 sc) 4 times, decrease, sc in next sc: 14 sc
Round 13: decrease in each sc around: 7 sc
Finish off, weaving egg shut.

This pattern was requested by a Crochet Spot Newsletter Subscriber! If you would like to receive the free newsletter too, just fill out the orange box at the top of this page.

If you need help with this pattern, no worries just let me know by leaving a comment!

The Making of an Egg

By Rachel Choi – March 26th, 2009 6 Comments

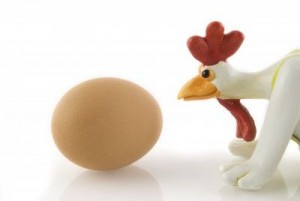
I never thought it would be so hard to come up with a pattern for an egg. I have to admit that this crochet egg pattern is one of the hardest, if not the hardest pattern I have created thus far. Not to scare anyone, the egg pattern is very easy to crochet when you follow the directions. It was just hard to make the directions. I must have frogged it at least 5 time. Each time it turned out looking like a rock or some arbitrary lump of something not egg-ish. chicken-or-egg

So I stared and stared at the egg I took out from my refrigerator, wondering why I couldn’t get the egg shape right. Finally, I decided to crochet it from the top down, instead of the bottom up. Then tada! An egg was born.

So what came first, the chicken or the egg?
Well obviously the egg, because I haven’t crocheted the chicken yet, LOL!

Thanks for reading my ramblings!

Free Crochet Pattern: Easy Basket

By Rachel Choi – March 25th, 2009 62 Comments
In the spirit of Easter, or any other occasion that may require a basket, here is a very fast and easy crochet basket pattern to follow. This pattern can easily be adjusted to make the basket larger or smaller than the noted finished size. Just follow the crochet tips at the bottom of this pattern to alter your basket as needed.

Skill Level: crochet skill 
level easy

Finished Size: 3 ¼” (8 cm) diameter, 4 ½” (11.5 cm) tall
Note: for a different finished size, follow the instructions to alter this basket

crochet basket
Materials:
Medium Weight Yarn
Crochet Hook H (5.00 mm)
Yarn Needle
crochet yarn size 4

Gauge: not really important

Need help understanding the abbreviations? Check out the crochet abbreviation chart.

Crochet Pattern: Basket
Note: stitches are crocheted in the back loop only unless otherwise indicated.
Round 1: ch 3, 12 dc in third ch from hook, sl st in ch-3: 12 dc
Round 2: ch 2, 2 dc in each dc around, sl st in ch-2: 24 dc
Round 3: ch 2, (2 dc in next dc, dc in next dc) around, sl st in ch-2: 36 dc
Round 4: ch 2, dc in both loops of each dc around, sl st in ch-2: 36 dc
Round 5 – 7: ch 2, dc in each dc around, sl st in ch-2: 36 dc
Finish off.

Handle
Start by chaining 30, or length of desired handle
Row 1: ch 2, dc in third ch from hook and in each ch across: 30 dc
Finish off.

Using photo as a guide, sew handle to basket with yarn needle.

Crochet Tips:

  • To increase height of the basket, repeat the last line in the pattern until the desired height is reached.
  • To increase the width of the basket add the following lines after round 3 then continue with the rest of the pattern:
    Round 4: ch 2, (2 dc in next dc, dc in next 2 dc) around, sl st in ch-2: 48 dc
    Round 5: ch 2, (2 dc in next dc, dc in next 3 dc) around, sl st in ch-2: 60 dc
    Round 6: ch 2, (2 dc in next dc, dc in next 4 dc) around, sl st in ch-2: 72 dc
    …

If you need help with this pattern, just let me know by leaving a comment!

All Crocheted Out!

By Rachel Choi – March 24th, 2009 58 Comments

Have you ever had one of those times where you crochet, crochet and crochet then you’re so tired of crocheting you just want to stop but for some reason you just keep doing it. Okay, I don’t know if that really makes sense, but that’s the feeling I got this weekend. Maybe I’m just addicted to crocheting, lol.

Anyway, I decided to make a new category here on Crochet Spot called “Rachel’s Ramblings” and as you can see this is my first post in it. I think that being able to write about crochet or other random stuff would be a fun thing to do besides being a pattern making robot, not that making patterns isn’t fun. This will definitely help me from getting all crocheted out! So I hope you all will enjoy reading some rambling as much as I will enjoy writing some!

This is my solution to solving my “All Crocheted Out” syndrome. What do you do when you are all crocheted out?

How to Crochet: Chain (ch)

By Rachel Choi – March 22nd, 2009 38 Comments

This tutorial is for both right and left handed people. For left handed pictures, roll your mouse over the image and it will change for you.

Chain stitches are the foundation of everything that is crocheted. Learning how to crochet a chain stitch is really easy and is one of the first things that anyone learning to crochet should do. Simply follow the instructions below to learn how to crochet chain stitches.

Step 1: Always start by making a slip knot and place the knot on your hook.


Step 2: Yarn over (wrap the yarn over your hook).


Step 3: Pull the strand of yarn through the loop.


Congrats! You just made one chain! Continue to yarn over (yo) and pull the strand of yarn through the loop to create more chains, repeating steps 2 and 3. Here is what a series of chains look like.


If you decide to follow a crochet pattern, it will tell you how many chains to make. Note that you should always have at least one loop on your hook the whole time. From time to time you may have to count the number of chains you made. When you are counting the number of chains you made, do not count the chain on your hook.

Was this helpful? Do you still need more help? Leave a comment to let me know!