How to Make Pom Poms

By Rachel Choi – February 17th, 2009 38 Comments

Pom poms are easy and fun to make. All you need is yarn and scissors. Follow the four simple steps below to learn how to make a pom pom. In this example, the finished pom pom is 3 inches (8 cm) in diameter.

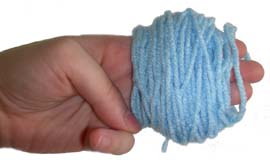
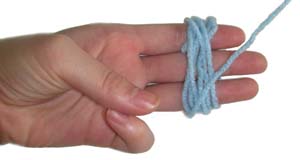
Step 1: Continuously wrap yarn around 3 fingers, about 100 times around

yarn pom-pom  yarn pom-pom

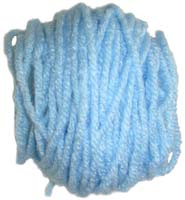
Step 2: Gently slide bundle of yarn off of hand

yarn pom-pom

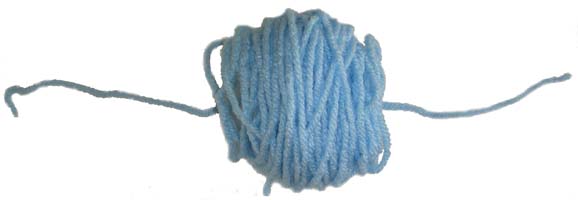
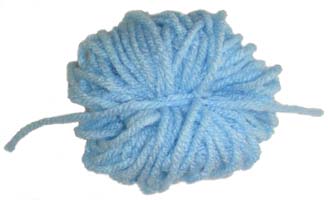
Step 3: With same colored yarn, tie bundle tightly together in the middle

yarn pom-pom

yarn pom-pom

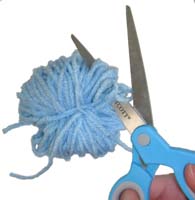
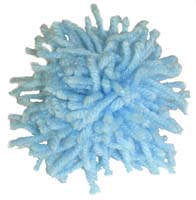
Step 4: Cut all the loops on the yarn, then trim and shape as desired

yarn pom-pom yarn pom-pom


To make a bigger or small pom pom, use more or less fingers in step one, as needed. To change the fullness of the pom pom, change the number of times the yarn is wrapped around your fingers.

Pom poms go great with hats and beanies. To add a pom pom to your hat or beanie, simple use a yarn needle and sew your pom pom on.

If you need help making a pom pom, just leave a comment and I will be sure to help!

How to Crochet a Scarf

By Rachel Choi – February 17th, 2009 2 Comments
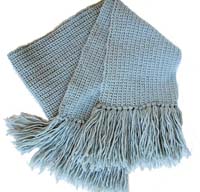
Learning how to crochet a scarf is so simple. There are tons and tons of crochet patterns on the internet and in books that you can follow or you can always make up your own pattern. Once you know the basics of crocheting, it will be very easy for you to crochet any scarf that you desire.

The basic instructions for crocheting a scarf are to start out with a foundation chain that is as long as the width of the scarf you want to crochet. Using the foundation chain, you can continue to make rows of crocheted stitches, using any crochet stitch that you like.

crochet scarf

Each row you add will make your scarf longer, so just keep adding rows until it is the perfect length for you. When you determine that you added enough rows, simple cut your yarn and tie the end, so your scarf does not unravel. To finish off, weave the end of the yarn as neatly as possible into your scarf.

There is an infinite number of ways you can crochet a scarf. Here is a very basic, easy to follow pattern for beginners.

Crochet Pattern: Scarf
Row 1: ch 31, sc in second ch from hook, sc in each ch across
Row 2: ch 1, turn, sc in each sc across
Repeat row 2 until the scarf is as long as you desire. Finish off the scarf by cutting the yarn and weaving the end into your scarf.

Need help understanding the abbreviations? Check out the crochet abbreviation chart.

To make a different scarf, try using other crochet stitches or a variation of crochet stitches. You can also create patterns by changing yarn colors or adding tassels.

If you need help on how to crochet a scarf, just leave a comment with your question!

Crochet Pattern: Piano Key Scarf

By Rachel Choi – February 16th, 2009 160 Comments

EDIT: This pattern was updated on December 21, 2009. The pattern as written now, uses a larger hook size (to solve the stiffness problem) and includes tips for changing colors and carrying loose ends as you work so that you will have only ONE loose end to tuck in after you complete your scarf. This pattern is intended for people with experience and lots of patience as a lot of color changes are required. This pattern is not recommended for beginners.

Please read this pattern fully and carefully before beginning. You will be required to repeat certain rows to obtain the piano key layout. Be sure to only repeat the rows indicated when instructed to.

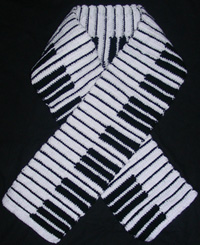
crochet piano-scarf

The piano key scarf is perfect for any piano lover. Take the piano anywhere and everywhere you go. This crocheted scarf is great for men, boys, ladies and girls. No matter who you are, this scarf is bound to keep you warm and fashionably in style. Just whip out your yarn and crochet hook and follow the crochet pattern below.

Skill Level:

Finished Size: 5’’ (13 cm) wide, and as long as you want it to be (follow the instructions within the pattern to adjust the length)

crochet piano-scarf
Materials:
Medium Weight Yarn (Black and White) approximately 200 yards each
Recommended yarn brand: Caron Simply Soft Yarn
Crochet hook K (6.50 mm)
Scissors
crochet yarn size 4

Gauge:
11 sc = 3’’
6 rows = 2’’
Gauge Swatch: 3’’w x 2’’h (7.5 cm x 5 cm) ch 12.
Row 1: sc in second ch from hook and in each ch across: 11 sc
Row 2 – 6: ch 1, turn, in front loop only, sc in each sc across: 11 sc
Finish off.

How to Change Colors in this Pattern
For this pattern, when you are instructed to change colors, make one chain with the color you are currently using, then cut the yarn and pull the loop on your hook so that the loose strand of yarn is pulled through the stitch. Pull the loose strand so that it creates a small knot. Your loose end should not be longer than 2 inches. With the new color, start with a slip knot on your hook, then make the stitches as indicated in the pattern. Carry the loose end of your yarns as indicated in the tips in the pattern. The knot made should not be noticed in your work.

How to Minimize the Number of Loose Ends
The tips included within the pattern instruct you to carry loose ends of yarn by crocheting over them to minimize the number of ends you have to weave in when you finish. If done correctly you will have only ONE loose end to weave in. Here is a link to a more detailed explanation of the technique used in this pattern: How to Minimize Weaving in Ends in Crochet

Crochet Pattern: Piano Key Scarf
Row 1: with white, ch 21, working in the back ridge only, sc in second ch from hook and in each ch across: 20 sc
Tip: before making your last few stitches on this row, hold the loose end created at the beginning of the chain, to the chain and crochet over it.

All stitches now and throughout are worked in the front loop only.

Row 2: ch 1, turn, sc in each sc across: 20 sc

One Key

Row 3: ch 1, turn, sc in next 10 sc, change to black, sc in next 10 sc: 20 sc
Tip: Carry the loose ends of the white and black yarn in your work until it is no longer sticking out.

Row 4: ch 1, turn, sl st in each sc across: 20 sl st

Row 5: change to white, turn, sc in next 10 sl st, change to black, sc in next 10 sl st: 20 sc
Tip: When crochet with white yarn at the beginning of row, carry the loose ends of the black and white yarn in your work until it is no longer sticking out. When you change to black, carry only the loose end of the black yarn in your work.

Row 6: change to white, turn, sc in each sc across: 20 sc
Tip: Carry the loose ends of the white and black yarn in your work until it is no longer sticking out. When you reach the loose end of the white yarn from the previous row, carry it in your work until it is no longer sticking out.

Work “One Key” (rows 3 – 6), 2 more times.

Space

Row 7: ch 1, turn, sc in each sc across: 20 sc

Row 8: change to black, turn, sl st in each sc across: 20 sl st

Row 9: change to white, turn, sc in each sl st across: 20 sc
Tip: Carry the loose ends of the white and black yarn in your work until it is no longer sticking out. Before making your last few stitches on this row, hold the loose ends of the black and white yarn from the previous row, to your work and crochet over it.

Row 10: ch 1, turn, sc in each sc across: 20 sc

Work “One Key” (rows 3 – 6), 2 times.
Work “Space” (rows 7 – 10), 1 time.
Work “One Key” (rows 3 – 6), 3 times.
Work “Space” (rows 7 – 10), 1 time.

Repeat the above 4 lines until the scarf is as long as you desire. When you choose to end your scarf, end after you compete your last row 7. You should only have 1 loose end to weave in when you are done.

For an extra perk, add black tassels on both ends of the scarf.

Do you need help crocheting the piano key scarf? No worries just leave a comment!
Free Crochet Pattern: Flower Hair Tie Scrunchie

By Rachel Choi – February 15th, 2009 30 Comments
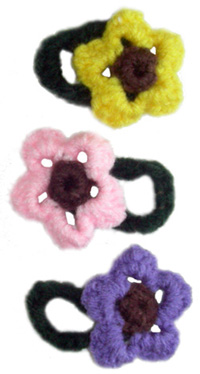
These bright flower hair ties are great for little girls! Use your scrap yarn to make these precious flowers and attach them to a nicely covered rubber band. They look great bouncing around on a child’s head and won’t pull hair like plain rubber bands do. Just grab a rubber band and some yarn and start crocheting.

Skill Level: crochet skill level easy

Finished Size: 2’’ (5 cm) diameter of flower, hair tie will vary based on rubber band size

Materials:
Medium Weight Yarn
Crochet Hook F (3.75mm)
Yarn Needle
Rubber Band(s)
crochet yarn size 4

Gauge: not very important

crochet flower-hair-tie

Need help understanding the abbreviations? Check out the crochet abbreviation chart.

Crochet Pattern: Hair Tie
Round 1: with green, sc in rubber band until the rubber band is fully covered, sl st in first sc made, finish off (the number of sc will vary based on rubber band size)

Flower
Round 1: with brown, ch 5, sl st in 5th ch from hook, 10 sc in loop, changing to flower color in last sc, place marker
Round 2: (ch 4, skip 1, sl st in next sc) around
Round 3: (sc, hdc, dc, dc, hdc, sc in next ch-4 loop, sl st in next ch-4 loop) around, finish off

Using photo as a guide, sew flower onto hair tie with a yarn needle.

Need help with this pattern? Just leave a comment!

Crochet Pattern: Flowered Ear Warmer

By Rachel Choi – February 13th, 2009 24 Comments
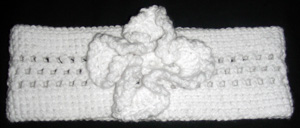
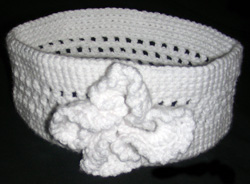
This crocheted ear warmer is great for the cold outdoors. Just slip it onto your head and over your ears for a nice, cozy sensation. But beware, this elegant ear warmer is bound to attract admiring attention. crochet earwarmer
Skill Level: crochet skill level easy

Finished Size: 3 1/4’’ (8 cm) tall, 9 3/4’’ (25 cm) diameter

Materials:
Medium Weight Yarn
Crochet Hook F (3.75mm)
yarn Needle
crochet yarn size 4
crochet earwarmer

Gauge:
17 sc = 3’’
8 rows = 2’’
Gauge Swatch: 3’’w x 2’’h (7.5cm x 5cm) ch 18.
Row 1: sc in second ch from hook and in each ch across
Row 2 – 8: ch 1, turn, sc in each sc across
Finish off.

Need help understanding the abbreviations? Check out the crochet abbreviation chart.

Crochet Pattern: Ear Warmer
Round 1: ch 91, sl st in first ch to form loop, place marker
Round 2-5: sc in each sc around
Round 6 – 8: (dc in next sc, chain one, skip one) around
Round 9 – 12: sc in each st around, sl st in next sc, finish off

Decorative Flower
Round 1: ch 8, sl st in first ch to form loop
Round 2: ch 1, 12 sc in loop, sl st in first sc
Round 3: (ch 10, skip 2 sc, sl st in next sc) around, sl st in starting sc
Round 4: ch 1, (sc, hdc, dc, 10 tr, dc, hdc, sc) around in all four 10 ch loops, sl st in starting sc
Round 5: (ch 3, sl st in next st) around, sl st in next st, finish off

Using photo as a guide, attach flower to ear warmer with a yarn needle.

If you have questions regarding this crochet pattern, feel from to leave a comment!

Crochet Flower Pattern: Rose

By Rachel Choi – February 12th, 2009 149 Comments
The classic rose adds elegance to all crochet projects. Whether you add it to your afghan, beanie or purse, a rose is bound to bring out a nice feminine touch. In this crochet pattern you can create a nice, large, full rose.

Pattern Updated 3/15/2010
Need extra help with this pattern? Check out the detailed explanation of the crochet rose pattern.

crochet rose

Finished Size: 2 1/2” (6 cm) tall, 4” (10 cm) diameter of flower (not including leaves)

Skill Level:
Materials:
Medium Weight Yarn
Crochet Hook F (3.75mm)
Yarn Needle
crochet yarn size 4

Gauge:
17 sc = 3’’
8 rows = 2’’
Gauge Swatch: 3’’w x 2’’h (7.5cm x 5cm) ch 18.
Row 1: sc in second ch from hook and in each ch across
Row 2 – 8: ch 1, turn, sc in each sc across
Finish off.

Need help understanding the abbreviations? Check out the crochet abbreviation chart.

Crochet Pattern: Rose
Row 1: with pink, ch 51, (dc, ch 2, dc) in fifth ch from hook, (ch 2, skip 2 ch, [dc,
ch 2, dc] in next ch) across until 1 ch remains, dc in last ch
Row 2: ch 3, turn, (2 dc, ch 2, 2 dc) in first ch-2 space, *skip next ch-2 space,
(ch 2, 2 dc, ch 2, 2 dc) in next ch-2 space, repeat from * across until 1 dc
remains, dc in last dc
Row 3: turn, *9 dc in next ch-2 space, (sl st, ch 1, sl st, ch 1) in next ch-2 space,
repeat from * across, finish off.

Using photo as a guide, roll rose together and sew with yarn needle. Need a step-by-step tutorial? Check out How to Roll Up a Crocheted Rose

Leaf (Make 2)
Row 1: with green, ch 14, sl st in second ch from hook, sc in next ch, hdc in next ch, dc in next 2 ch, tr in next 2 ch, dc in next 2 ch, hdc in next 2 ch, sc in next ch, sl st in next ch
Row 2: ch 1, turn, sl st in next sl st, sc in next sc, hdc in next hdc, dc in next 2 dc, tr in next 2 tr, dc in next 2 dc, hdc in next 2 hdc, sc in next sc, sl st in next sl st, finish off.

With yarn needle, sew leaves to rose using photo as a guide.

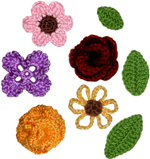
You may also like to check out more flower applique crochet patterns. This set has 5 different flowers and 3 leaf sizes.

You can find more flower patterns at the Crochet Spot Store.

If you have questions regarding this pattern, simply leave them here as a comment and I would be glad to help!

crochet flower appliques

Crochetville: The Largest Crochet Forum

By Rachel Choi – February 11th, 2009 4 Comments

Yesterday, I had the pleasure of joining the largest crochet forum on the internet: Crochetville. I expected everyone to be nice, but they definitely exceeded my expectations with warmer than warm welcomes.

I even met some amazing people in the crochet world. One very admirable woman made over 350 blankets and gave then all away to charity! This is so amazing to me since I don’t even have the patience to complete one. Crochetville is a great place to find others crocheting for charity and has inspired me to want to join in as well.

Crochetvillers are some of the most supportive people that I have ever met. They share crochet patterns and help each other when in need. This is a great place for any crocheter to be, amateur or pro.

As a member of Crochetville for only one day, this is what I discovered and I can’t wait to see what lies ahead.

Free Crochet Pattern: Teddy Bear Coaster

By Rachel Choi – February 10th, 2009 49 Comments
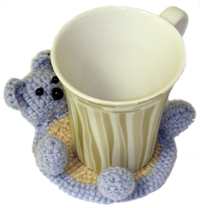
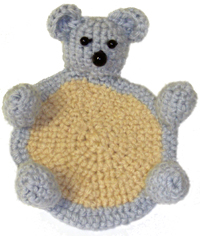
A beary nice coaster.
This is a really cute crocheted coaster that is great for kids and adults. Need to get your kids in the habit of using a coaster? Well, they won’t deny putting their cups on this teddy bear. But we all must admit that it’s just so adorable that even us adults can’t resist the teddy bear coaster’s desire to hold your cup. So what are you waiting for? Get crocheting! For more animal coaster crochet patterns, check out the Crochet Spot Store.

Skill Level: crochet skill level easy
crochet bear-coaster
Finished Size: 4 ½’’ (11cm) diameter and 5 ½’’ (14cm) from bottom to top of head

Materials:
Medium weight yarn: Beige and Blue (less than 1 skein each)
Crochet Hook F (3.75mm)
Polyester fiberfill
2 small beads or doll eyes
1 large bead
Yarn needle

crochet bear-coaster-2

Gauge:
17 sc = 3’’
8 rows = 2’’
Gauge Swatch: 3’’w x 2’’h (7.5cm x 5cm) ch 18.
Row 1: sc in second ch from hook and in each ch across
Row 2 – 8: ch 1, turn, sc in each sc across
Finish off.

Need help understanding the abbreviations? Check out the crochet abbreviation chart.

Body
Round 1: With Beige, ch 2, 8 sc in second ch from hook, place marker
Round 2 : 2 sc in each sc around
Round 3: (2 sc in next sc, sc in next 1 sc) around
Round 4: (2 sc in next sc, sc in next 2 sc) around
Round 5: (2 sc in next sc, sc in next 3 sc) around
Round 6: (2 sc in next sc, sc in next 4 sc) around
Round 7: (2 sc in next sc, sc in next 5 sc) around, change to Blue in last sc made
Round 8: (2 sc in next sc, sc in next 6 sc) around
Round 9: (2 sc in next sc, sc in next 7 sc) around, sl st in next sc, finish off

Head
Round 1: With Blue, ch 2, 8 sc in second ch from hook, place marker
Round 2: 2 sc in each sc around
Round 3: (2 sc in next sc, sc in next sc) around
Round 4 – 8: sc in each sc around
Round 9: (decrease, sc in next sc) around, sl st in next sc, finish off leaving a long end for sewing

Using photo as a guide, attach eyes and nose to head. Stuff head with fiber fill.

Limb (make 4)
Round 1: With Blue, ch 2, 8 sc in second ch from hook, place marker
Round 2: (2 sc in next sc, sc in next 2 sc) around
Round 3 – 5: sc in each sc around
Round 6: Stuff with fiberfill, decrease, sc in next 2 sc, decrease twice, sc in next 2, decrease, sl st in next sc, finish off leaving a long end for sewing

Ear (make 2)
Round 1: With Blue, ch 2, 9 dc in second ch from hook, finish off leaving a long end for sewing

Using photo as a guide, assemble parts with yarn needle.

Do you need help with the crochet pattern? No Worries, just leave a comment and I will help you!

Crochet Flower Pattern: Carnations

By Rachel Choi – February 10th, 2009 22 Comments
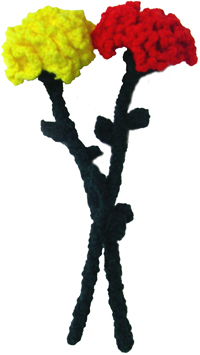
Need something easy and fast to make? These simply beautiful, crocheted carnations will last forever, as a gift to your loved ones or a decoration for your table. There’s nothing like a bundle of crocheted flowers to brighten someone’s day! Just follow the simple crochet flower pattern below.

Finished Size: 13” (33 cm) tall, 4” (10 cm) diameter of flower

Skill Level: beginner crochet skill level
Materials:
Medium Weight Yarn
Crochet Hook F (3.75mm)
Yarn Needle
Wire (Optional)
crochet yarn size 4
crochet flower carnations

Gauge:
17 sc = 3’’
8 rows = 2’’
Gauge Swatch: 3’’w x 2’’h (7.5cm x 5cm) ch 18.
Row 1: sc in second ch from hook and in each ch across
Row 2 – 8: ch 1, turn, sc in each sc across
Finish off.

Need help understanding the abbreviations? Check out the crochet abbreviation chart.

Crochet Pattern: Flower
Round 1: ch 5, sl st in fifth from hook, ch 3, 15 dc in loop, sl st in next ch
Round 2 – 4: ch 3, place marker, 2 dc in each dc around, sl st in next ch
Round 5: (ch 3, sl st in next dc) around, finish off

With yarn needle, weave yarn into the top of round 2 (bottom of round 3), pull yarn tightly, bunching the flower together. Tie off and shape flower.

Flower Stem
Round 1: ch 5, sl st in fifth ch from hook, place marker, dc in each ch around
Round 2 – 21: dc in each dc around
Round 22 – 23: 2 dc in each dc around, sl st in next dc
Round 24: (ch 3, sl st in next dc) around, sl st in next ch, finish off

With yarn needle, sew stem onto bottom of flower using photo as a guide.

Leaf (Make as many as desired)
Row 1: ch 5, dc in third ch from hook, dc across
Row 2: skip 1, dc across, finish off leaving a long end for sewing

With yarn needle, sew leaves to stem as desired.

Optional: insert wire into the stem of the flower and shape as desired.

Do you need help with this crochet pattern? Leave a comment!

How to Crochet a Hat

By Rachel Choi – February 9th, 2009 42 Comments
Hats are easy and simple to crochet, once you have the basic idea. That is to start with a small circle and crochet around it, while slowly increasing the number of stitches in each round around the hat. Once the hat is as wide as you want it, it is time to simply make your hat longer by continuing to crochet around the hat but without adding additional stitches in each round. Here is a basic crochet hat pattern for you to follow that uses double crochet stitches. crochet hat
Skill Level: beginner crochet skill level

Finished Size: 4 1/2’’(12 cm) tall, 7’’ (18 cm) diameter (not including pom pom and ear covers)

Materials:
Medium Weight Yarn
Crochet Hook F (3.75 mm)
Yarn Needle
crochet yarn size 4

Gauge:
17 dc = 3’’
4 rows = 2’’
Gauge Swatch: 3’’w x 2’’h (7.5cm x 5cm) ch 20.
Row 1: dc in forth ch from hook and in each ch across
Row 2 – 4: ch 3, turn, dc in each dc across
Finish off.

Need help understanding the abbreviations? Check out the crochet abbreviation chart.

Crochet Pattern: Hat
Round 1: ch 5, sl st in 5th ch from hook forming a loop, 10 dc in loop, place marker
Round 2: 3 dc in each dc around
Round 3: (2 dc in next dc, dc in next dc) around
Round 4: (2 dc in next dc, dc in next 2 dc) around
Round 5: (2 dc in next dc, dc in next 3 dc) around
Round 6: (2 dc in next dc, dc in next 4 dc) around
Round 7 – 15: dc in each dc around
Finish off.

Note: If you want to make your hat longer, just continue crocheting until it is the length that you want.

Ear Covers (Make 2) (Optional)
Row 1: ch 15, dc in third ch from hook, dc across
Row 2 – 3: ch 2, turn, dc across
Row 4: ch 1, hdc in next dc, 11 dc across, hdc in next dc
Row 5: turn, ch 1, skip 1, sc, hdc, 7 dc, hdc, sc, sl st
Row 6: turn, 3 sl st, sc, hdc, 2 dc, hdc, sc, 3 sl st
Row 7: turn, 3 sl st, sc, 2 hdc, sc, 3 sl st, finish off

Tie Strap (Make 2) (Optional)
Row 1: ch 82, dc in third ch from hook, dc across

With yarn needle, sew tie straps to ear covers using photo as a guide.

Pom Pom (Optional)
Step 1: Continuously wrap yarn around 4 fingers 100 times around
Step 2: gently slide bundle off of hand
Step 3: with same colored yarn, tie bundle tightly together in the middle
Step 4: cut both the loops on the yarn open and shape

Confused? Check out the how to make pom poms tutorial!

With yarn needle, sew pom pom to hat using photo as a guide.

Note: for smaller pom poms use less fingers and for fuller pom poms revolve yarn more times

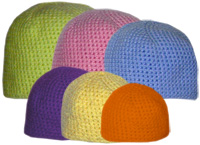
You may also like to check out the Crochet Pattern: Family Beanie Set – 6 sizes. This pattern set has various beanies for you to crochet! Plus, you don’t have to worry much about how to increase or decrease the size of your beanie.

Be sure to check out the Crochet Spot Store for more beanie and hat patterns!

crochet beanies

If you need help on how to crochet a hat, just leave a comment and I would love to help!