Yoyo Crochet
By A Guest Writer – 11 CommentsA Guest Post by Elsa.
If you’ve ever tried to make an afghan or scarf or other crocheted project with motifs, you’ll know that stitching together all the individual pieces can be quite annoying! This tutorial will show you a new way of doing this, with assemble-as-you-go pieces, so there’s no sewing required! This tutorial will show small circular pieces being joined together, but you can also use these techniques on granny squares and other motif shapes.
First Yoyo

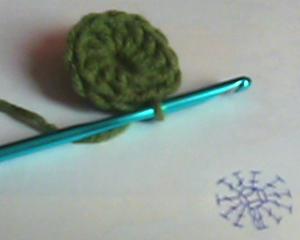
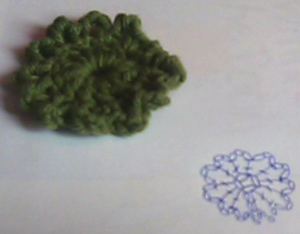
Now you have completed your first yoyo. After this, there are two different joining methods. The first of these is the hexagonal Net Joining. This method is relatively loose, and has a lacier look. The second method is the hexagonal Flat Braid Joining. This method is tighter, and less lacy-looking.
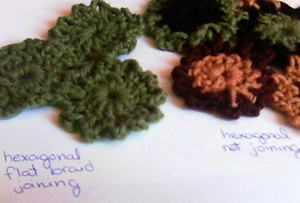
Net Joining
After finishing your first yoyo, start your second yoyo: ch 4, sl st in first ch forming a ring, 12 dc in ring, (ch 3, sc to next dc) 6 times, *ch 1, sc in one of the ch-3 spaces on the first yoyo, ch 1, sc in next dc on second yoyo, repeat from * one more time.
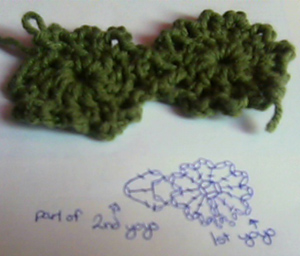
Flat Braid Joining
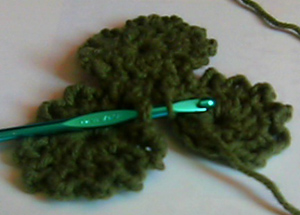
After finishing your first yoyo, start your second yoyo: ch 4, sl st in first ch forming a ring, 12 dc in ring, (ch 3, sc to next dc) 6 times. Now to start the joining, *ch 2, drop the stitch and insert hook into one of the ch-3 spaces on the first yoyo, then pick up the dropped stitch.
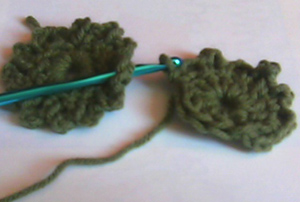
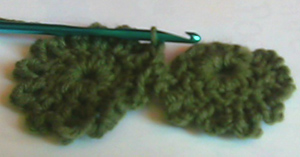
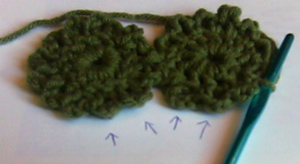
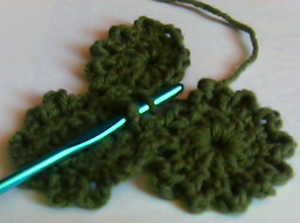
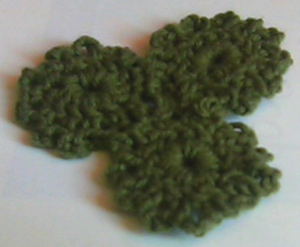
Repeat from * one more time. Now to join the third yoyo. This can be done with both joining, but here I’ll be using the flat braid joining. There are four places you need to stitch your third yoyo two, indicated with the arrows in the picture:
Elsa is 13 years old, and has OCD. Obsessive Crochet Disorder. Her grandma taught her crochet when she was 7. Elsa surrounds herself with yarn in her free time. She loves designing her own patterns, and all the gifts she gives to her friends, are unique, handmade crocheted items.


Thank you for this wonderful tutorial ,the photos are very good and the instructions are neat and clear.Thank you again.
That is so COOL Elsa! I can’t wait to try it! BTW, I think I have Obsessive Crochet Disorder too….what are the symptoms? 😉
Thank you, Elsa! This is a great tutorial. I can’t wait to try it! Like Angie and you, I also have OCD! LOL!
I always wanted to know the secret to doing this…THANKS so much for sharing with another OCD person!! This will be great for making my own unique designs!!
Only 13 yrs old! Elsa, what a great tutorial for joining up yo-yos! When I first started learning to read crochet patterns I saw a fun pattern for a yo-yo afghan but despite a couple of attempts I never managed to follow the instructions well enough to make anything of it.
This post makes it very clear and I’ll most definitely be trying it one more time. Thank you, Elsa!
Thanks guys, but this tutorial wouldn’t be so clear if it wasn’t for all the wonderful editors at crochetspot. 😀
Thank you so much for sharing this!!! I’ve been wanting to make a yoyo afghan/bedspread, but didn’t want to make out of material-yoyos!!! This is awesome!!! 🙂
Is there a way to finish a yoyo using a granny square?
is there a way to fininsh a yoyo circle; using a granny square pattern?
Thanks for the pattern . Been an OCD since I was around 15. I am so glad you started so much earlier. Enjoy the crocheting and gifting experience!
Great little pattern. I’m using this little flower yo-yo to make Montessori mini doilies for two 2 friend’s classroom. They are used to blot up little spills. Need 1”- 4″ doilies. Thank you for sharing.